
How to use the ucos-ii on zedboard?
Platform: Windows7 x64
Toolchain: Xilinx EDK 14.4
Bloger: DragenDesirous
Data: 2th,june,2013
- Download the bsp and demo .zip files in your computer via website: http://micrium.com/downloadcenter/download-results/?searchterm=hm-xilinx&supported=true
-
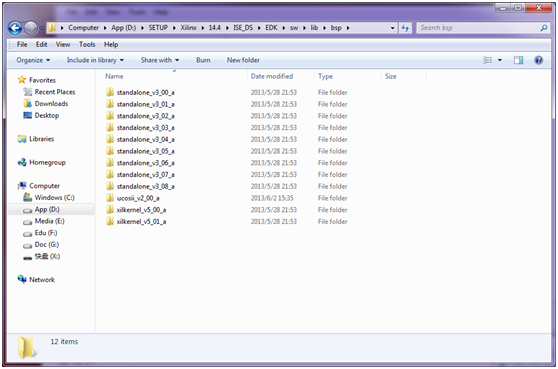
Extract the Micrium_Zynq-7000_uCOS-II.zip . extract the zynq-7000-ucosii-bsp.zip and copy the contents: ucosii_v2_00_a into the path:
D:SETUPXilinx14.4ISE_DSEDKswlibbsp,the D:SETUPXilinx14.4ISE_DSEDK is the path where your edk software located in. it should like this:

In the same way, extract the zynq-7000-ucosii-demo.zip and copy the contents: ucosii_demo into D:SETUPXilinx14.4ISE_DSEDKswlibsw_apps and it should look like the one below:

-
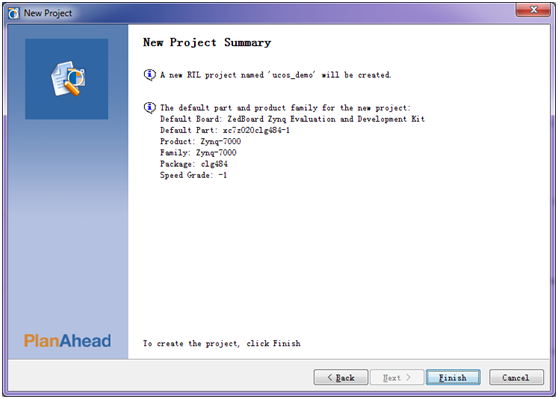
Start the Xilinx PlanAhead application and create a new project named ucos_demo in F:PLCProProjects, the figure below indicates the project setting:
-
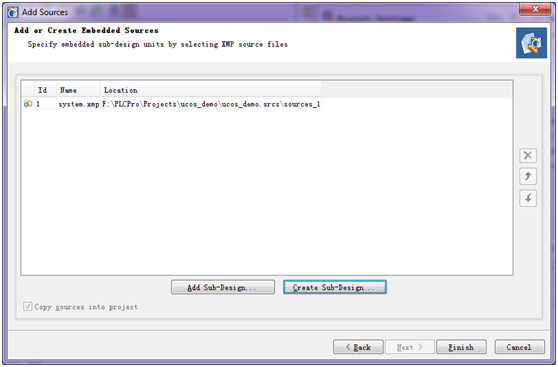
Make click on the add sources under the project manager panel, and select the add or create embedded sources item, then select the create file button to create a file named system. the screen shot as follows:
- The PlanAhead will create the system.xml file and invoke the Xilinx Platform Studio automatically. Just wait for a moment.
-
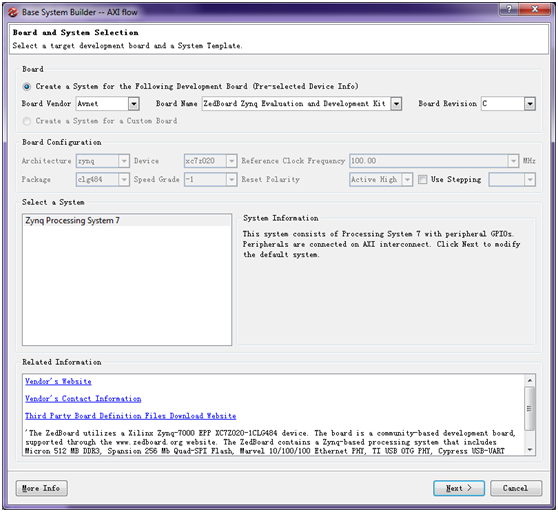
When the XPS opens, the PlanAhead is running background to wait for your work on XPS, so just leave the PlanAhead aside and turn to XPS. The XPS asks you add Processing System7 instance to the system and click Yes and then click Yes again. The next dialog is shown as follows:
And then click the Next button. Remove the right instance by selecting each instance and click the << button.
-
Click the zynq tab in the system assembly view, and click on the I/O Peripherals stock, a dialog box as shown following:
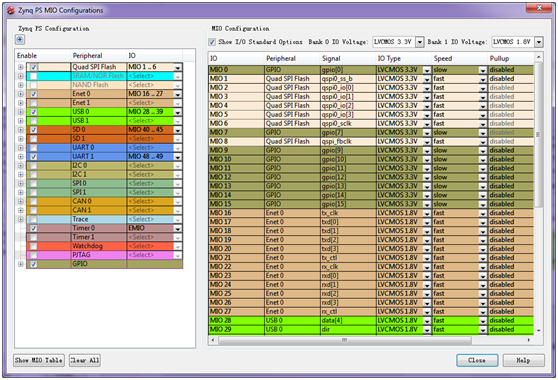
As the ucos ii prints the run time message via uart1 peripheral, you need ensure the uart1 enabled and uart0 disabled.
- Close the XPS and turn back to PlanAhead.
- PlanAhead updates the changes in system.xmp automatically according to your changes in XPS. Right click on the System(system.xmp) item and select Create TOP HDL item. Wait for a moment. The system_stub(system_stub.v) occurs. Actually, you need NOT to Create the system_stub(system_stub.v) item as the Xilinx Soft Development Kit need the sytem.xml only.
- Click File>Export>Export hardware for SDK and select the Lauch SDK item in the Export Harware box.
- The PlanAhead invode the Xilinx Soft Deveopment Kit automatically and then keep running in the background. Let it alone and turn to SDK view.
-
The hardware description (system.xml) has been read in automatically, as show following:

Double click the system.xml file and the contents is display in the center view.
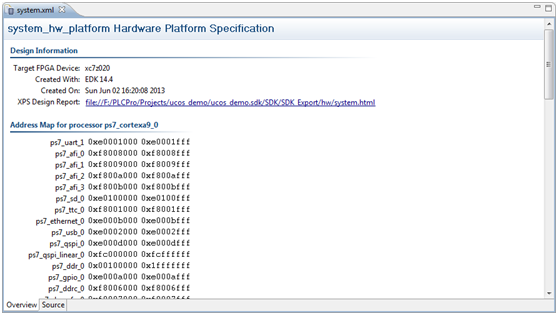
we can find the ps7_uart1_0 item in the figure above.
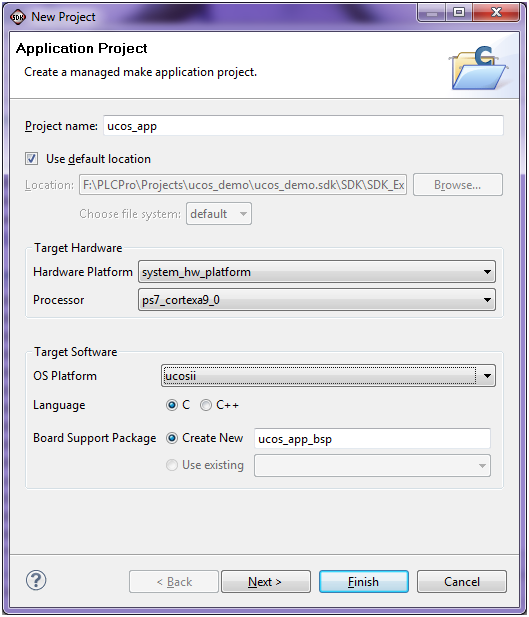
- Click File>New>Xilinx C Project, name the new project as ucos_app and select the OS Platform: ucosii , as shown below:
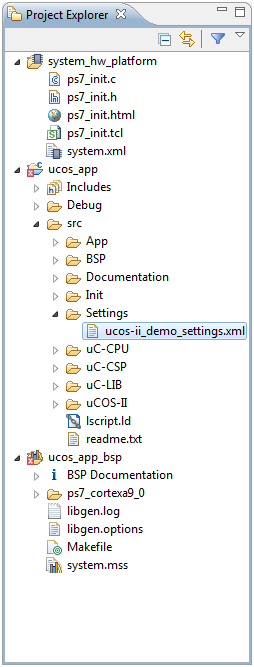
Click Next, choose the uCos-II demo and click Finish. The Project Explorer is shown as follows:
-
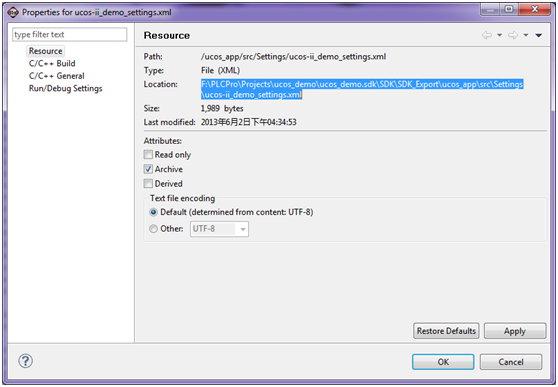
As we notice a small error flag occurred in the proect name:ucos_app and ucos_app_bsp, it's because the include files of ucos-ii can NOT be found out. We should import the paths for ucos-ii. Right click on the ucos-ii_demo_setting.xml and select Property , copy the Location path in the below box.

-
Right click on the project name: ucos_app and select C/C++ General>Paths and Symbols >Import settings, paste the clipboard into Setting file as shown in below figure:

-
on the Project:ucos_app, right click clean project and then click build project. console tab is shown as follows:

SOLUTION:
Add a new C source file to the ucos_app project and type the following:
#include "xparameters.h"
void outbyte(char ch)
{
XUartPs_SendByte(XPAR_XUARTPS_0_BASEADDR,ch);
}
-
Ensure the following setting:
- JP7-JP11: all connect to GND
- Power adapter is connected and USB-UART is connected to PC
- PORG is connected to PC
Turn on zedboard .
-
Right click on the project : ucos_app and select Run as >Run configuration, in the STDIO Connection tab select Connect STDIO to console:
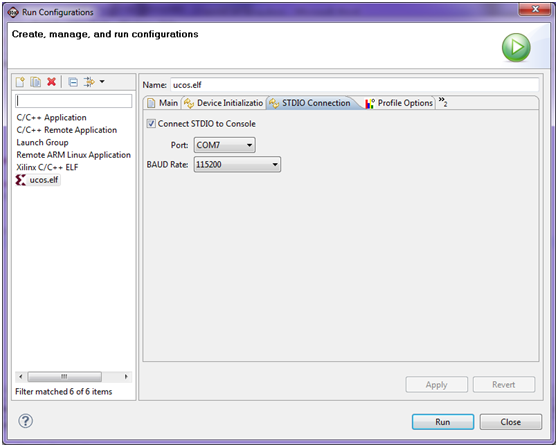
Click Run button and the application result is shown as follows:

原文链接: https://www.cnblogs.com/dragen/archive/2013/06/02/3114357.html
欢迎关注
微信关注下方公众号,第一时间获取干货硬货;公众号内回复【pdf】免费获取数百本计算机经典书籍

原创文章受到原创版权保护。转载请注明出处:https://www.ccppcoding.com/archives/90900
非原创文章文中已经注明原地址,如有侵权,联系删除
关注公众号【高性能架构探索】,第一时间获取最新文章
转载文章受原作者版权保护。转载请注明原作者出处!