
Download Software
RedHat Enterprise Linux 4 Update 3 (RHEL4-U3):
http://218.6.142.227/soft-dist/redhat/RHEL4U3-i386/RHEL4-U3-i386-AS-disc1.iso
http://218.6.142.227/soft-dist/redhat/RHEL4U3-i386/RHEL4-U3-i386-AS-disc2.iso
http://218.6.142.227/soft-dist/redhat/RHEL4U3-i386/RHEL4-U3-i386-AS-disc3.iso
http://218.6.142.227/soft-dist/redhat/RHEL4U3-i386/RHEL4-U3-i386-AS-disc4.iso
ORACLE 9i 9.2.0.4.0:
http://download.oracle.com/otn/linux/oracle9i/9204/ship_9204_linux_disk1.cpio.gz
http://download.oracle.com/otn/linux/oracle9i/9204/ship_9204_linux_disk2.cpio.gz
http://download.oracle.com/otn/linux/oracle9i/9204/ship_9204_linux_disk3.cpio.gz
Additional packages for ORACLE 9i (Patch 4198954):
http://download.csdn.net/detail/zhangzxy161723/772173
Installation of RHEL4-U3
follow the default installation directions. ORACLE will occupy 2.6GB disk space, reserve space in advance.
Unpack ORACLE Files
First unzip the files
gunzip ship_9204_linux_disk1.cpio.gz
gunzip ship_9204_linux_disk2.cpio.gz
gunzip ship_9204_linux_disk3.cpio.gz
Next unpack the contents of the files.
cpio -idmv < ship_9204_linux_disk1.cpio
cpio -idmv < ship_9204_linux_disk2.cpio
cpio -idmv < ship_9204_linux_disk3.cpio
unzip p4198954_21_LINUX.zip
You should now have three directories (Disk1, Disk2 and Disk3) containing installation files and a patch directory (4198954).
Hosts File
The "/etc/hosts" file must contain a fully qualified name for the server.
<IP-address> <fully-qualified-machine-name> <machine-name>
Set Kernel Parameters
Add the following lines to the "/etc/sysctl.conf" file.
kernel.shmmax = 2147483648
kernel.shmmni = 100
kernel.shmall = 2097152
# semaphores: semmsl, semmns, semopm, semmni
kernel.sem = 100 256 100 100
fs.file-max = 327679
kernel.hostname = Centos42.localdomain #<--- full qualified hostname !!
kernel.domainname = localdomain #<--- correct domain name !!
Run the following command to change the current kernel parameters:
/sbin/sysctl -p
Add the following lines to the "/etc/security/limits.conf" file.
oracle soft nofile 65536
oracle hard nofile 65536
oracle soft nproc 16384
oracle hard nproc 16384
Setup
Oracle Support Note: 303859.1 states that the following packages are required by Red Hat Enterprise Linux AS 4.1.
compat-db-4.1.25-9
compat-gcc-32-3.2.3-47.3
compat-gcc-32-c++-3.2.3-47.3
compat-oracle-rhel4-1.0-3
compat-libcwait-2.0-1
compat-libgcc-296-2.96-132.7.2
compat-libstdc++-296-2.96-132.7.2
compat-libstdc++-33-3.2.3-47.3
gcc-3.4.3-9.EL4
gcc-c++-3.4.3-9.EL4
gnome-libs-1.4.1.2.90-44
gnome-libs-devel-1.4.1.2.90-44
libaio-devel-0.3.102-1
libaio-0.3.102-1
make-3.80-5
openmotif21-2.1.30-11
xorg-x11-deprecated-libs-devel-6.8.1-23.EL
xorg-x11-deprecated-libs-6.8.1-23.EL
check whether .rpm packages are installed or not.
rpm -qa | grep compat
Depending on the update version of Red Hat, the exact package versions and locations may vary. The installation of the required packages is shown below, with the locations relevant for RHEL4-U3.
# RHEL4-U3 Disk 2
cd /media/cdrom/RedHat/RPMS
rpm -Uvh compat-libstdc++-33-3*
rpm -Uvh xorg-x11-deprecated-libs-6*
rpm -Uvh make-3*

# RHEL4-U3 Disk 3
cd /media/cdrom/RedHat/RPMS
rpm -Uvh compat-db*
rpm -Uvh compat-libgcc-296-2*
rpm -Uvh compat-libstdc++-296-2*
rpm -Uvh gcc-3*
rpm -Uvh gcc-c++-3*
rpm -Uvh gnome-libs-1*
rpm -Uvh freetype-devel*
rpm -Uvh fontconfig-devel*
rpm -Uvh xorg-x11-devel*
rpm -Uvh xorg-x11-deprecated-libs-devel-6*
rpm -Uvh libaio-0*
rpm -Uvh libaio-devel-0*
rpm -Uvh openmotif21-2*

# RHEL4-U3 Disk 4
cd /media/cdrom/RedHat/RPMS
rpm -Uvh compat-gcc-32-3*
rpm -Uvh compat-gcc-32-c++-3*
# the dependent .rpm package of gnome-libs-devel-1* is in disk 3 and disk 4
rpm -Uvh gnome-libs-devel-1*
Install the packages associated with Patch 4198954.
cd 4198954
rpm -Uvh compat-oracle-rhel4-1*
rpm -Uvh compat-libcwait-2*
Create the new groups and users.
groupadd oinstall
groupadd dba
groupadd oper
groupadd apache

useradd -g oinstall -G dba oracle
passwd oracle

useradd -g oinstall -G apache apache
passwd apache
Create the directories in which the Oracle software will be installed.
mkdir -p /u01/app/oracle/product/9.2.0
chown -R oracle.oinstall /u01
Login as the oracle user and add the following lines at the end of the .bash_profile file.
# Oracle 9i
ORACLE_BASE=/u01/app/oracle; export ORACLE_BASE
ORACLE_HOME=$ORACLE_BASE/product/9.2.0; export ORACLE_HOME
ORACLE_TERM=xterm; export ORACLE_TERM
PATH=$ORACLE_HOME/bin:$PATH; export PATH
ORACLE_OWNER=oracle; export ORACLE_OWNER
ORACLE_SID=TSH1; export ORACLE_SID

LD_LIBRARY_PATH=$ORACLE_HOME/lib; export LD_LIBRARY_PATH
CLASSPATH=$ORACLE_HOME/JRE:$ORACLE_HOME/jlib:$ORACLE_HOME/rdbms/jlib
CLASSPATH=$CLASSPATH:$ORACLE_HOME/network/jlib; export CLASSPATH

LD_ASSUME_KERNEL=2.4.19; export LD_ASSUME_KERNEL
TMP=/tmp; export TMP
TMPDIR=$TMP; export TMPDIR
Save the ".bash_profile" file and re-login as the oracle user. Make sure the ".bash_profile" ran correctly by issuing the following command.
set | more
Installation
Start the Oracle Universal Installer (OUI) by run the following file in the Disk1 directory (under GNOME Desktop Environment).
./runInstaller
During the installation enter the appropriate ORACLE_HOME and name then continue as normal. For a more detailed look at the installation process, click on the links below to see screen shots of each stage.
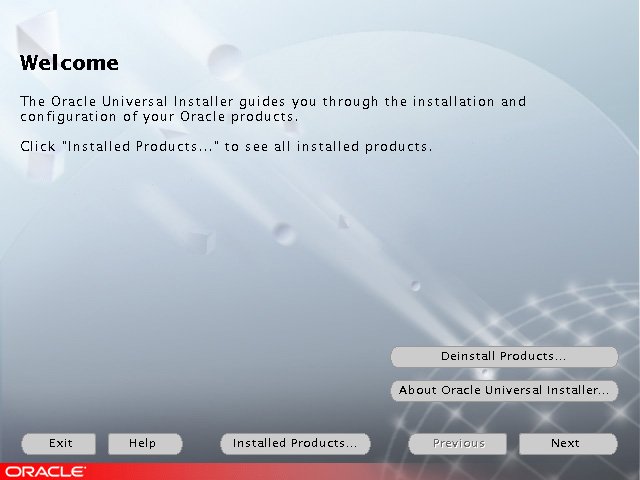
- Welcome
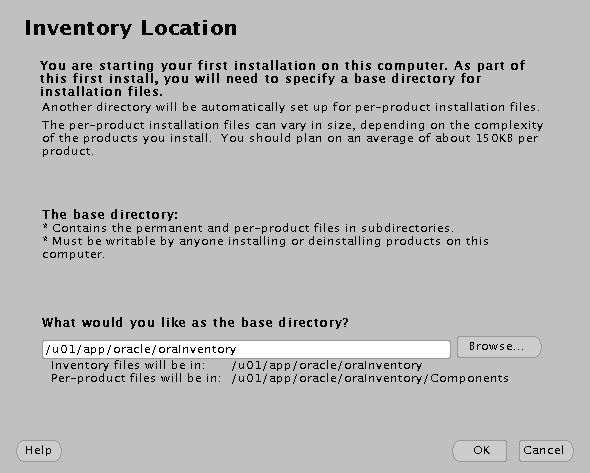
- Inventory Location
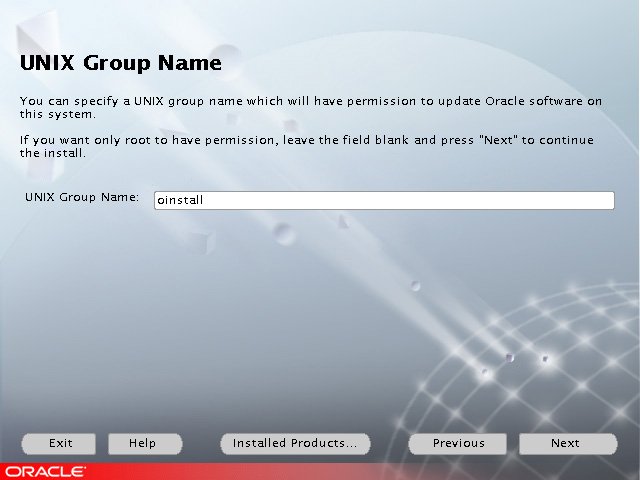
- UNIX Group Name
- UNIX Group Name Privileges Dialog
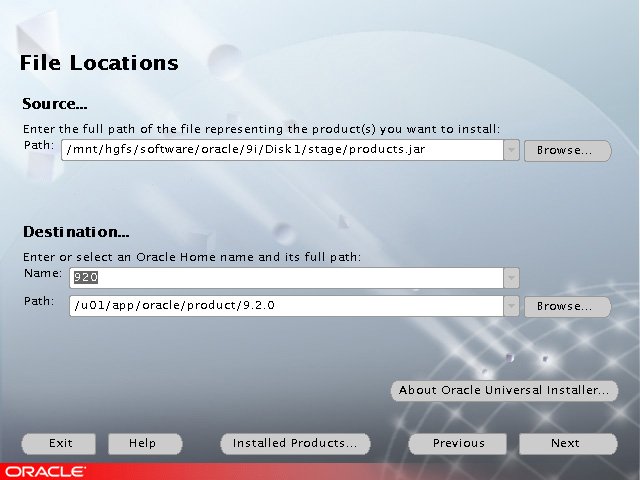
- File Locations
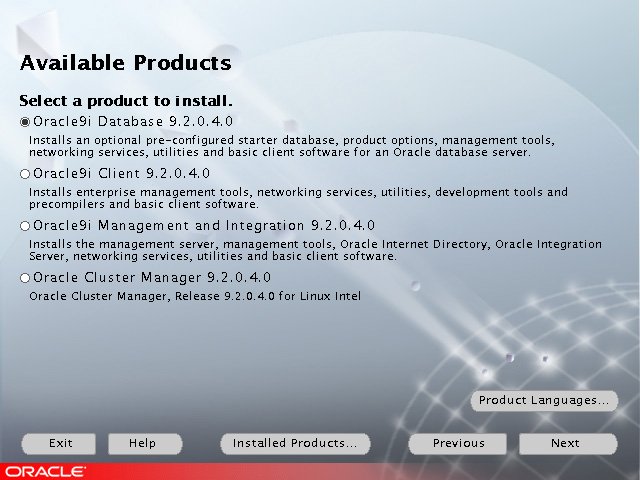
- Available Products
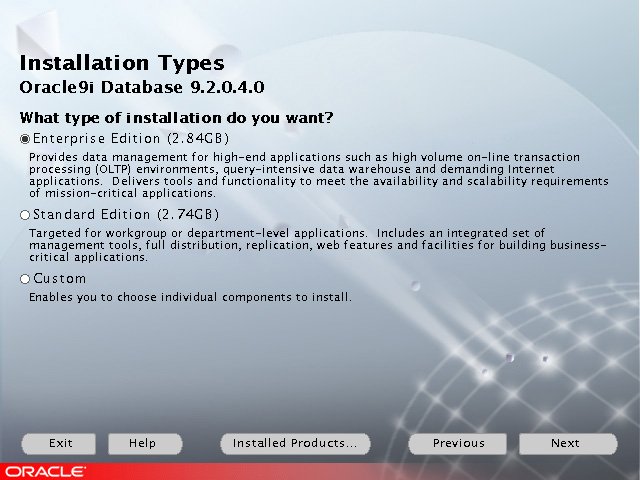
- Installation Types
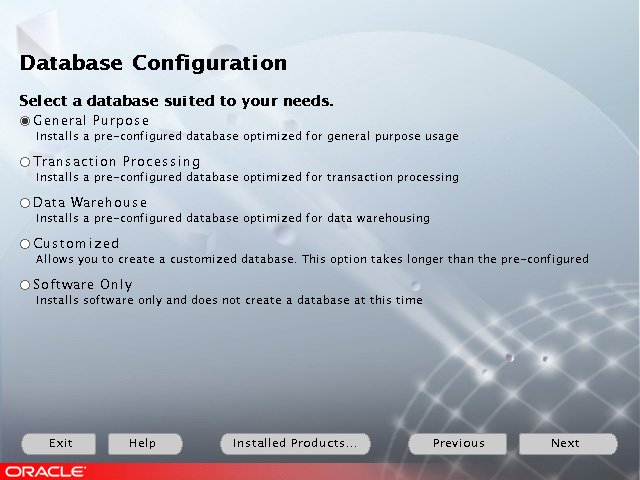
- Database Configuration
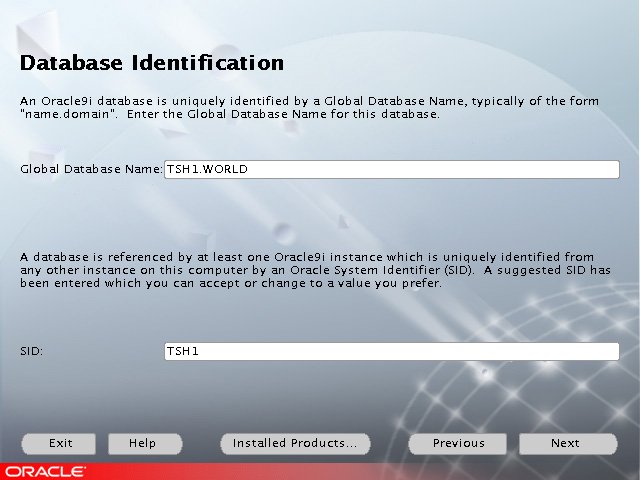
- Database Identification
- Database File Location
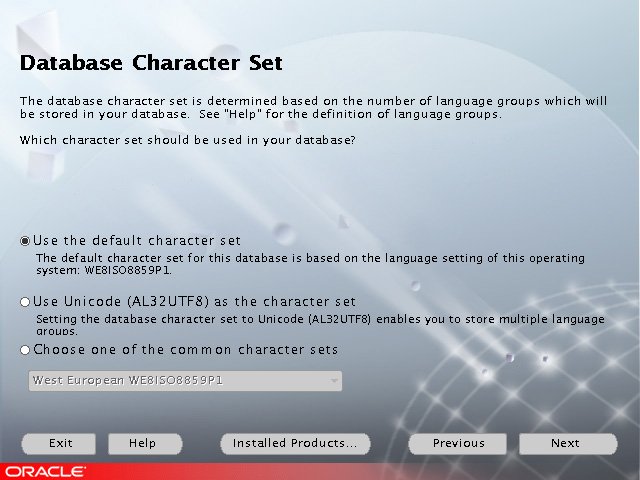
- Database Character Set
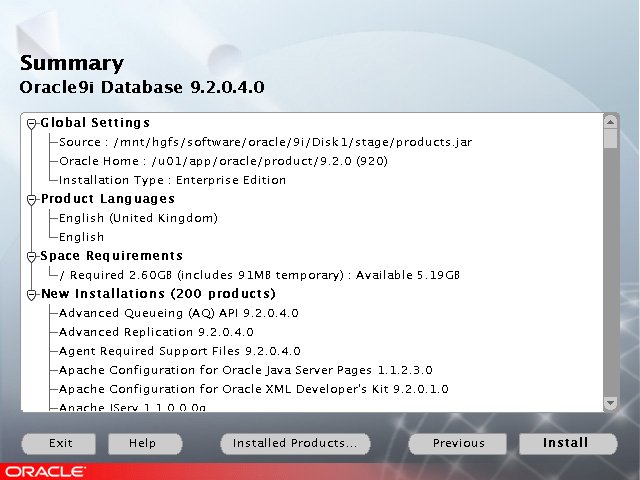
- Summary
- Install
- Setup Privileges
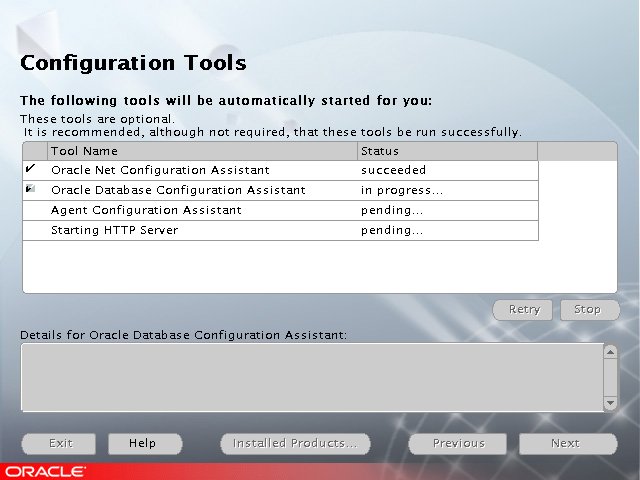
- Configuration Tools
- Database Configuration Assistant
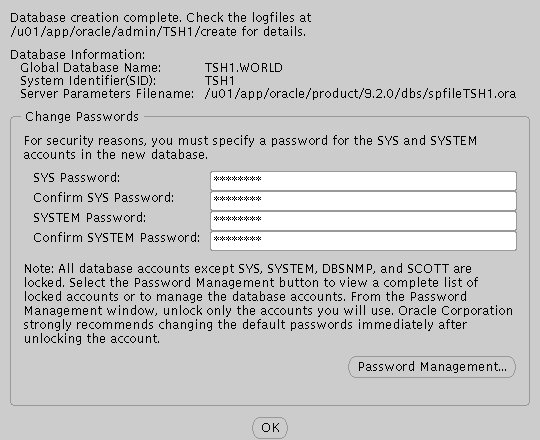
- Database Configuration Assistant Passwords
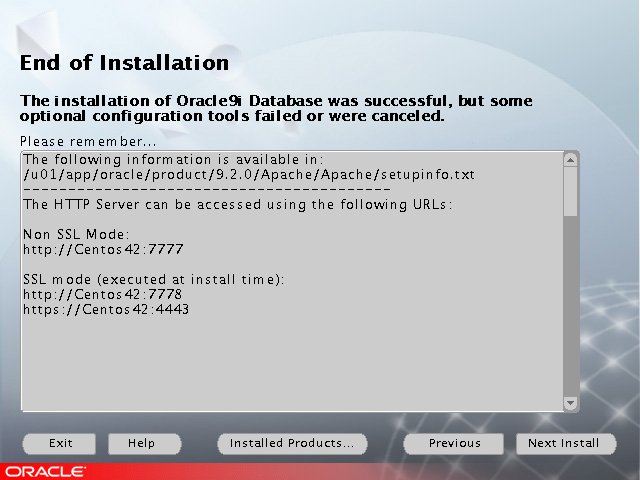
- End Of Installation
Post Installation
Once the instance is created edit the "/etc/oratab" file setting the restart flag for each instance to 'Y'.
TSH1:/u01/app/oracle/product/9.2.0:Y
For more information see:
Installation Guide for UNIX Systems: http://docs.oracle.com/html/A96167_01/toc.htm
Automating Database Startup and Shutdown on Linux: http://www.oracle-base.com/articles/linux/automating-database-startup-and-shutdown-on-linux.php
Ref
http://www.oracle-base.com/articles/9i/oracle-db-9i-installation-on-rhel-and-centos-4.php
added@2012-7-1
ERROR: Oracle ORA-01034和ORA-27101错误(Oracle未启动)
[oracle@fdb01 /]$sqlplus /nolog
SQL> conn /as sysdba
SQL> startup
added@2012-7-20
ERROR:org.apache.tomcat.dbcp.dbcp.SQLNestedException: Cannot create PoolableConnectionFactory (Io exception: The Network Adapter could not establish the connection)
需要启动Oracle服务器端监听器,只有开启监听器才能通过网络访问到Oracle数据库。
查看监听器状态
lsnrctl status
开启监听器
lsnrctl start
ref:http://wenku.baidu.com/view/46b00cc04028915f804dc288.html
ERROR: your default context is user_u system_r unconfined_t
禁用linux组策略
将/etc/selinux/config中的SELINUX=[permissive|enforcing|disabled]改为
SELINUX=[permissive|enforcing|disabled]
原文链接: https://www.cnblogs.com/snigoal/archive/2012/07/14/2591927.html
欢迎关注
微信关注下方公众号,第一时间获取干货硬货;公众号内回复【pdf】免费获取数百本计算机经典书籍
原创文章受到原创版权保护。转载请注明出处:https://www.ccppcoding.com/archives/55192
非原创文章文中已经注明原地址,如有侵权,联系删除
关注公众号【高性能架构探索】,第一时间获取最新文章
转载文章受原作者版权保护。转载请注明原作者出处!