
Hosts File
The "/etc/hosts" file must contain a fully qualified name for the server.(修改hosts文件)
127.0.0.1 localhost.localdomain localhost
#192.168.2.181 ol5-11gr2.localdomain ol5-11gr2
192.168.2.34 rhel localhost
2.修改参数文件,在红帽5以上系统中安装oracle 10g 与11g 最大的区别就在内核参数是不一样的。主要为红色的字符串
fs.suid_dumpable = 1
fs.aio-max-nr = 1048576
fs.file-max = 6815744
kernel.shmall = 2097152
kernel.shmmax = 536870912
kernel.shmmni = 4096
kernel.sem = 250 32000 100 128
net.ipv4.ip_local_port_range = 9000 65500
net.core.rmem_default = 262144
net.core.rmem_max = 4194304
net.core.wmem_default = 262144
net.core.wmem_max = 1048586
The current values can be tested using the following command.
/sbin/sysctl -a | grep <param-name>
Add or amend the following lines in the "/etc/sysctl.conf" file.
fs.suid_dumpable = 1
fs.aio-max-nr = 1048576
fs.file-max = 6815744
kernel.shmall = 2097152
kernel.shmmax = 536870912
kernel.shmmni = 4096
# semaphores: semmsl, semmns, semopm, semmni
kernel.sem = 250 32000 100 128
net.ipv4.ip_local_port_range = 9000 65500
net.core.rmem_default=4194304
net.core.rmem_max=4194304
net.core.wmem_default=262144
net.core.wmem_max=1048586
Run the following command to change the current kernel parameters.
/sbin/sysctl -p
Add the following lines to the "/etc/security/limits.conf" file.
oracle soft nproc 2047
oracle hard nproc 16384
oracle soft nofile 4096
oracle hard nofile 65536
oracle soft stack 10240 //这个可以不加
3.安装相关的rpm包
Install the following packages if they are not already present.
# From redhat enterprise 6_86
cd /media/RHEL_6.0 \ i386\ Disc \1 /Packages/ //此路径为我的系统光盘路径
rpm -Uvh binutils-2.*
rpm -Uvh compat-libstdc++-33*
rpm -Uvh compat-libstdc++-33*.i386.rpm
rpm -Uvh elfutils-libelf*
rpm -Uvh gcc-4.*
rpm -Uvh gcc-c++-4.*
rpm -Uvh glibc-2.*
rpm -Uvh glibc-common-2.*
rpm -Uvh glibc-devel-2.*
rpm -Uvh glibc-headers-2.*
rpm -Uvh ksh*
rpm -Uvh libaio-0.*
rpm -Uvh libaio-devel-0.*
rpm -Uvh libgomp-4.*
rpm -Uvh libgcc-4.*
rpm -Uvh libstdc++-4.*
rpm -Uvh libstdc++-devel-4.*
rpm -Uvh make-3.*
rpm -Uvh sysstat-7.*
rpm -Uvh unixODBC-2.*
rpm -Uvh unixODBC-devel-2.*
rpm -Uvh numactl-devel-*
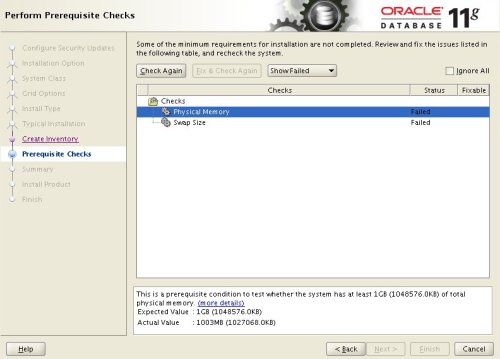
//以上的包和内核参数在ORACLE安装检测系统过程中会有信息显示,ORACLE会提示你有哪些包没有安装,那些内核参数没有修改好。
4.创建用户和组
Create the new groups and users.
groupadd oinstall
groupadd dba
groupadd oper //可以不创建
groupadd asmadmin //可以不创建
useradd -g oinstall -G dba,oper,asmadmin oracle
passwd oracle
Note. We are not going to use the "asmadmin" group, since this installation will not use ASM.
AdditionalSetup
The following setup tasks must be performed regardless of which setup method you used previously.
Disable secure linux by editing the "/etc/selinux/config" file, making sure the SELINUX flag is set as follows.
SELINUX=disabled
Alternatively, this alteration can be done using the GUI tool (Applications > System Settings > Security Level). Click on the SELinux tab and disable the feature. If SELinux is disabled after installation, the server will need a reboot for the change to take effect.
Create the directories in which the Oracle software will be installed.
mkdir -p /u01/app/oracle/product/11.2.0/db_1 //红色部分可以不创建
chown -R oracle:oinstall /u01
chmod -R 775 /u01
Login as root and issue the following command.
xhost +<machine-name> //可直接输入xhost + 命令
5.登录oracle用户,修改oracle用户下的.bash_profile文件
Login as the oracle user and add the following lines at the end of the ".bash_profile" file, remembering to adjust them for your specific installation.
# Oracle Settings
TMP=/tmp; export TMP
TMPDIR=$TMP; export TMPDIR
ORACLE_HOSTNAME=ol5-112.localdomain; export ORACLE_HOSTNAME
ORACLE_UNQNAME=DB11G; export ORACLE_UNQNAME
ORACLE_BASE=/u01/app/oracle; export ORACLE_BASE
ORACLE_HOME=$ORACLE_BASE/product/11.2.0/db_1; export ORACLE_HOME
ORACLE_SID=DB11G; export ORACLE_SID
PATH=/usr/sbin:$PATH; export PATH
PATH=$ORACLE_HOME/bin:$PATH; export PATH
LD_LIBRARY_PATH=$ORACLE_HOME/lib:/lib:/usr/lib; export LD_LIBRARY_PATH
CLASSPATH=$ORACLE_HOME/jlib:$ORACLE_HOME/rdbms/jlib; export CLASSPATH
6.安装
Installation
Log into the oracle user. If you are using X emulation then set the DISPLAY environmental variable.
DISPLAY=<machine-name>:0.0; export DISPLAY
Start the Oracle Universal Installer (OUI) by issuing the following command in the database directory.
./runInstaller
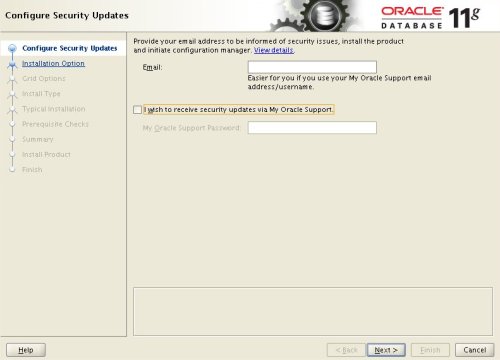
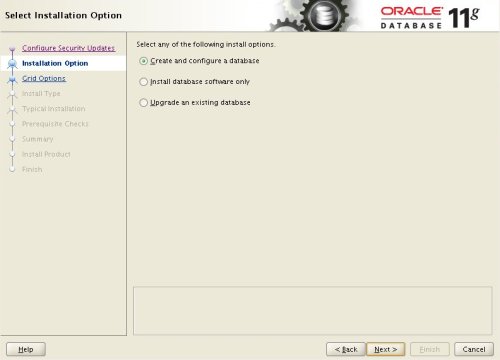
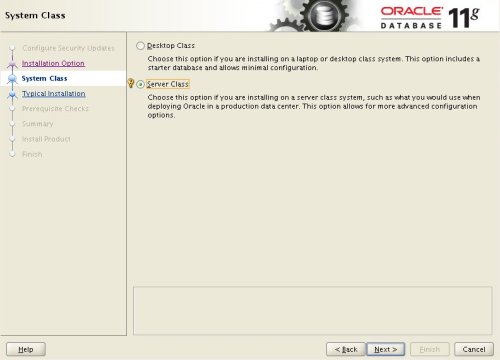
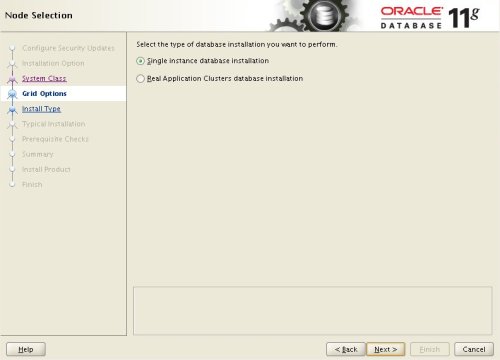
Proceed with the installation of your choice. You can see the type of installation I performed by clicking on the links below to see screen shots of each stage.
- Configure Security Updates
- Select Install Option
- System Class
- Node Selection
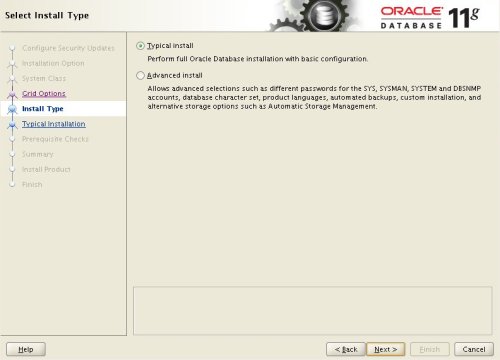
- Select Install Type
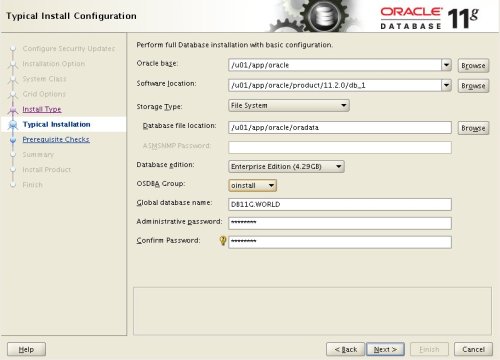
- Typical Install Configuration
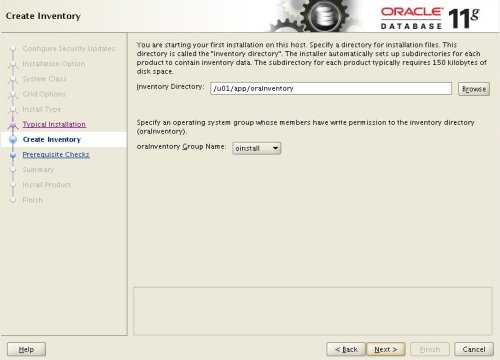
- Create Inventory
- Perform Prerequisite Checks
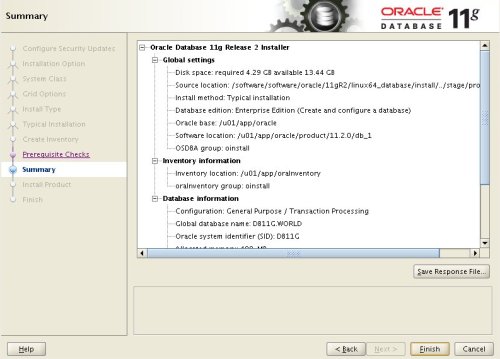
- Summary
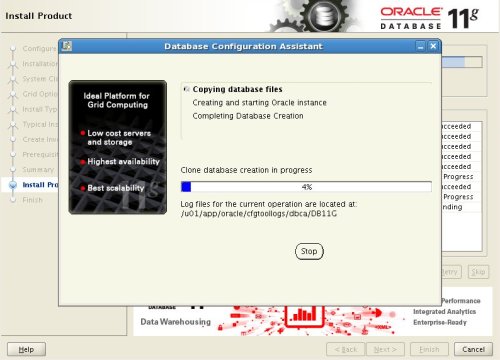
- Install Product
- Database Configuration Assistant
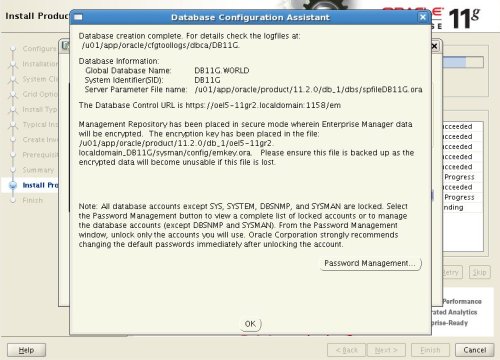
- Database Configuration Assistant 2
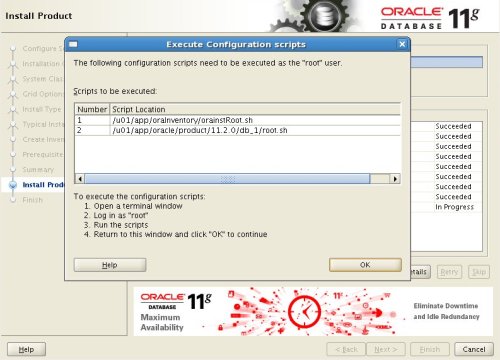
- Execute Configuration Scripts
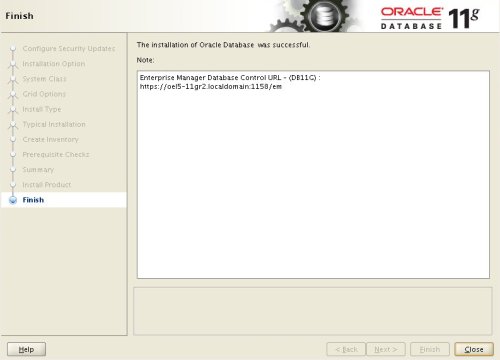
- Finish
Post Installation
Edit the "/etc/oratab" file setting the restart flag for each instance to 'Y'.
DB11G:/u01/app/oracle/product/11.2.0/db_1:Y
原文链接: https://www.cnblogs.com/fengqingtao/archive/2012/02/20/2360217.html
欢迎关注
微信关注下方公众号,第一时间获取干货硬货;公众号内回复【pdf】免费获取数百本计算机经典书籍


原创文章受到原创版权保护。转载请注明出处:https://www.ccppcoding.com/archives/42085
非原创文章文中已经注明原地址,如有侵权,联系删除
关注公众号【高性能架构探索】,第一时间获取最新文章
转载文章受原作者版权保护。转载请注明原作者出处!