
一、下载CentOS7的镜像文件ISO
CentOS官方镜像站点列表地址: https://www.centos.org/download/mirrors/
中国境内CentOS镜像下载地址:
阿里: http://mirrors.aliyun.com/centos/
清华: https://mirrors.tuna.tsinghua.edu.cn/centos/
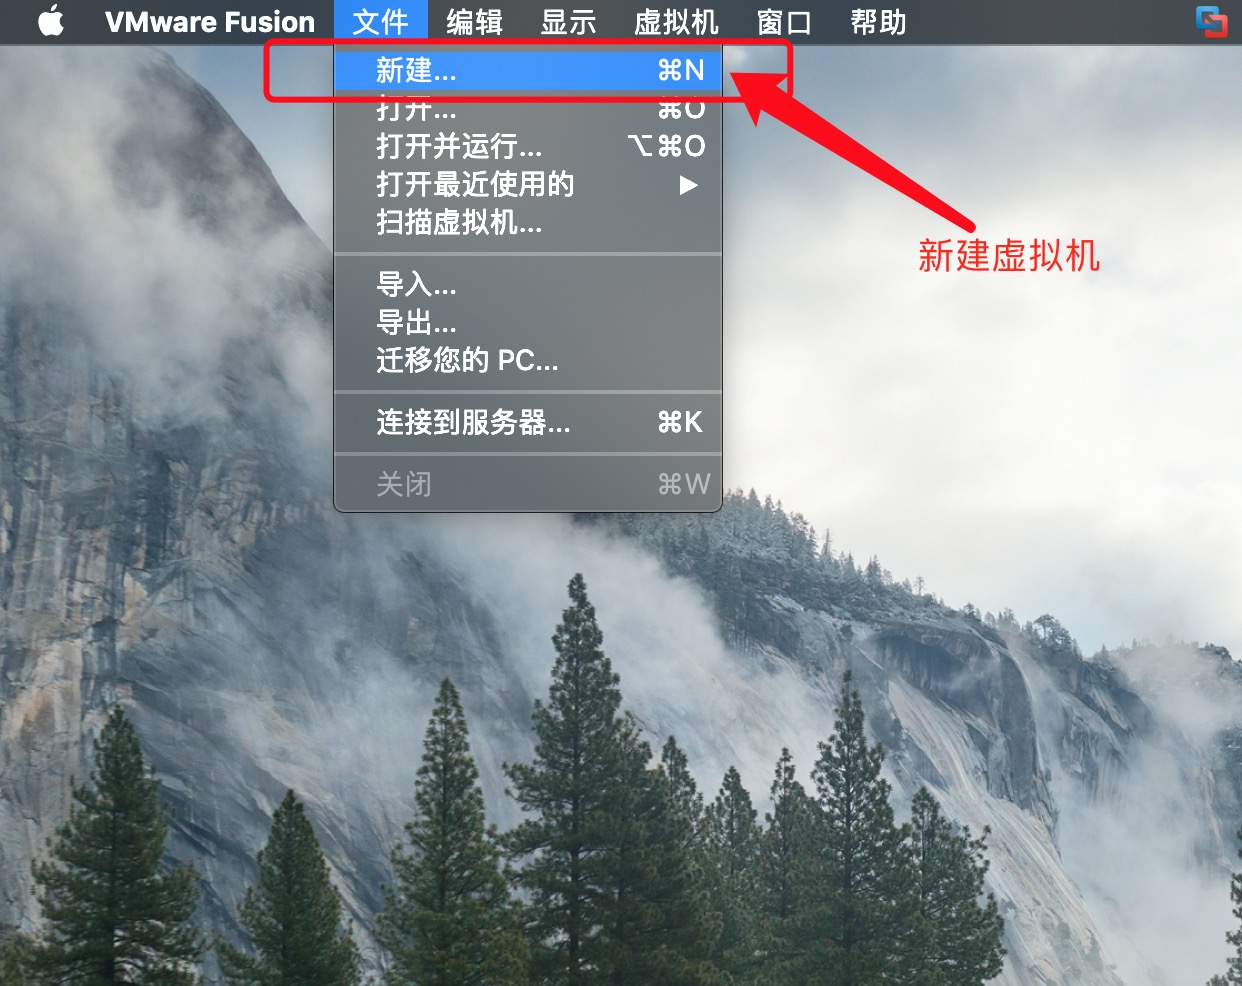
二、VM Funsion安装CentOS7
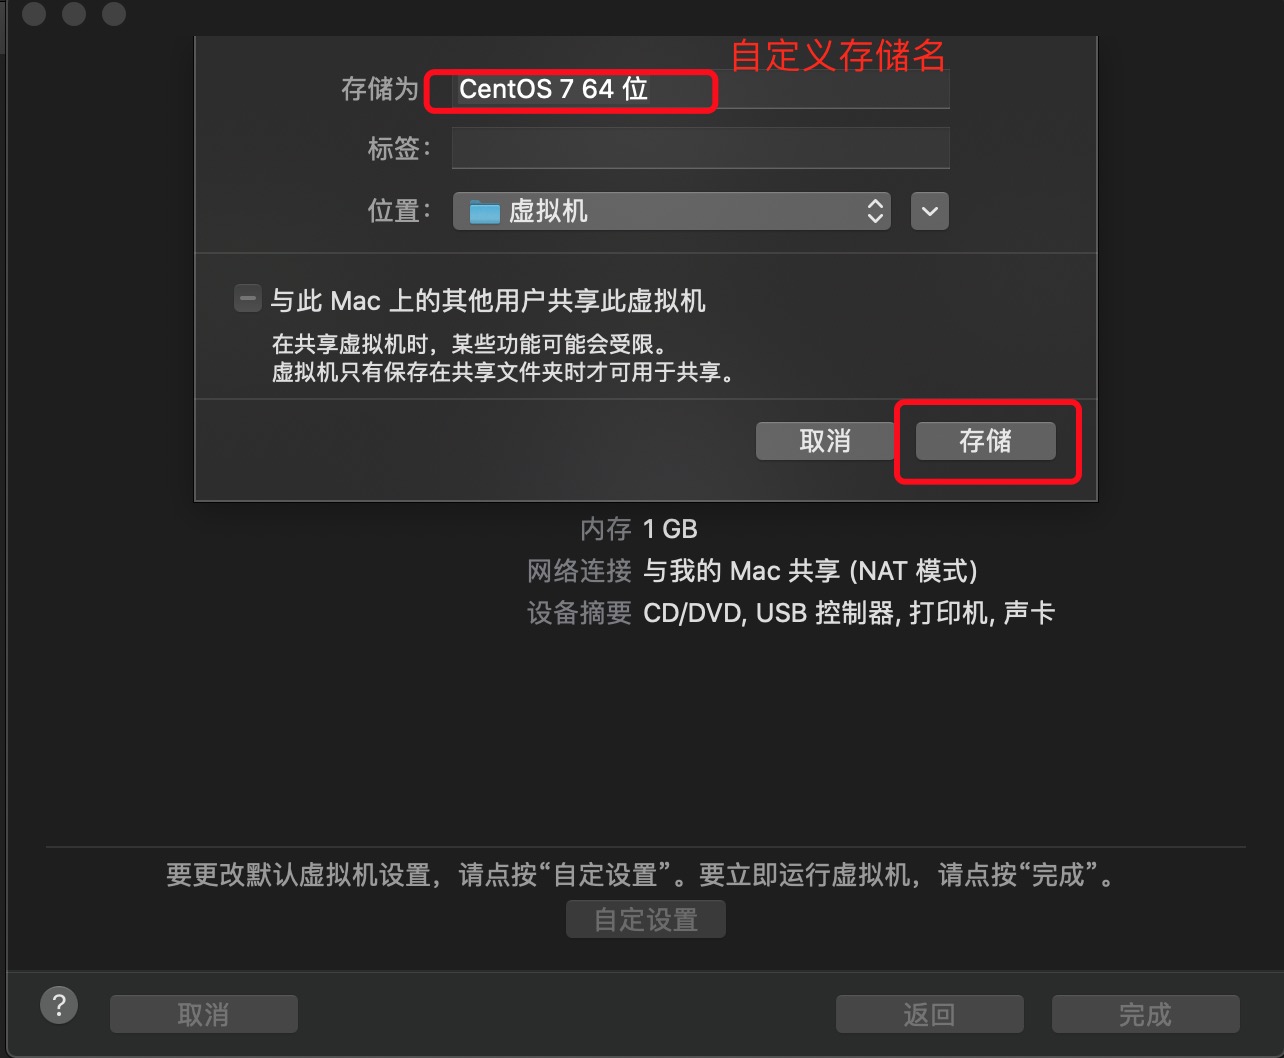
1、打开Mac的Funsion,点击创建虚拟机

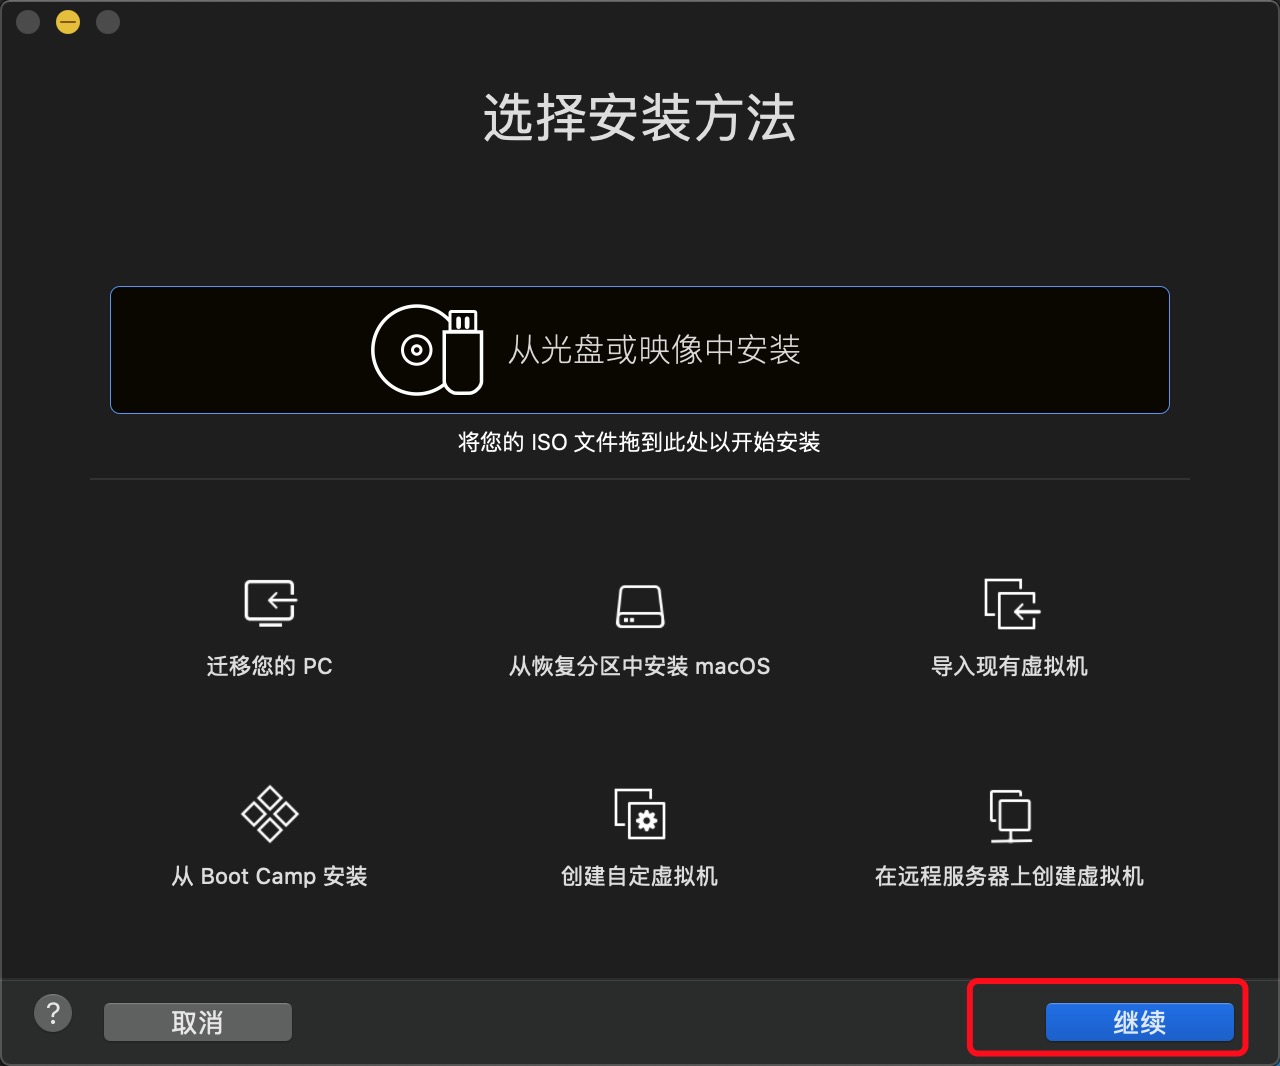
2、选择安装方法,默认即可,也可以自行选择"创建自定虚拟机"
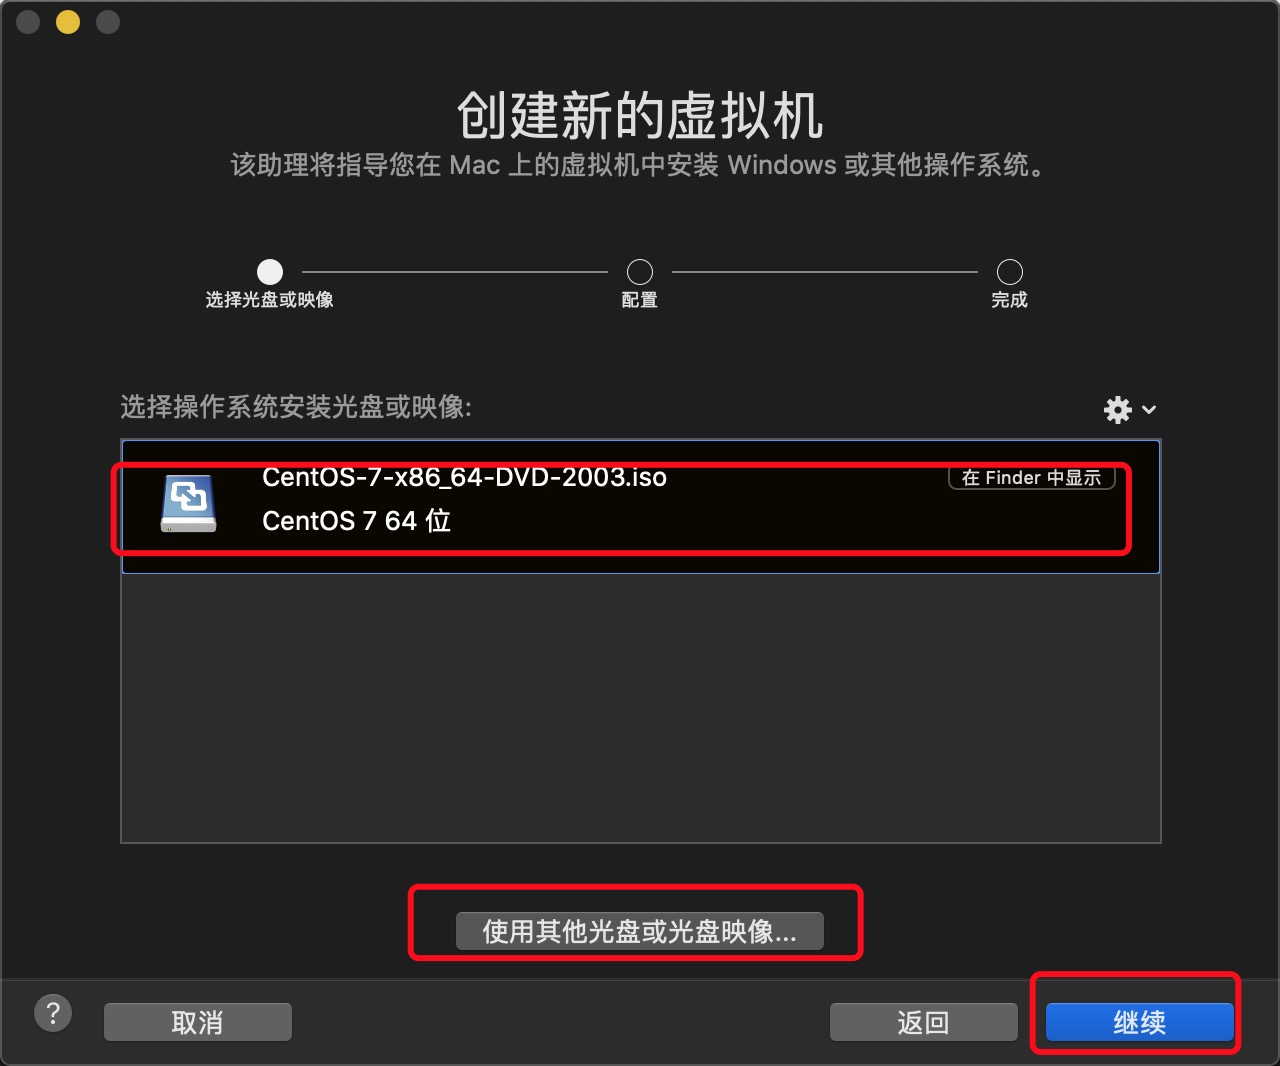
3、选择镜像文件
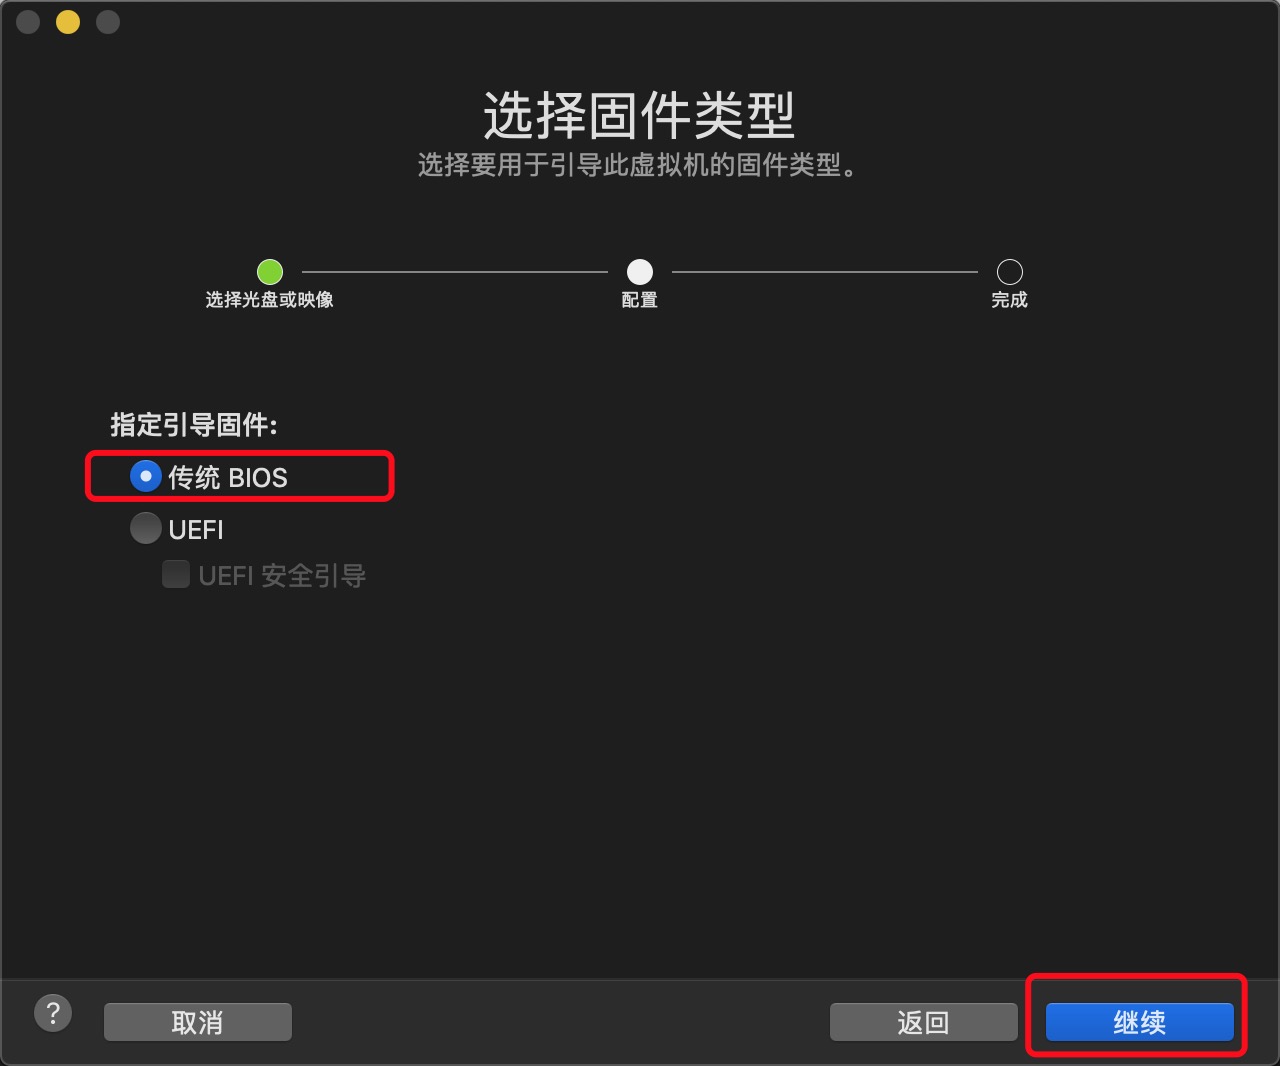
4、选择固件类型
5、选择自定义设置
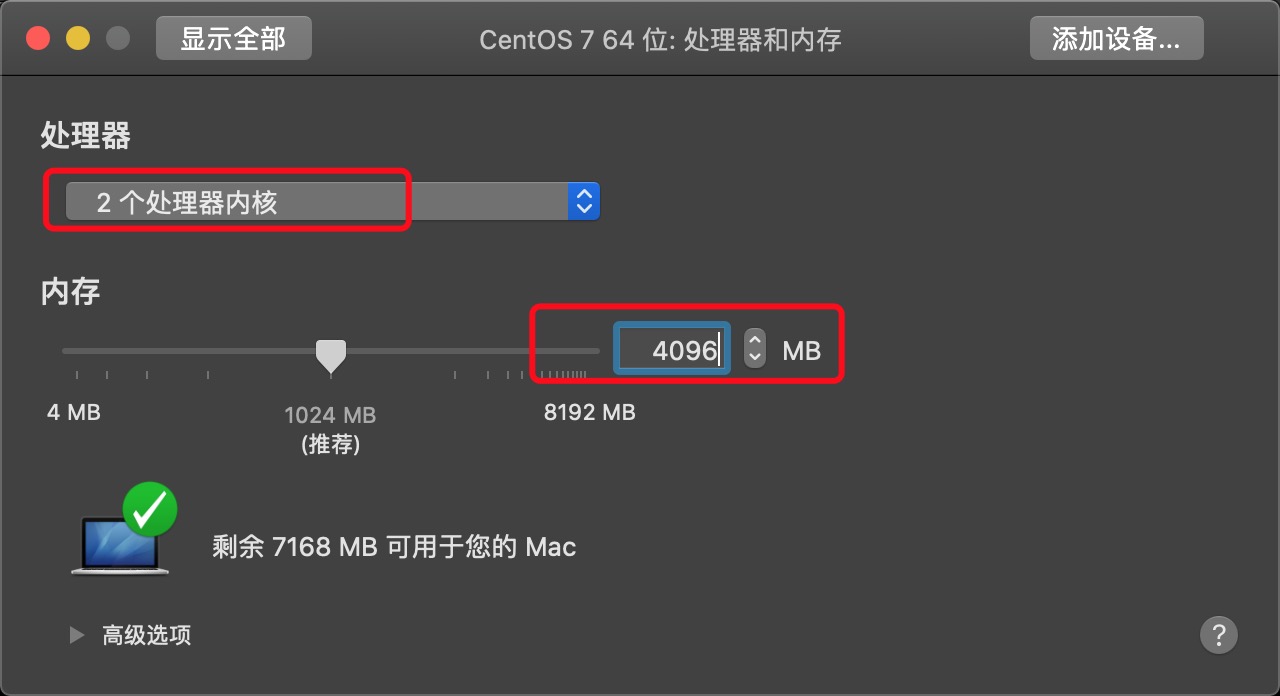
6、设置CPU和内存
7、设置硬盘--根据你的物理机选择合适的虚拟机硬盘容量

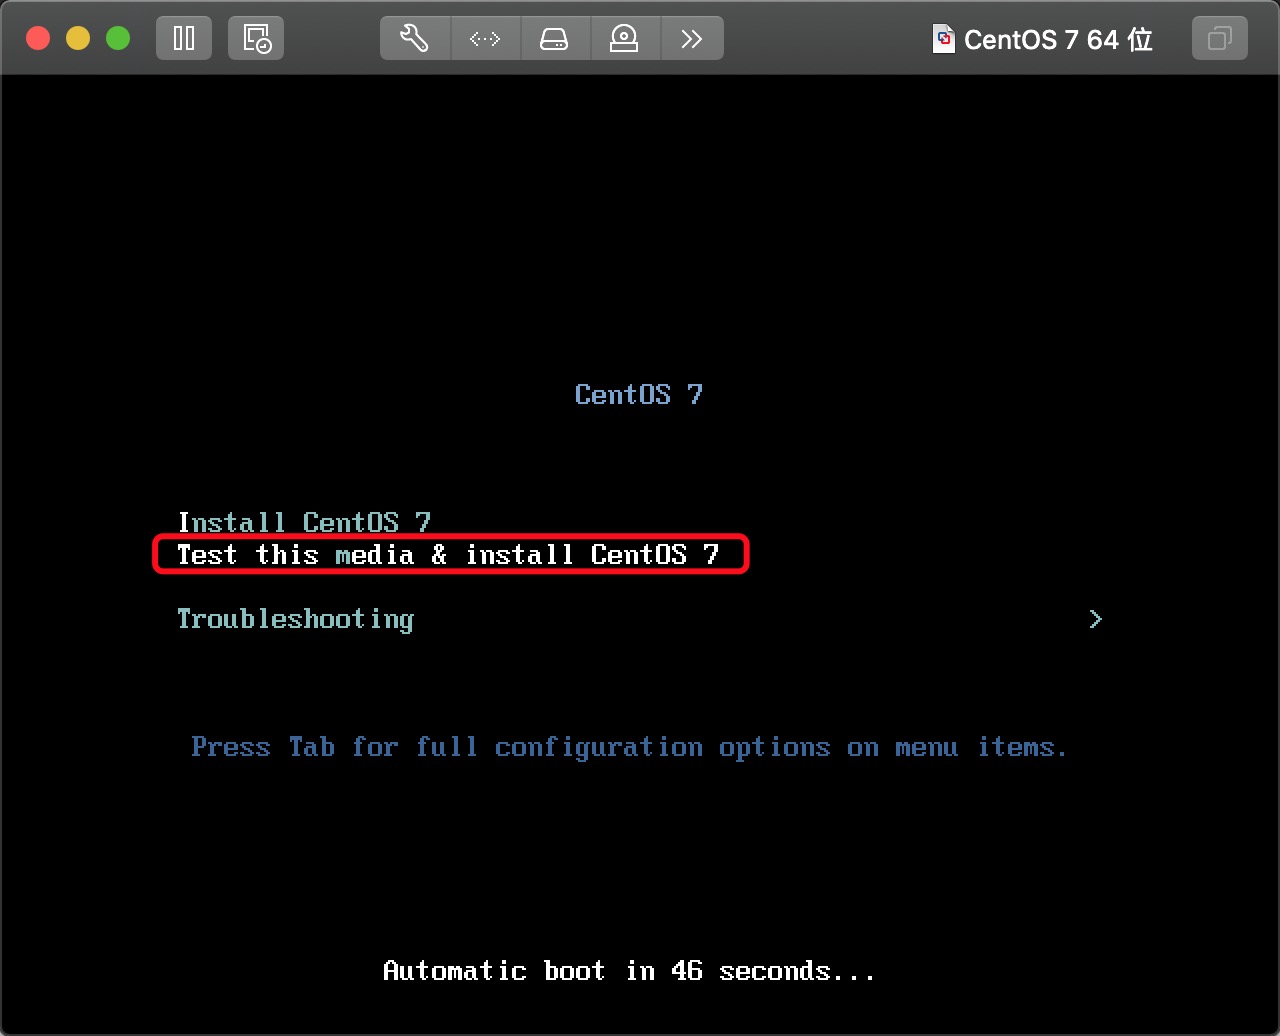
8、启动--这里选择的是先检查然后在安装(个人喜好),也可以直接选择启动安装
9、选择语言--英语

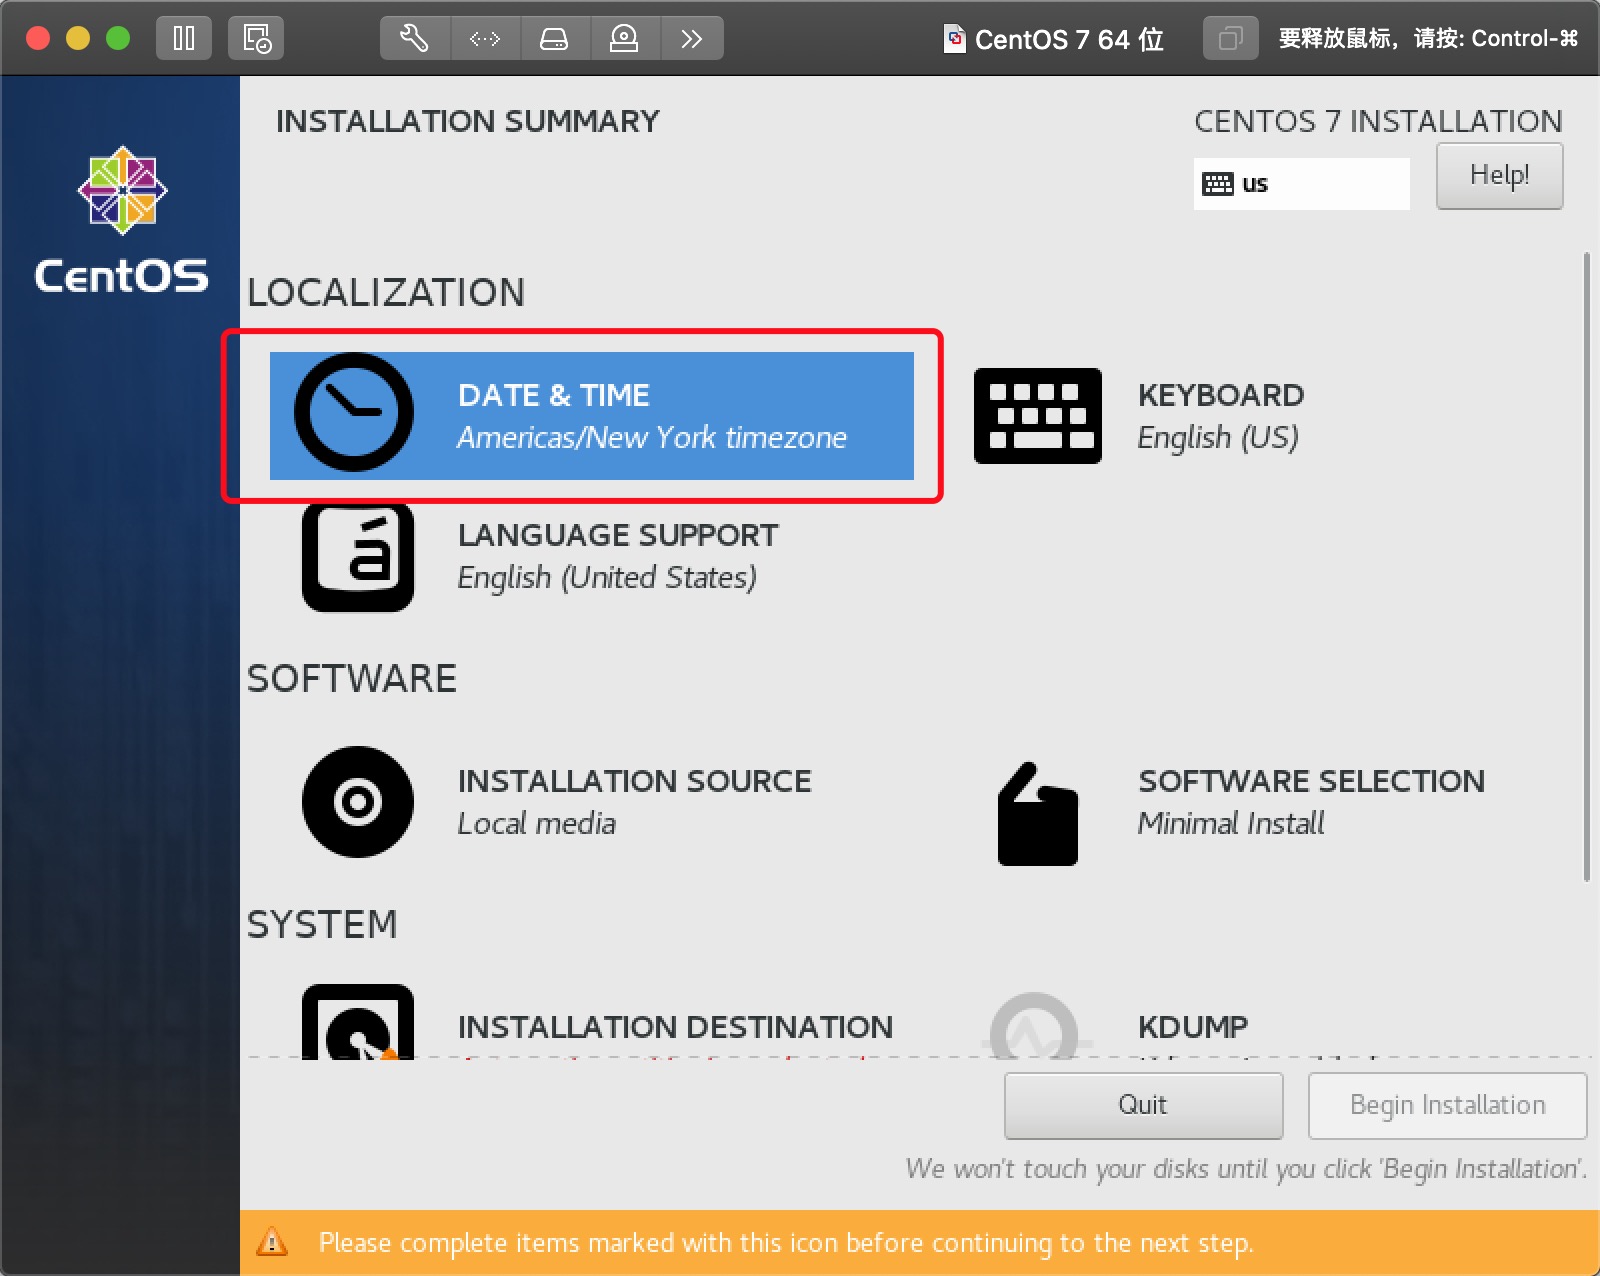
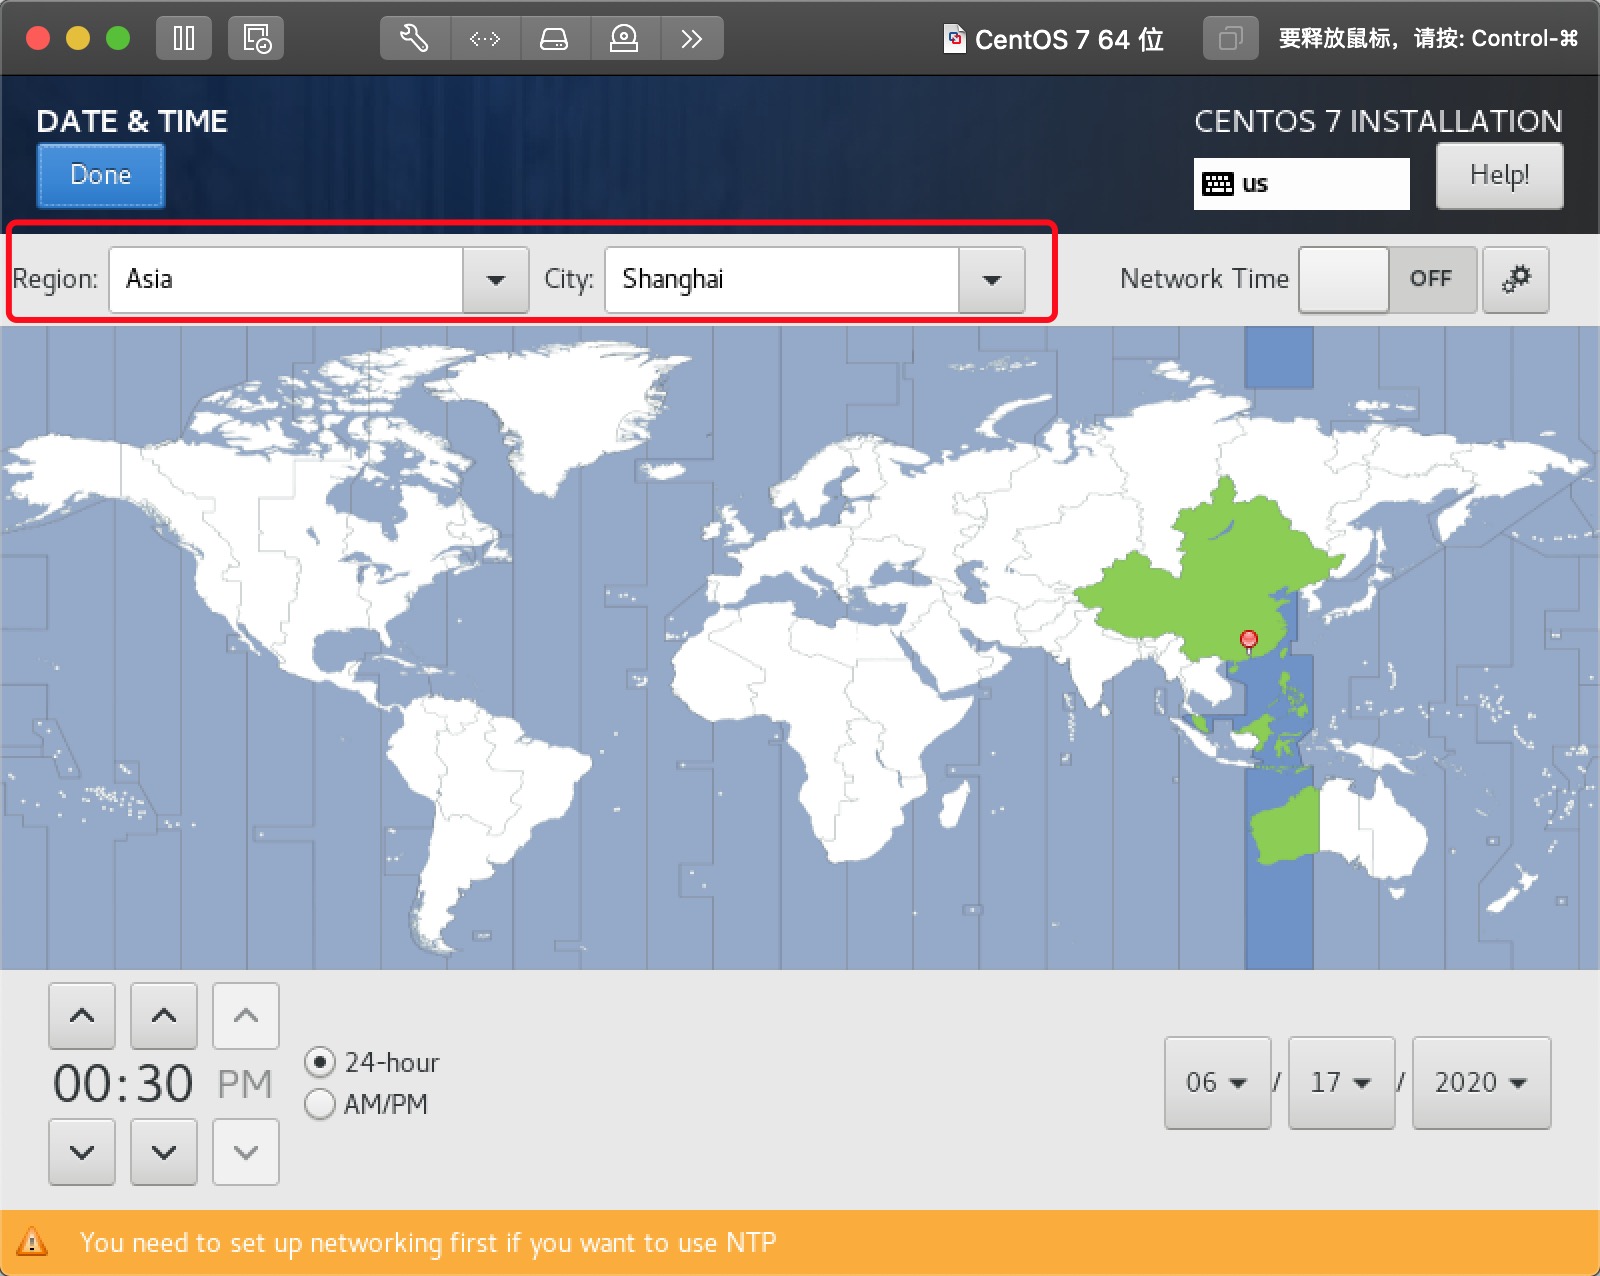
10、选择时区
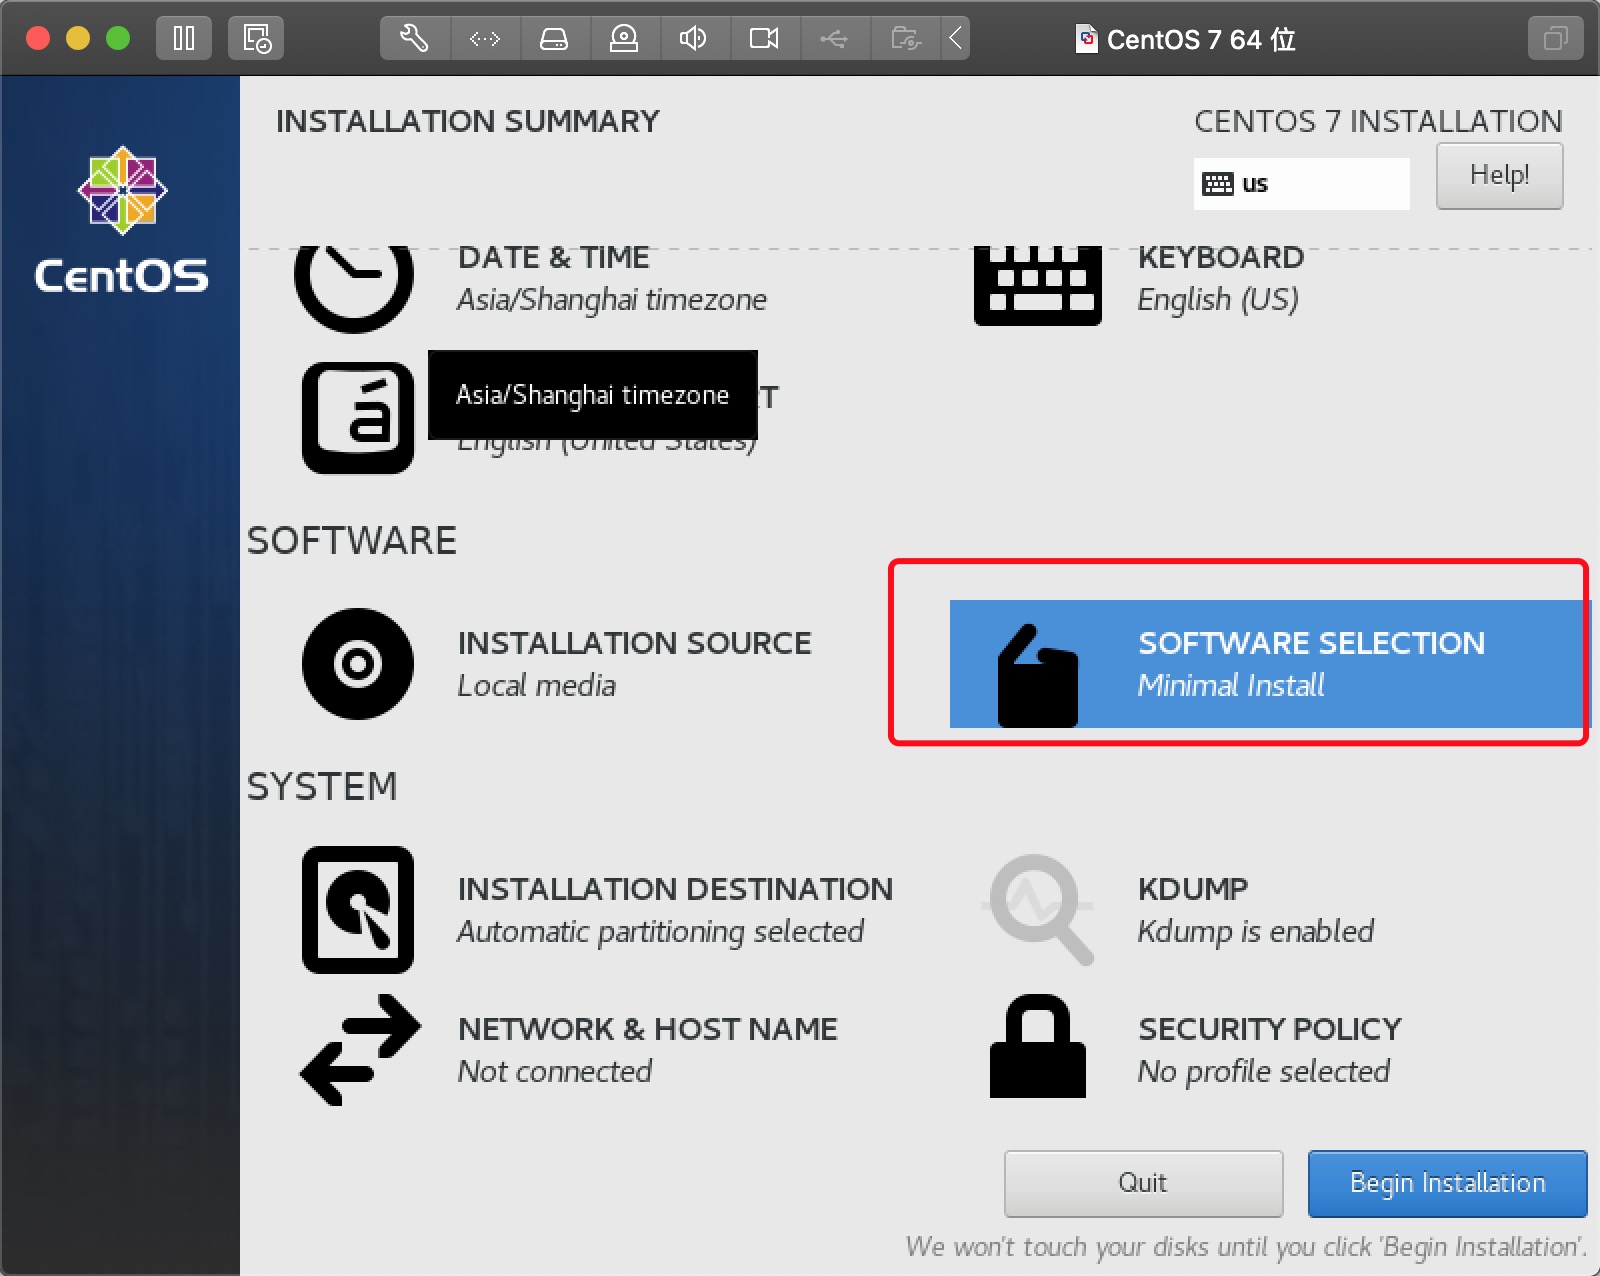
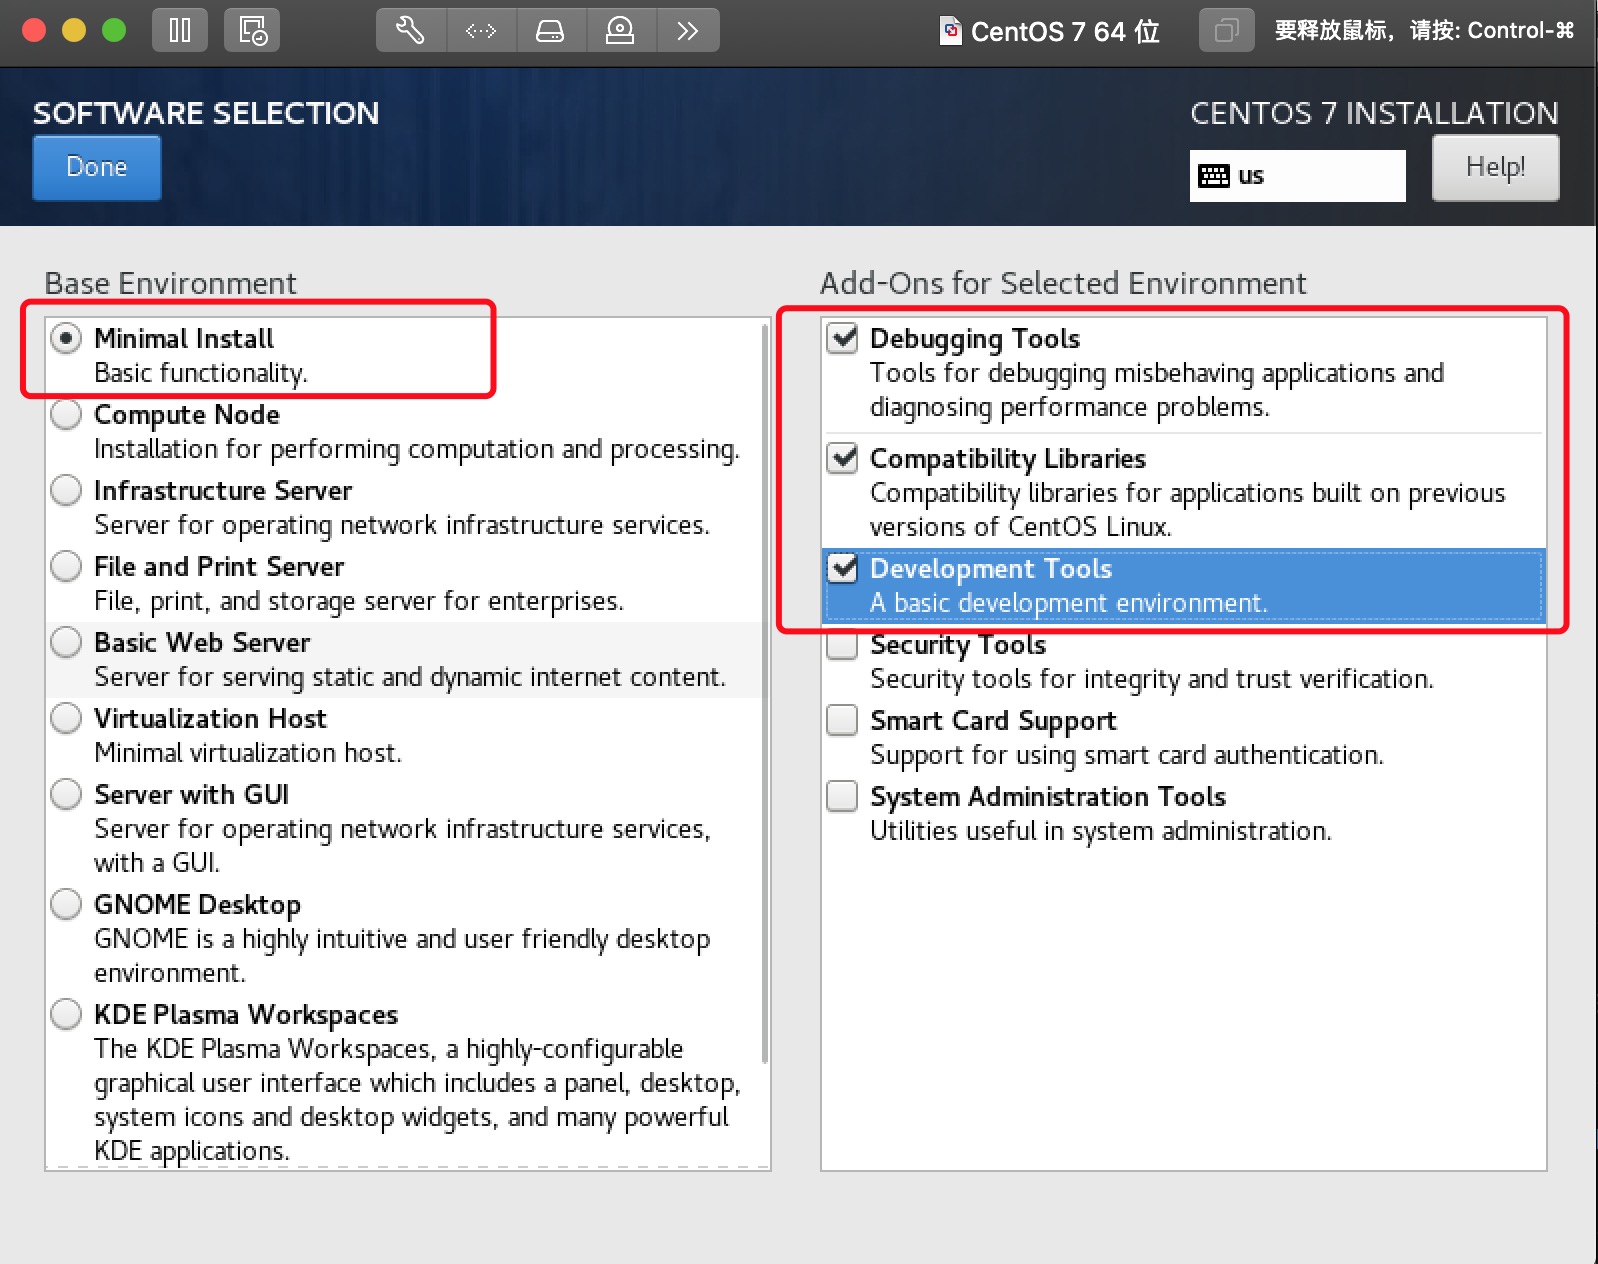
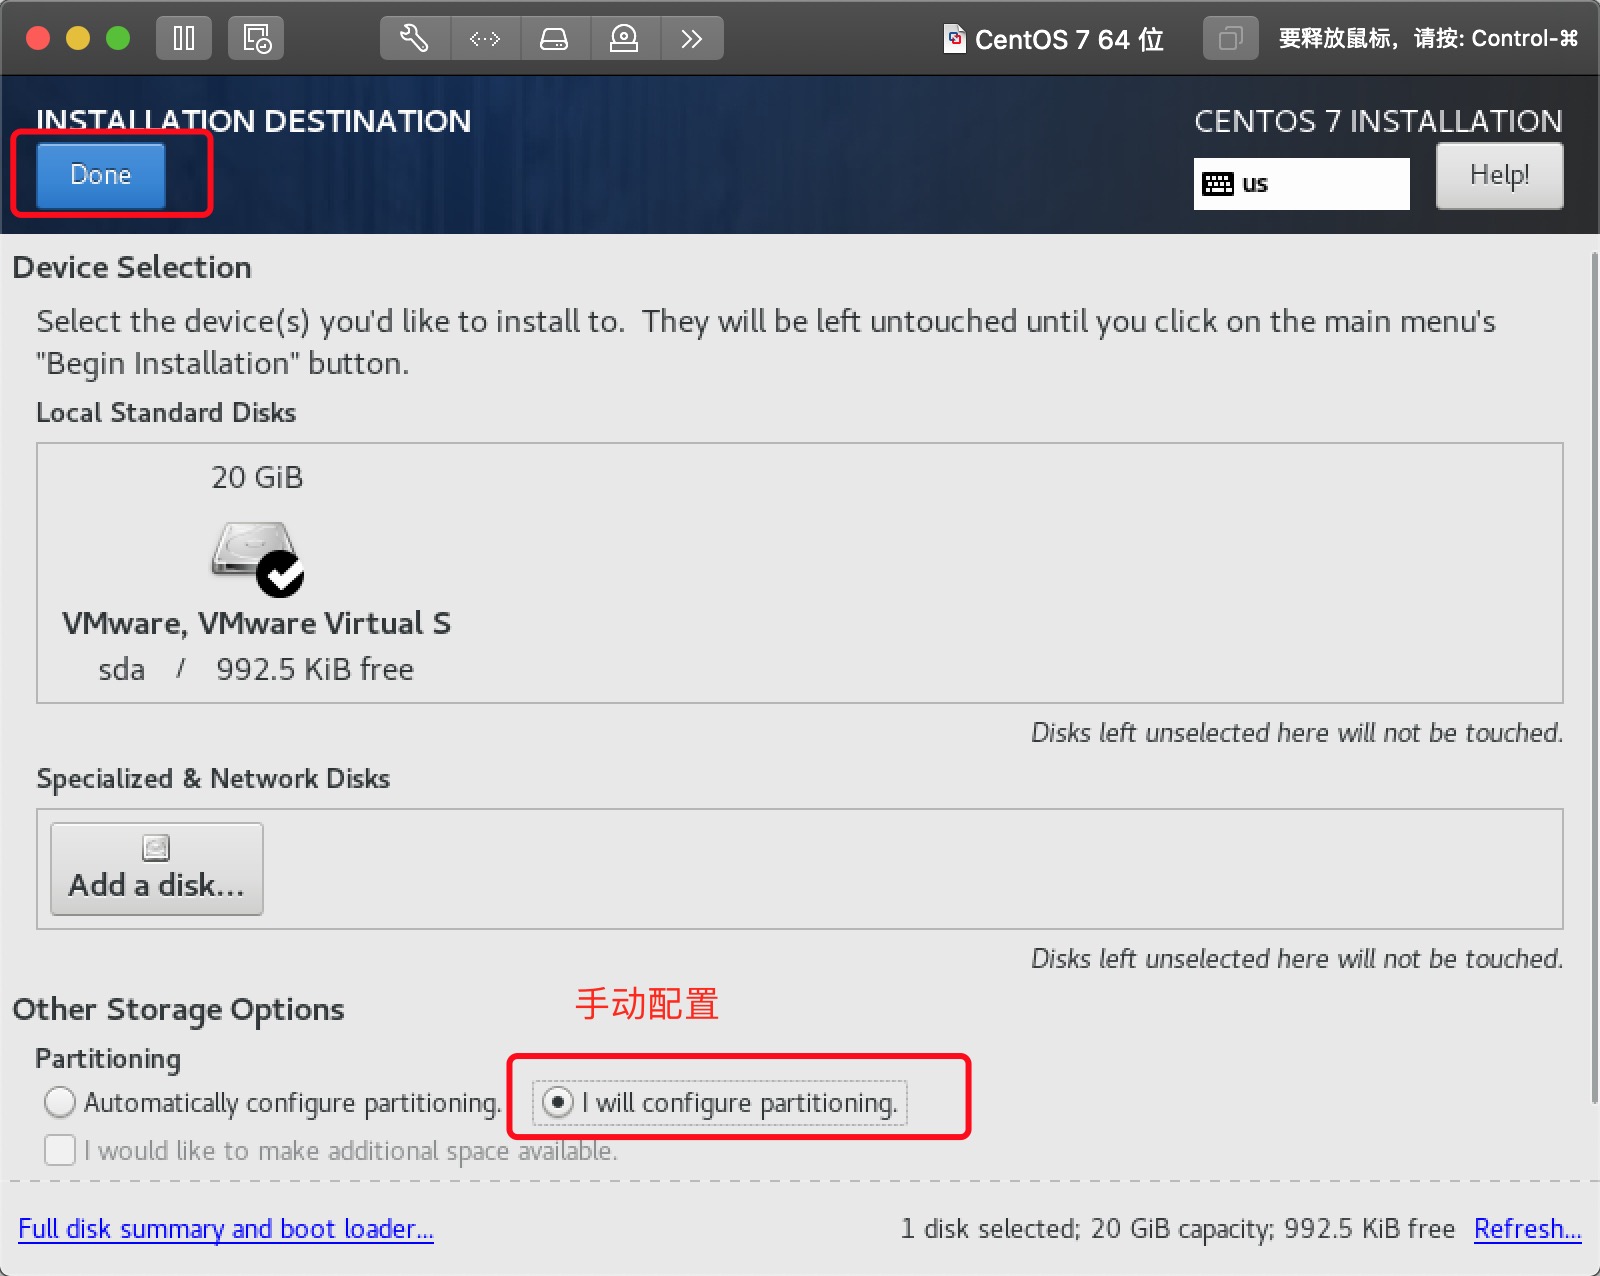
11、选择安装方式以及初始安装的工具
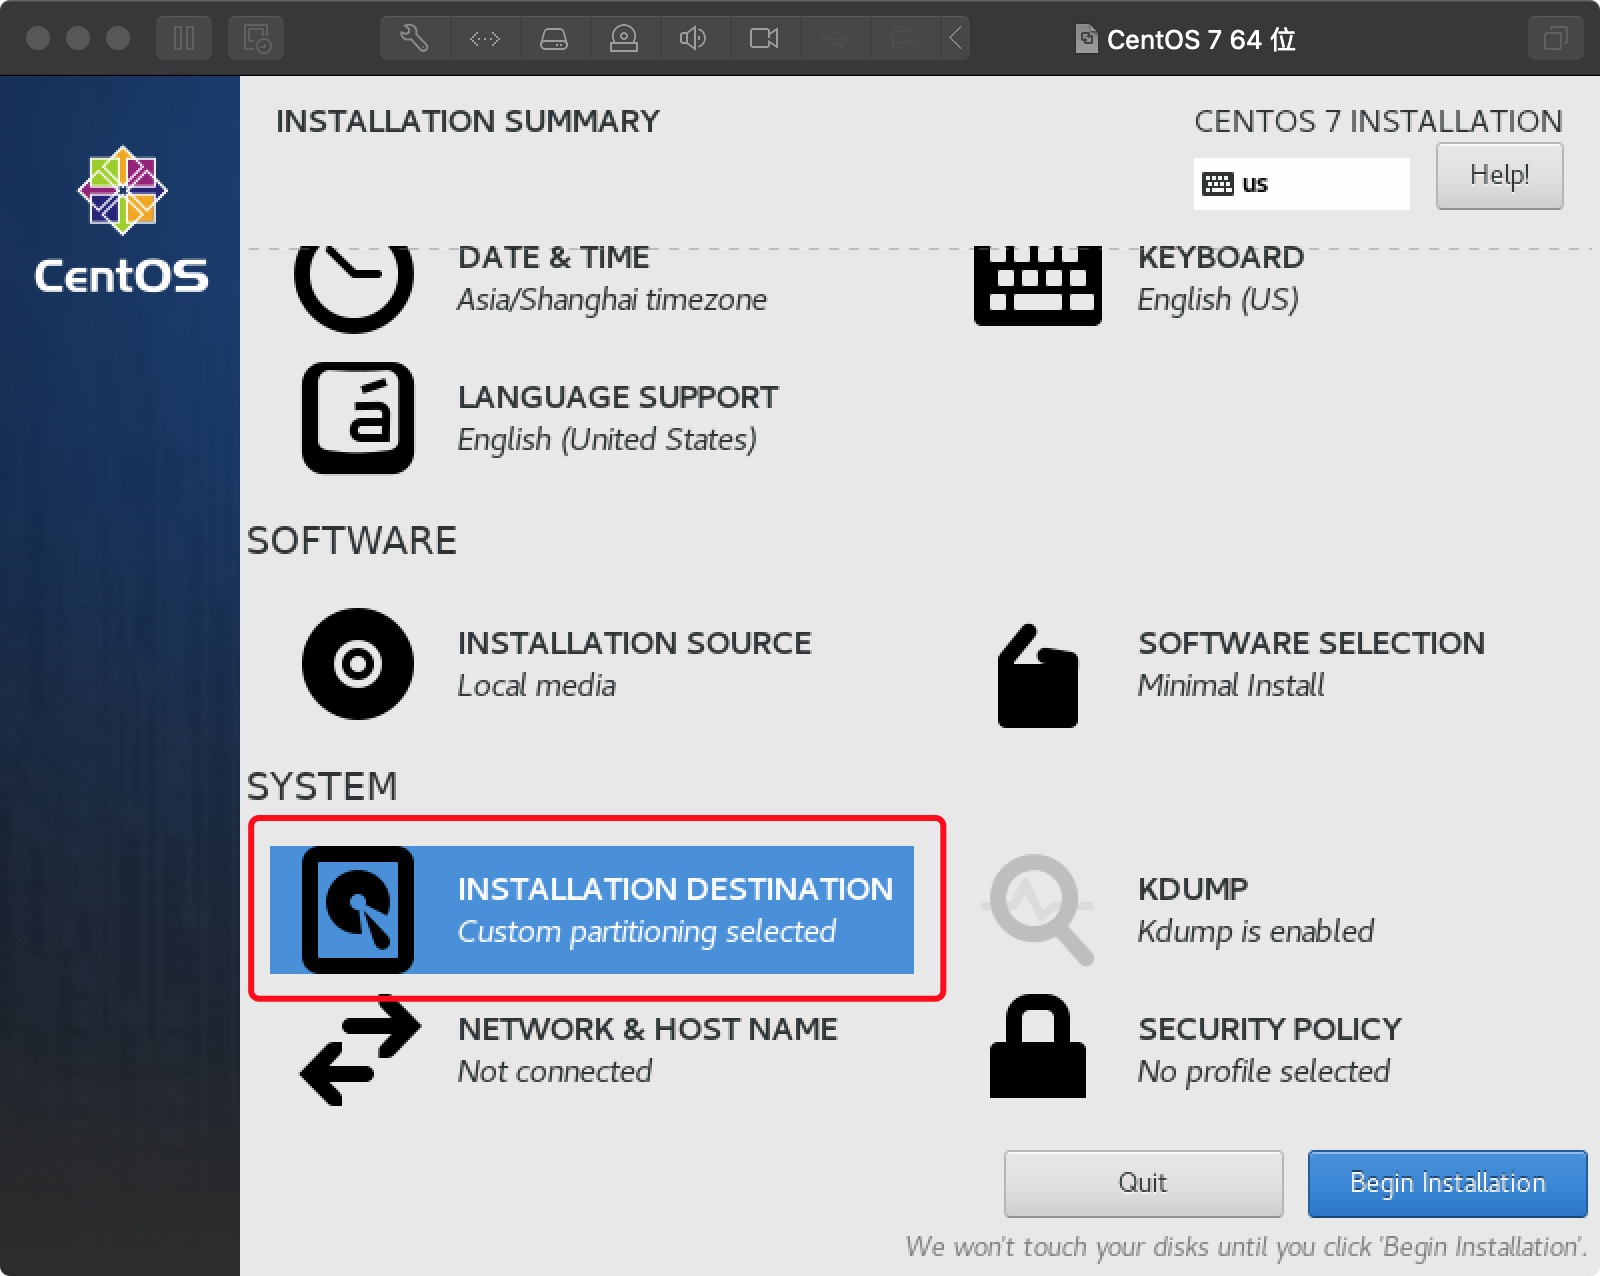
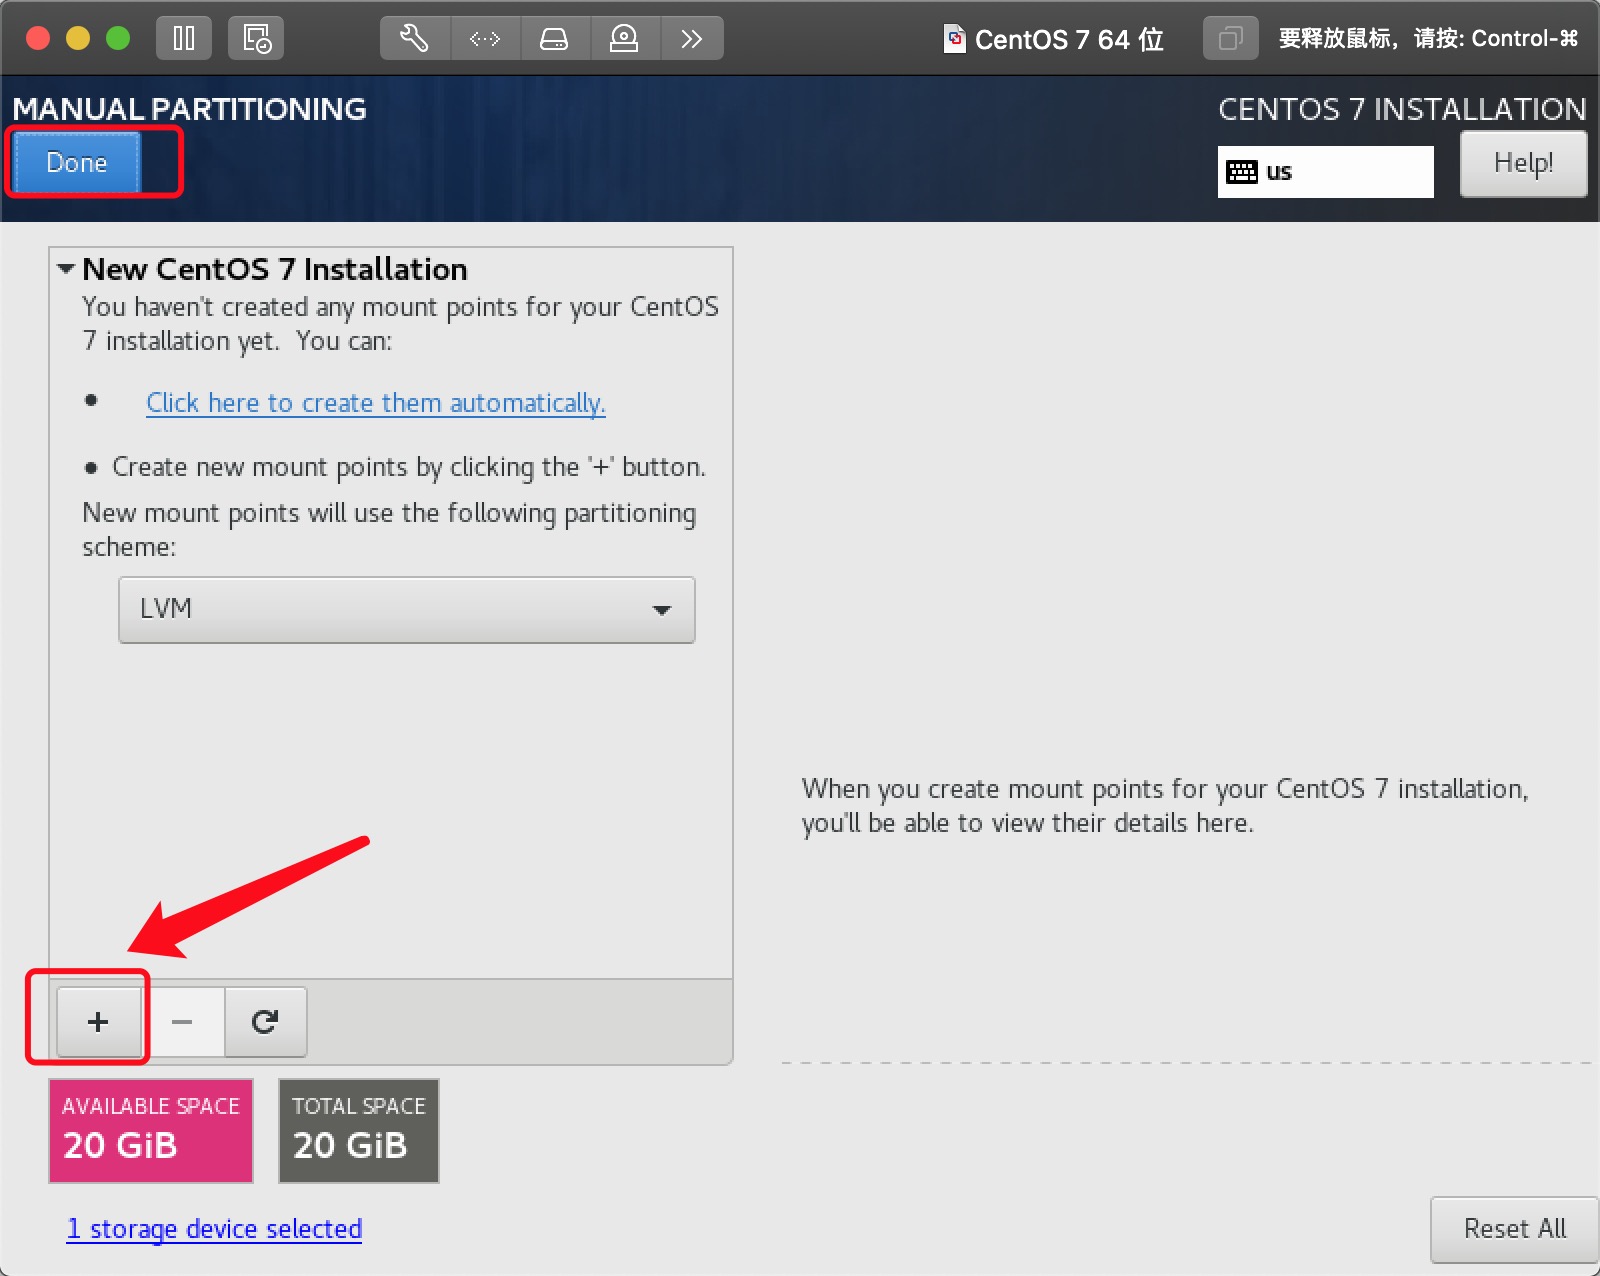
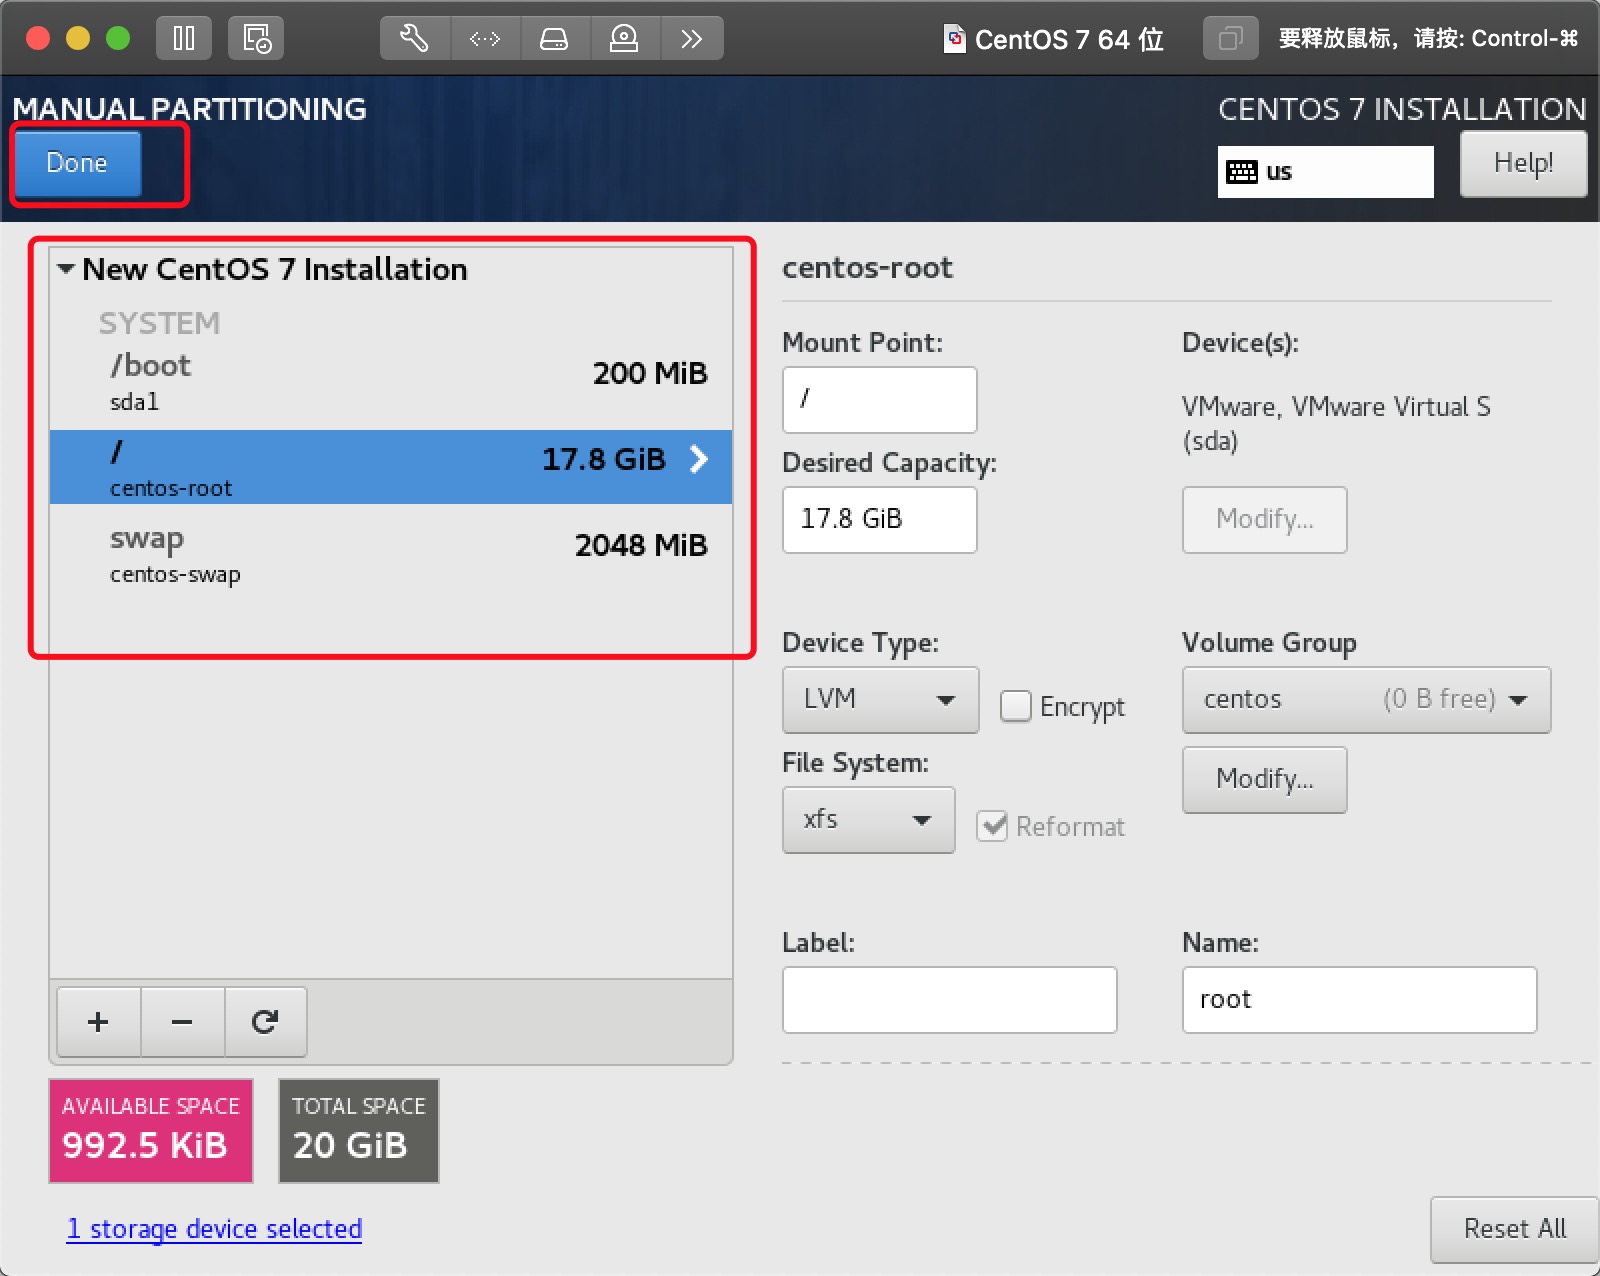
12、磁盘分区--boot分区,swap分区,根(/)分区
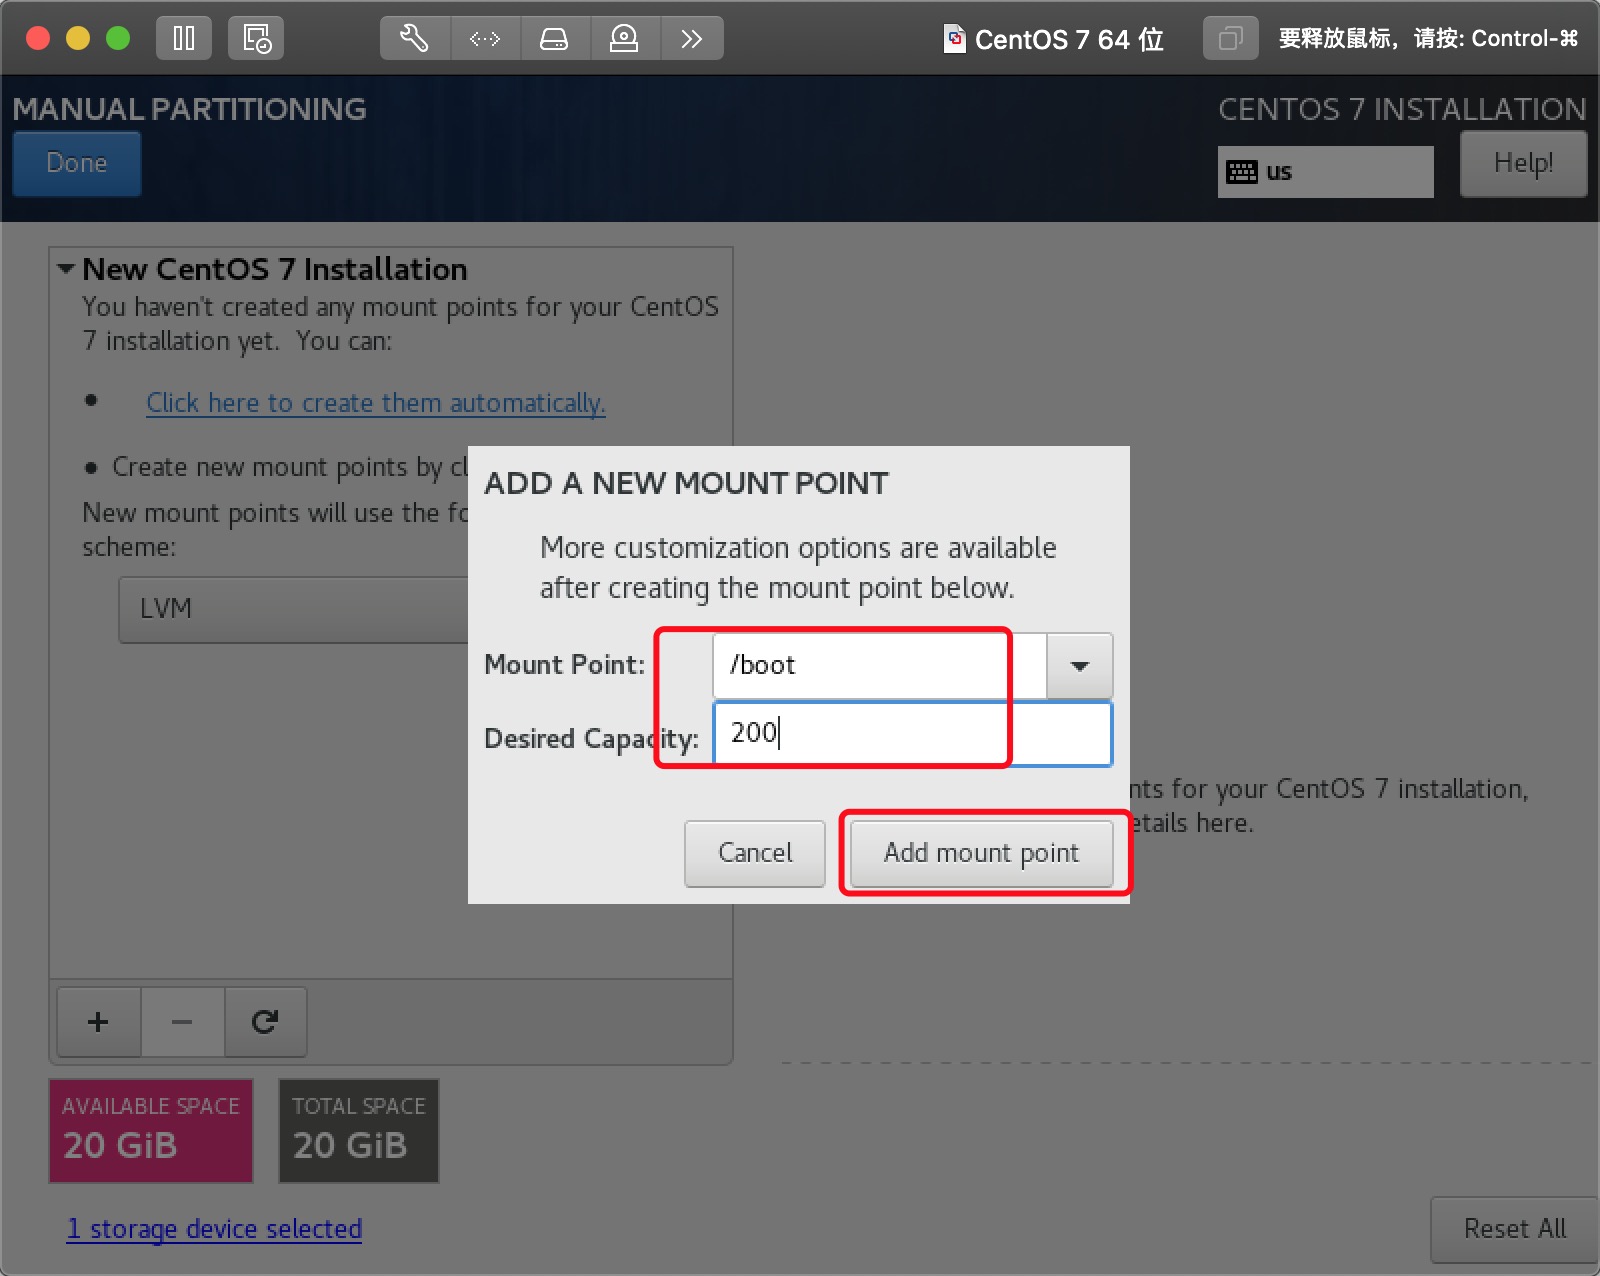
12.1、boot分区--启动分区
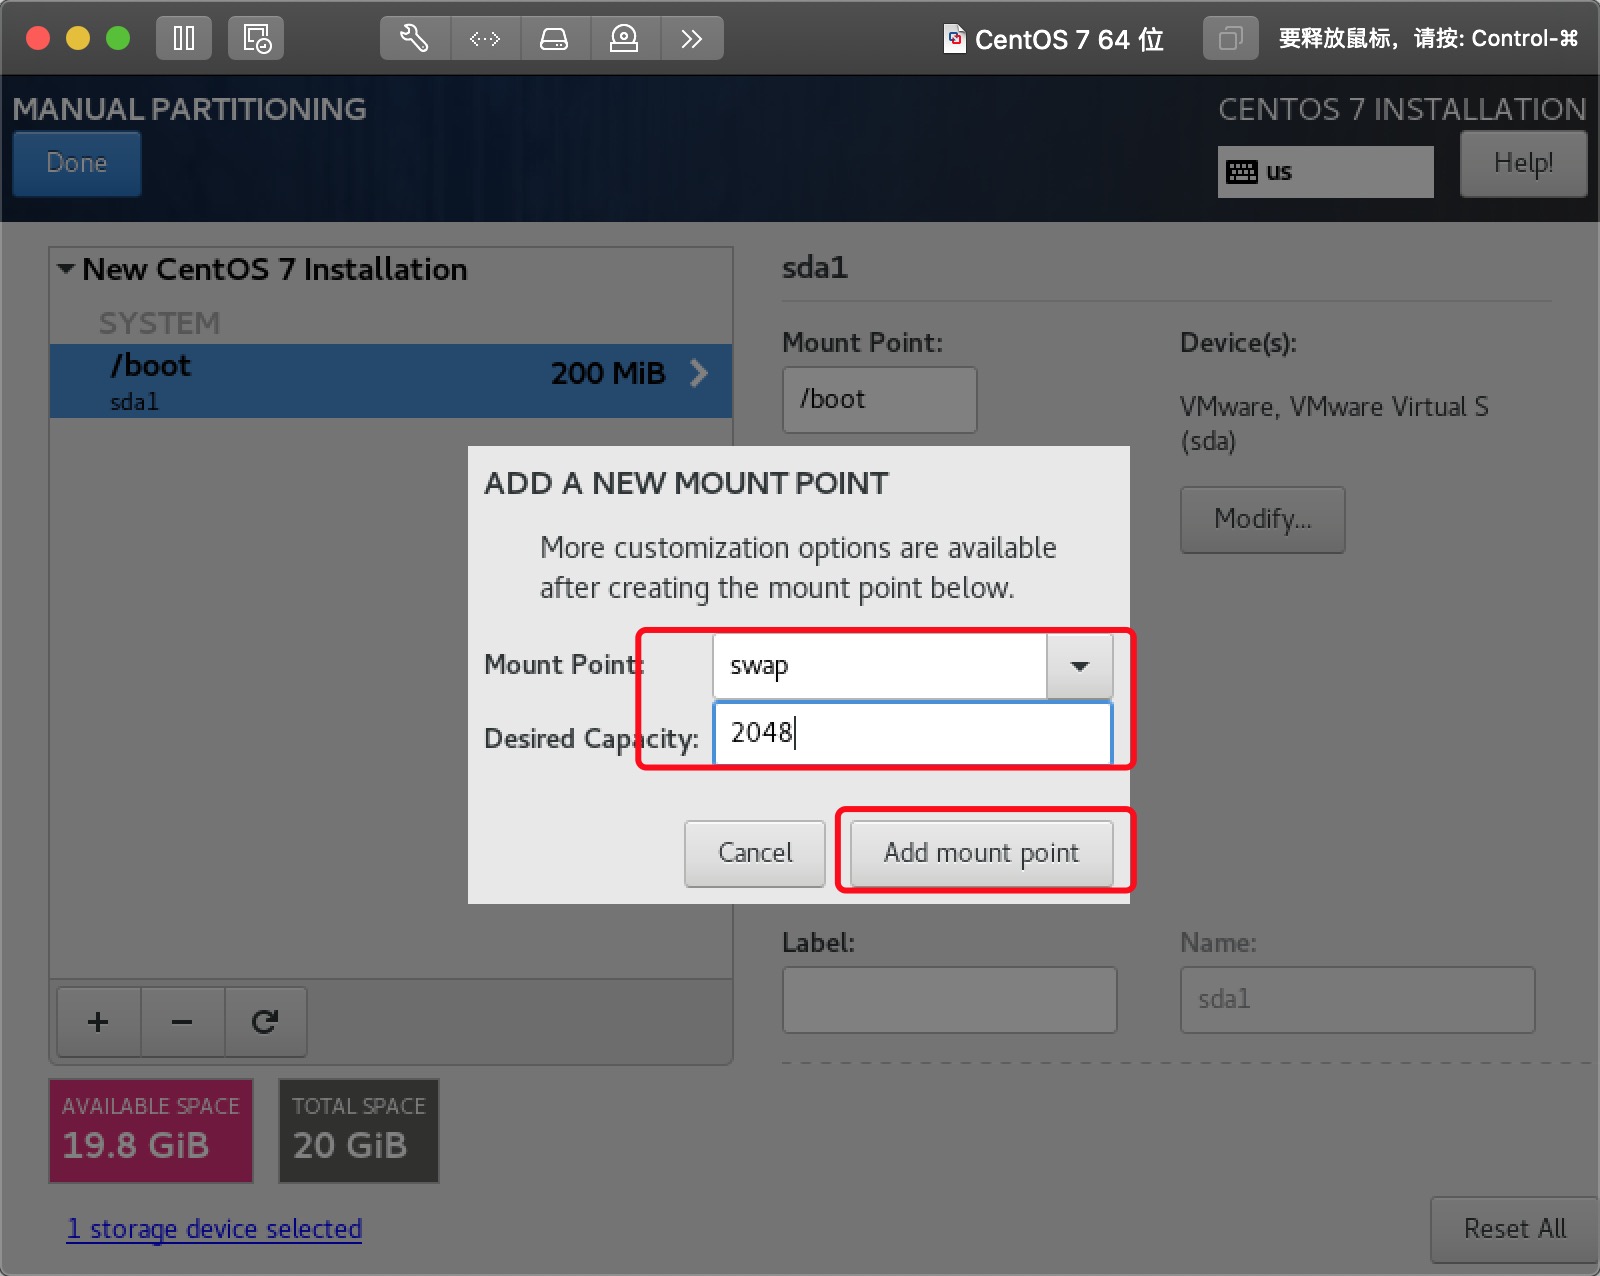
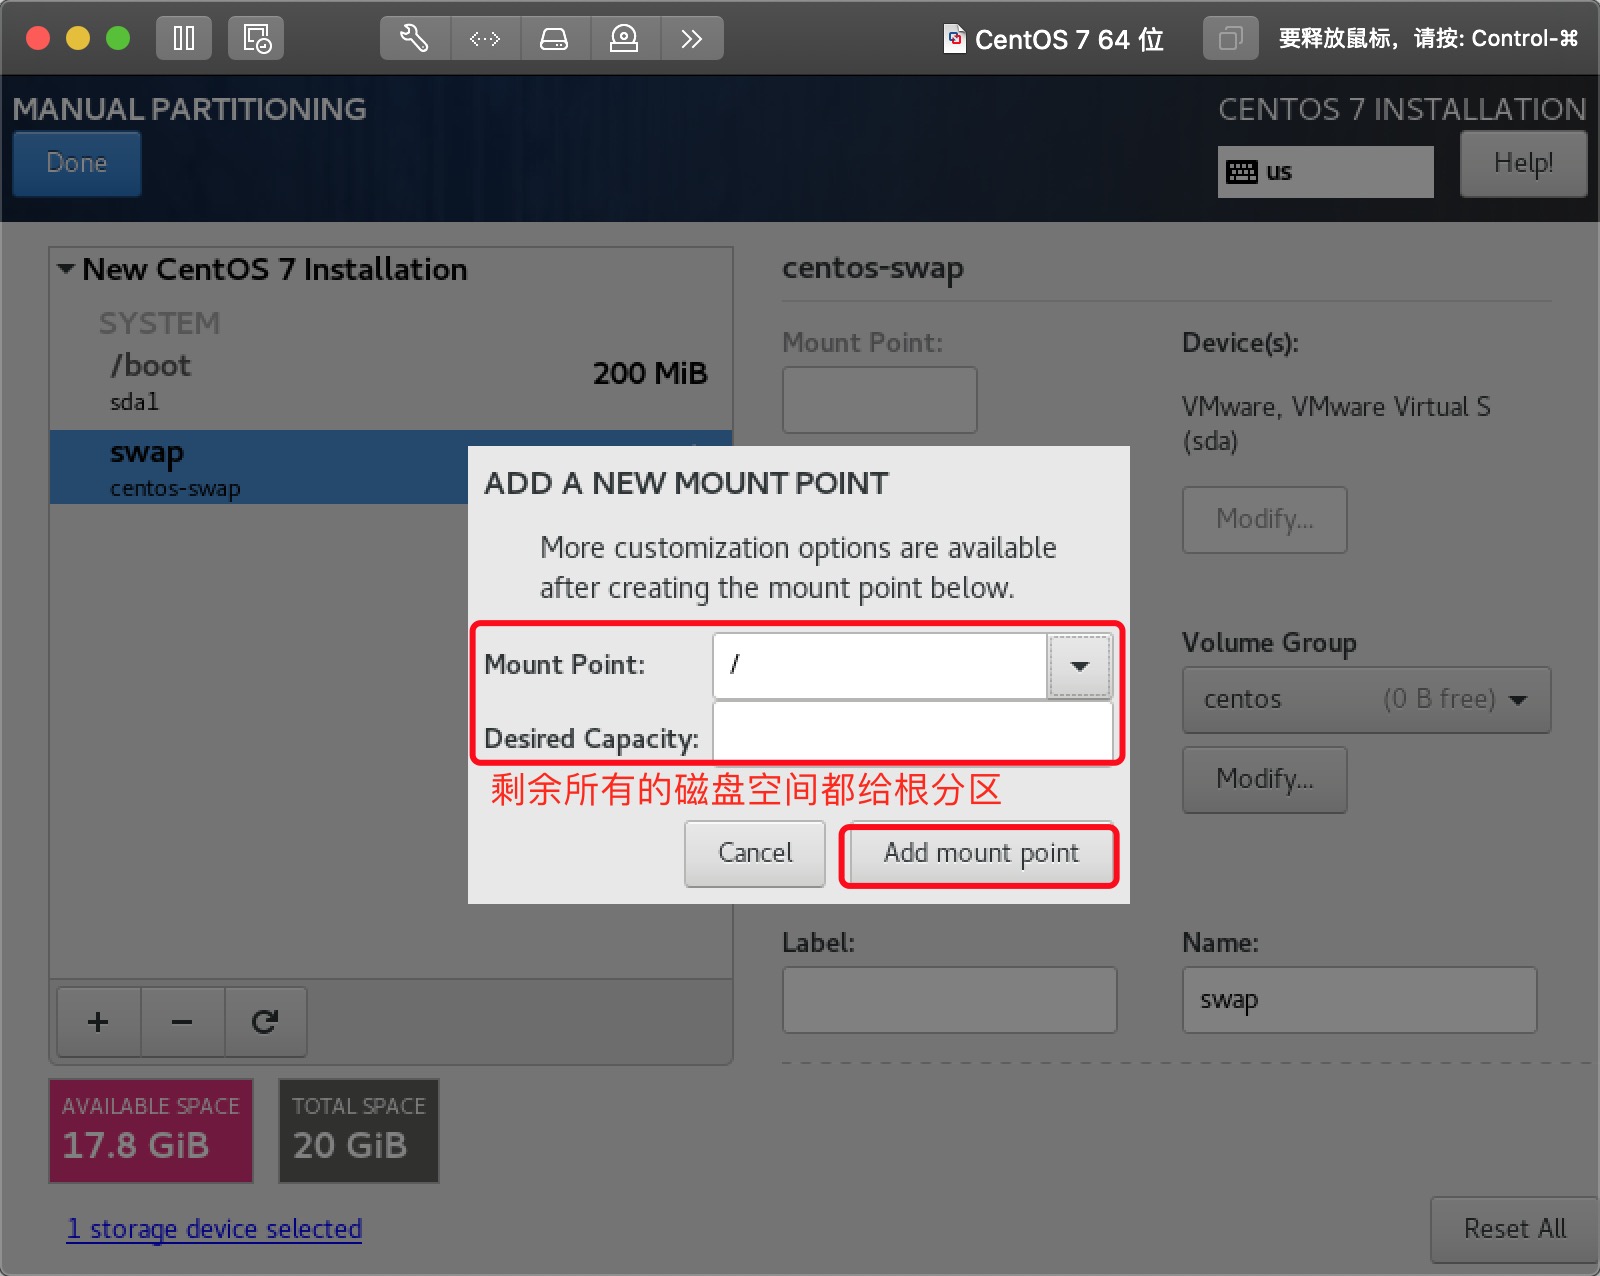
12.2、swap分区
12.3、根(/)分区
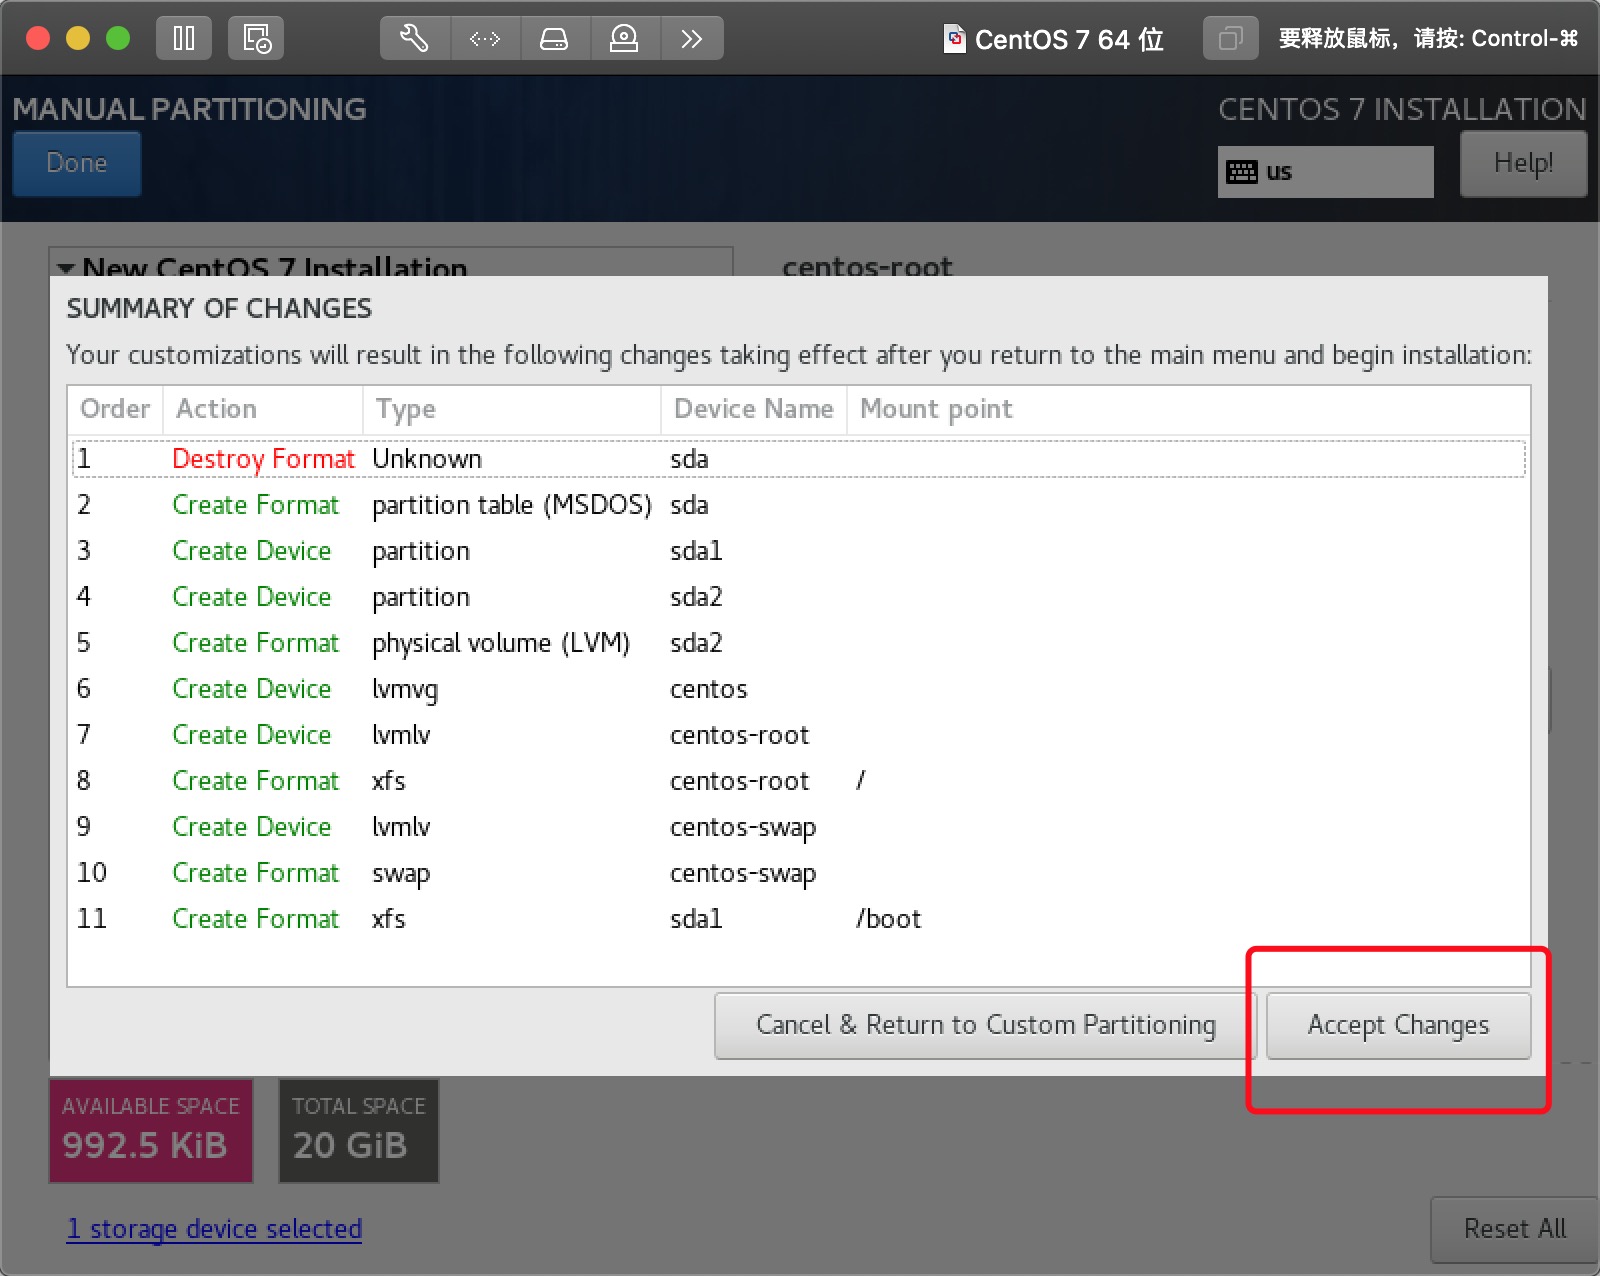
12.4、分区完成
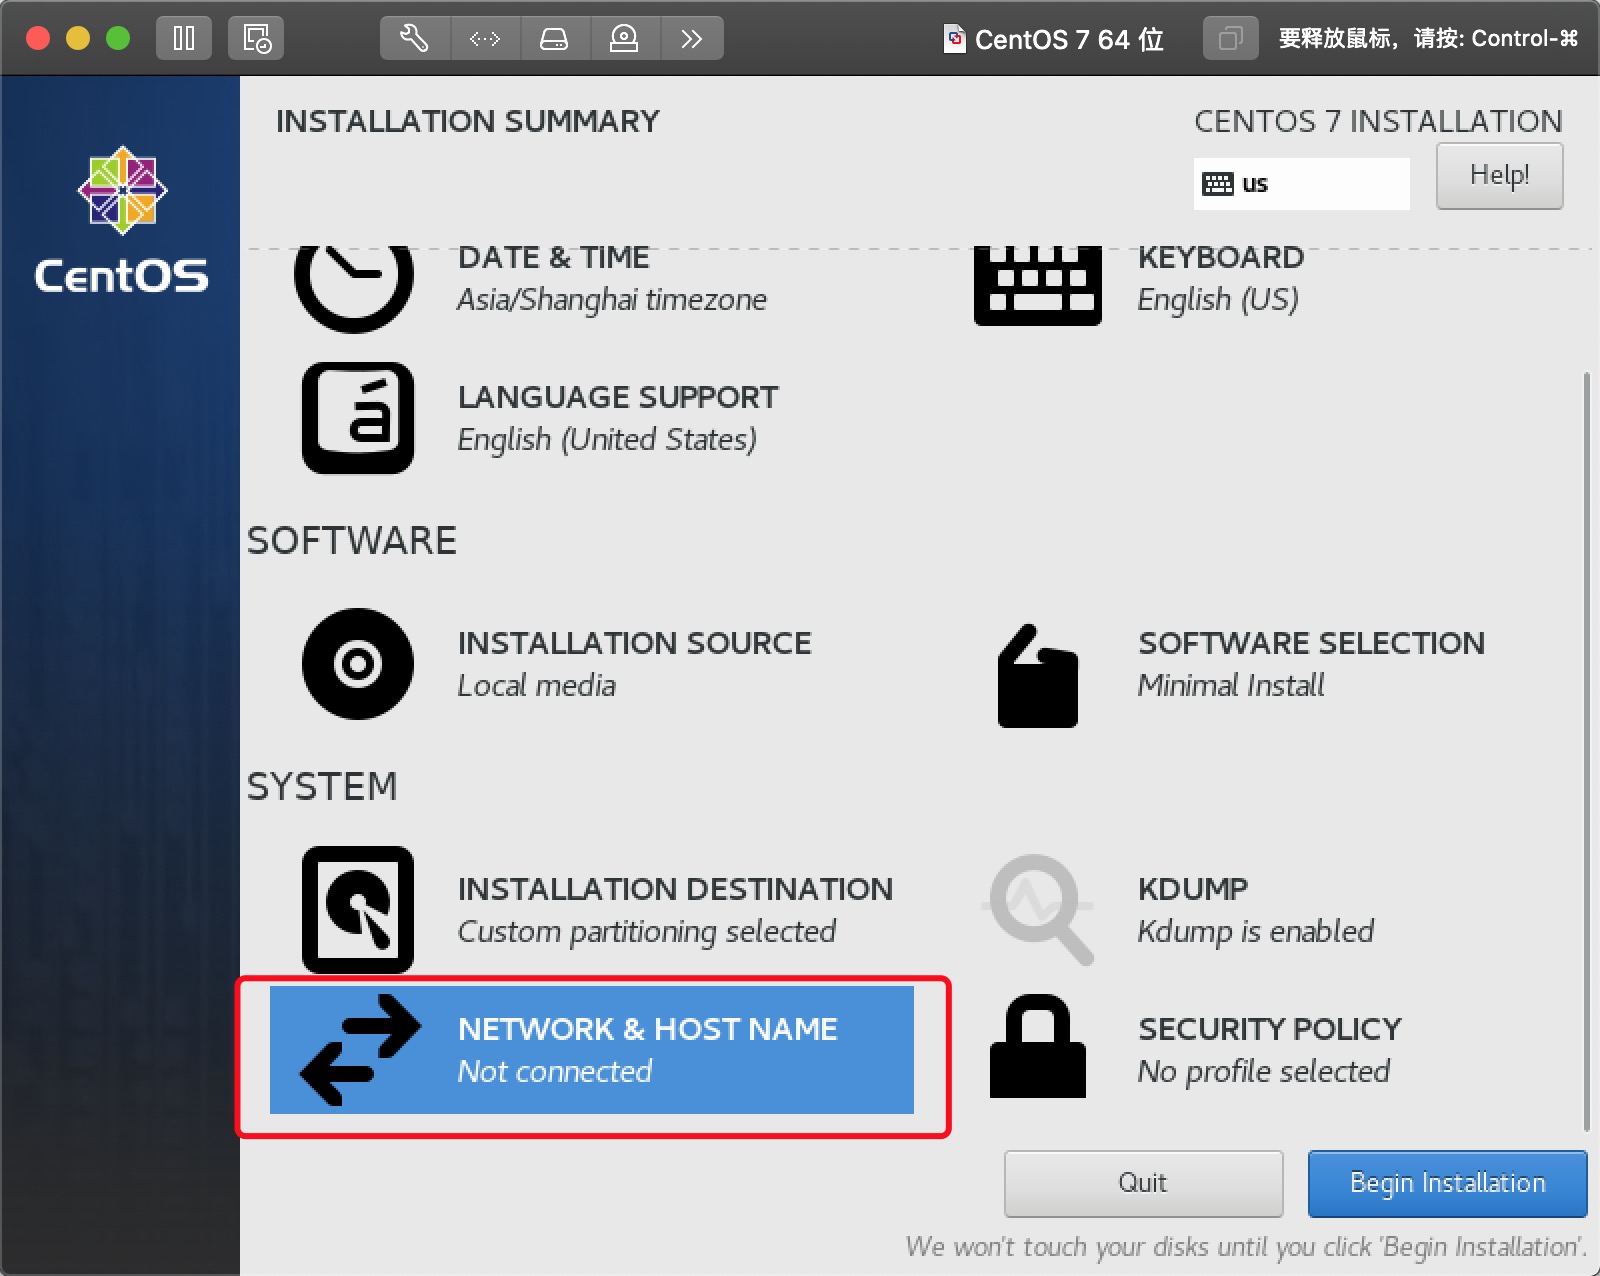
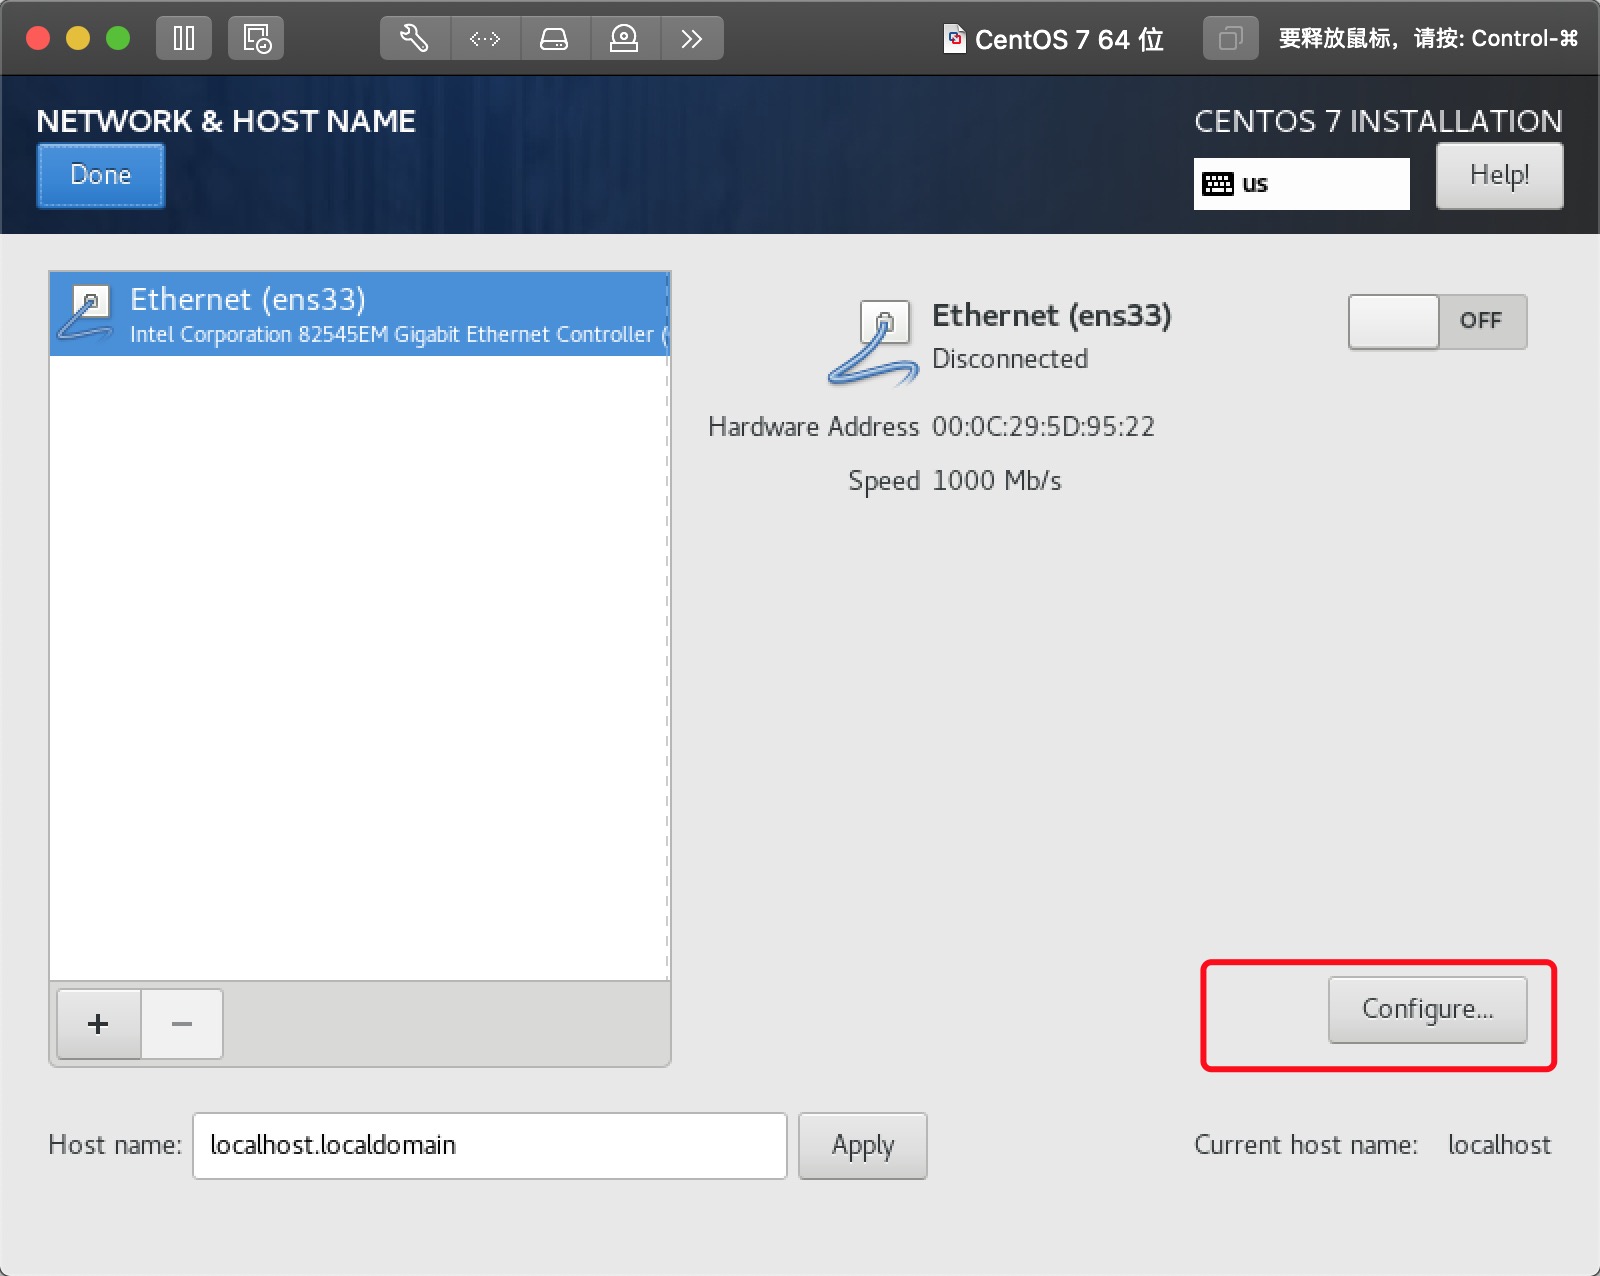
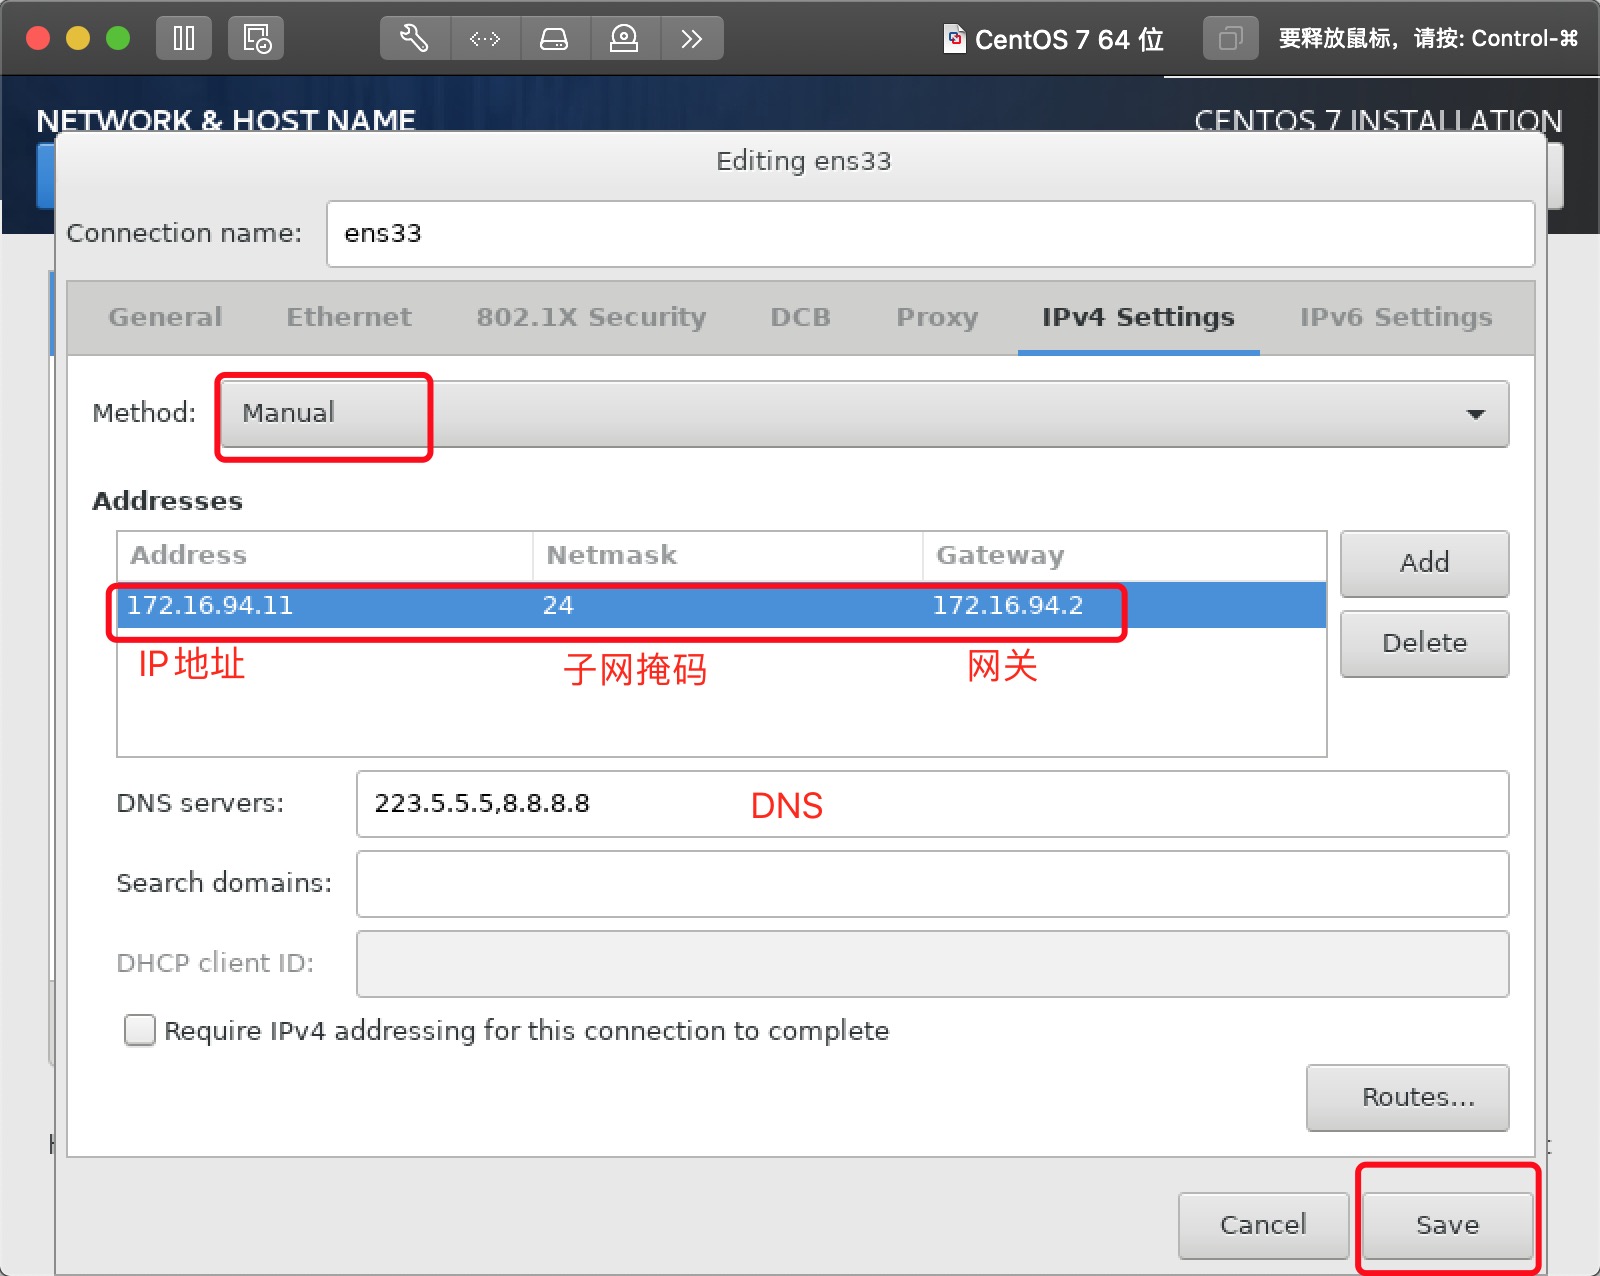
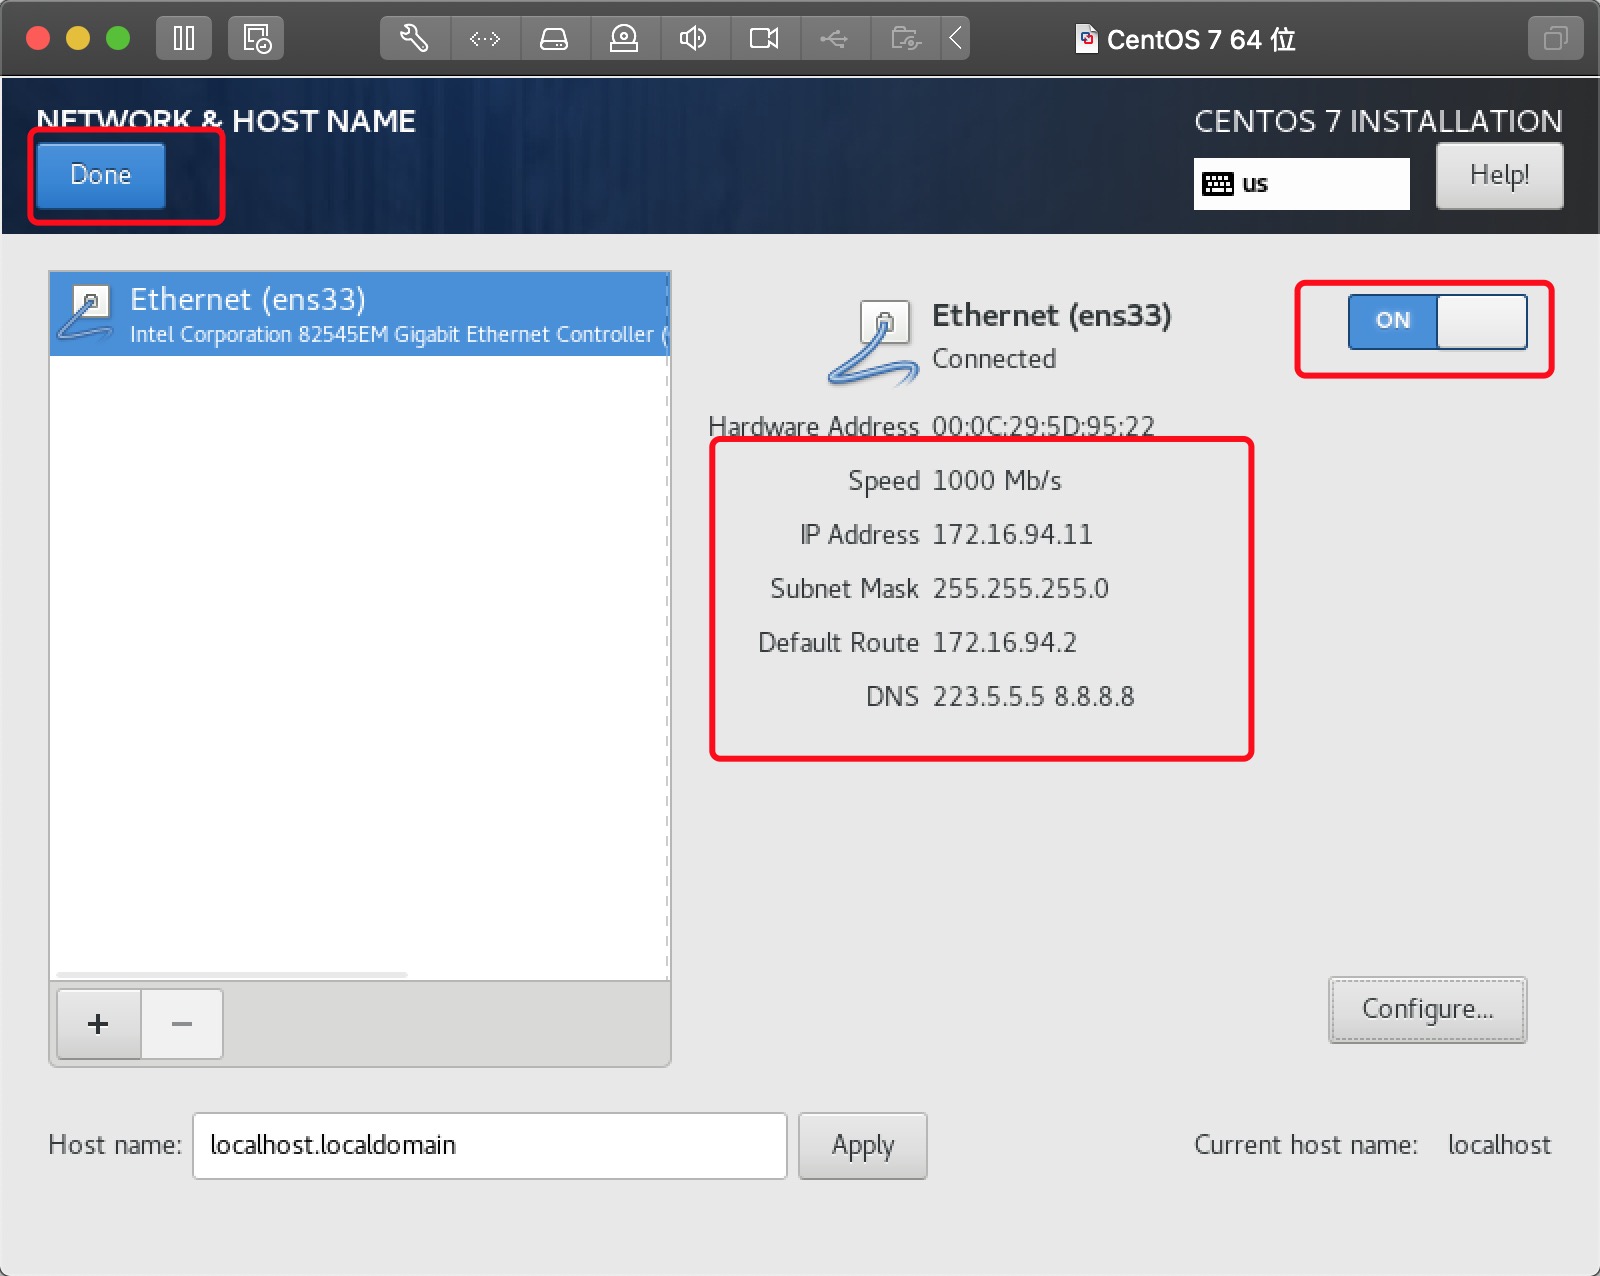
13、网络配置
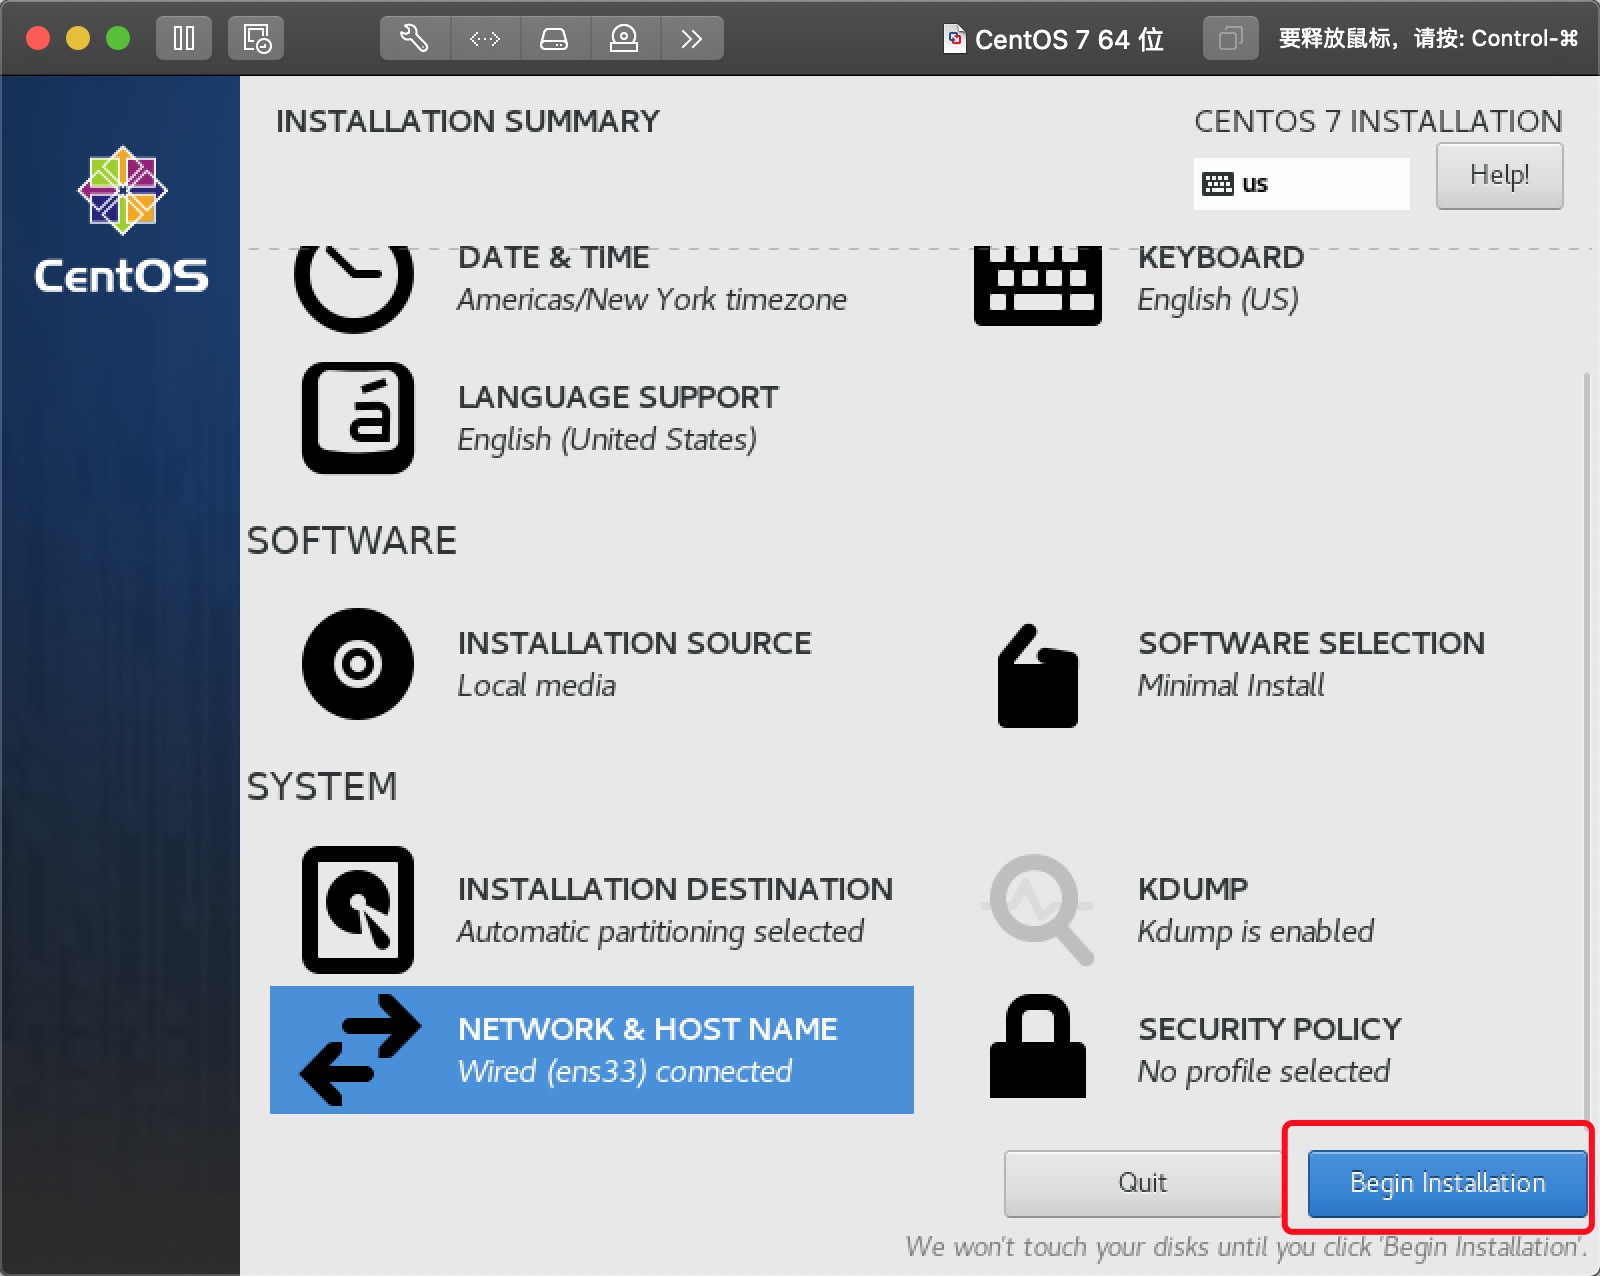
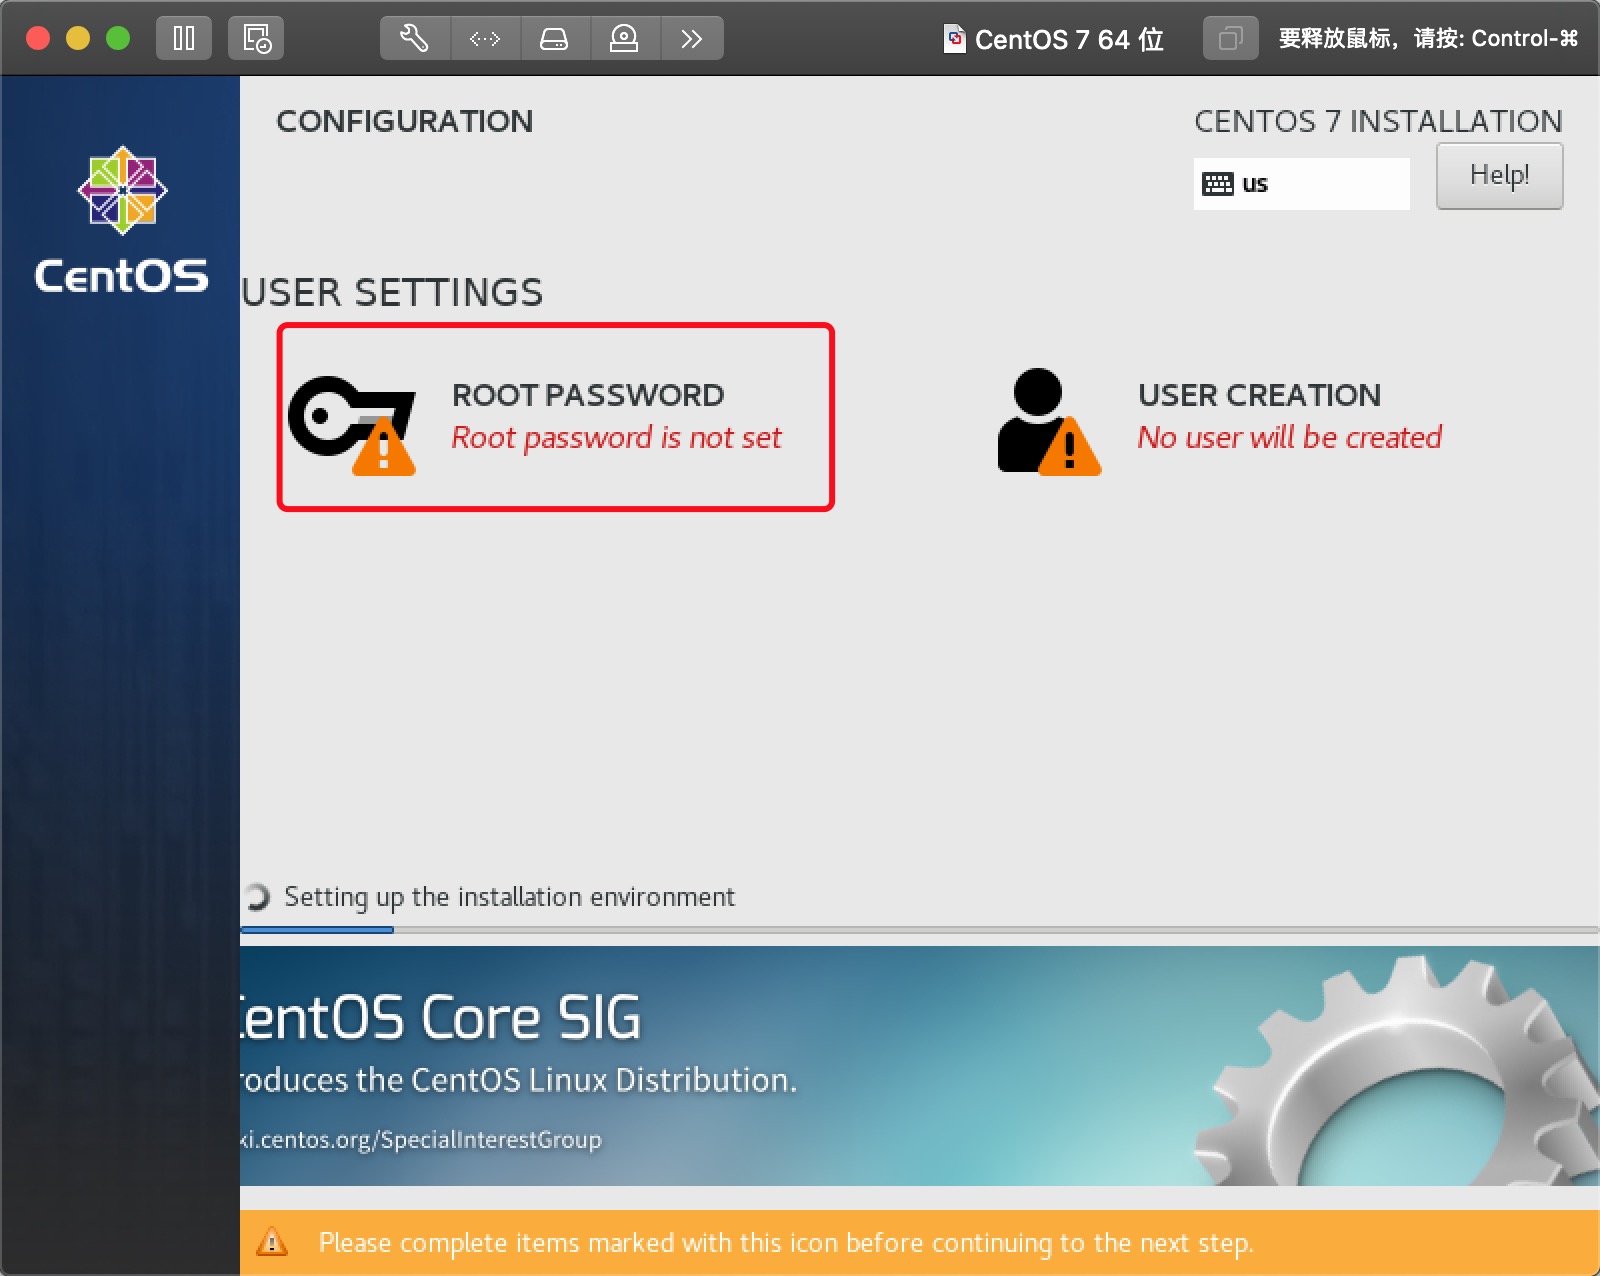
14、以上设置完成以后,点击"Begin Installation"开始安装
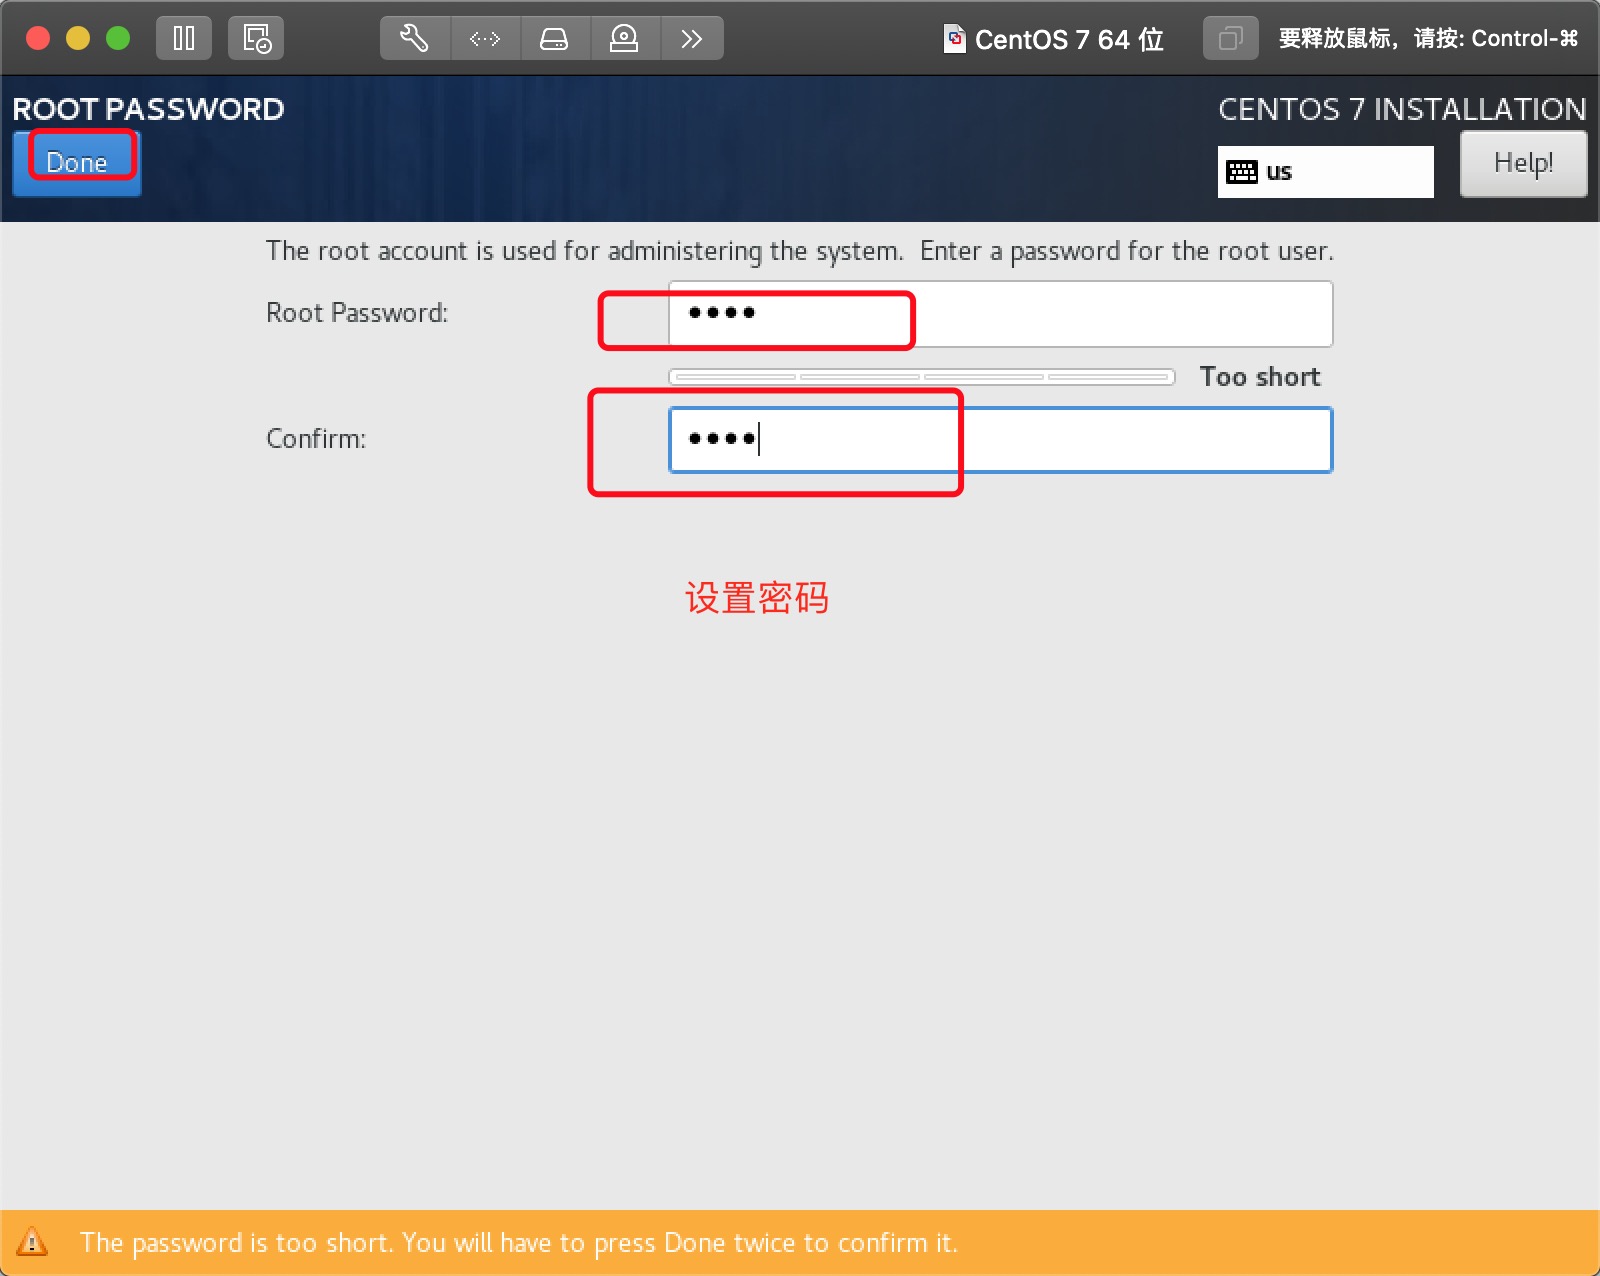
15、设置root密码
注意: 设置密码时,要求设置复杂的密码,但是如果想设置简单的密码,保存时点击两次"Done"就可以生效,就不会报错
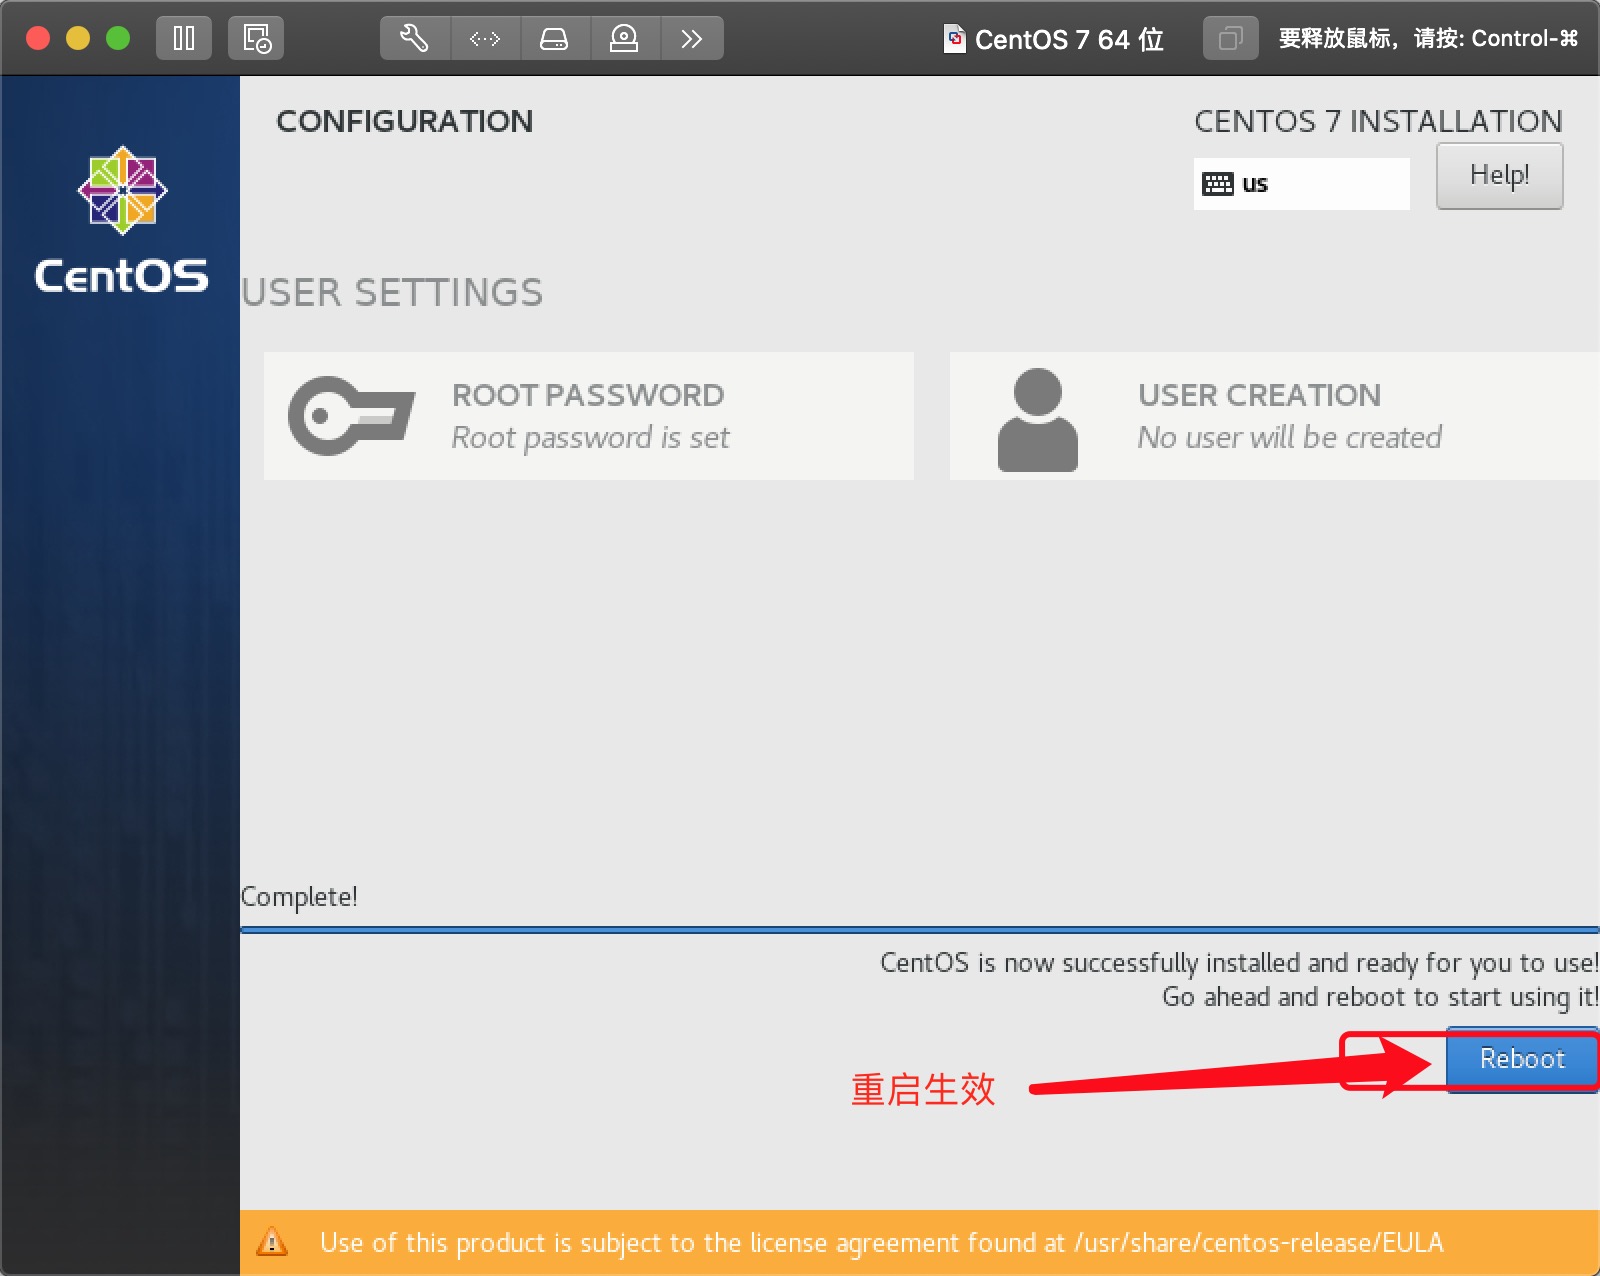
16、安装完成后重启后就可以使用了
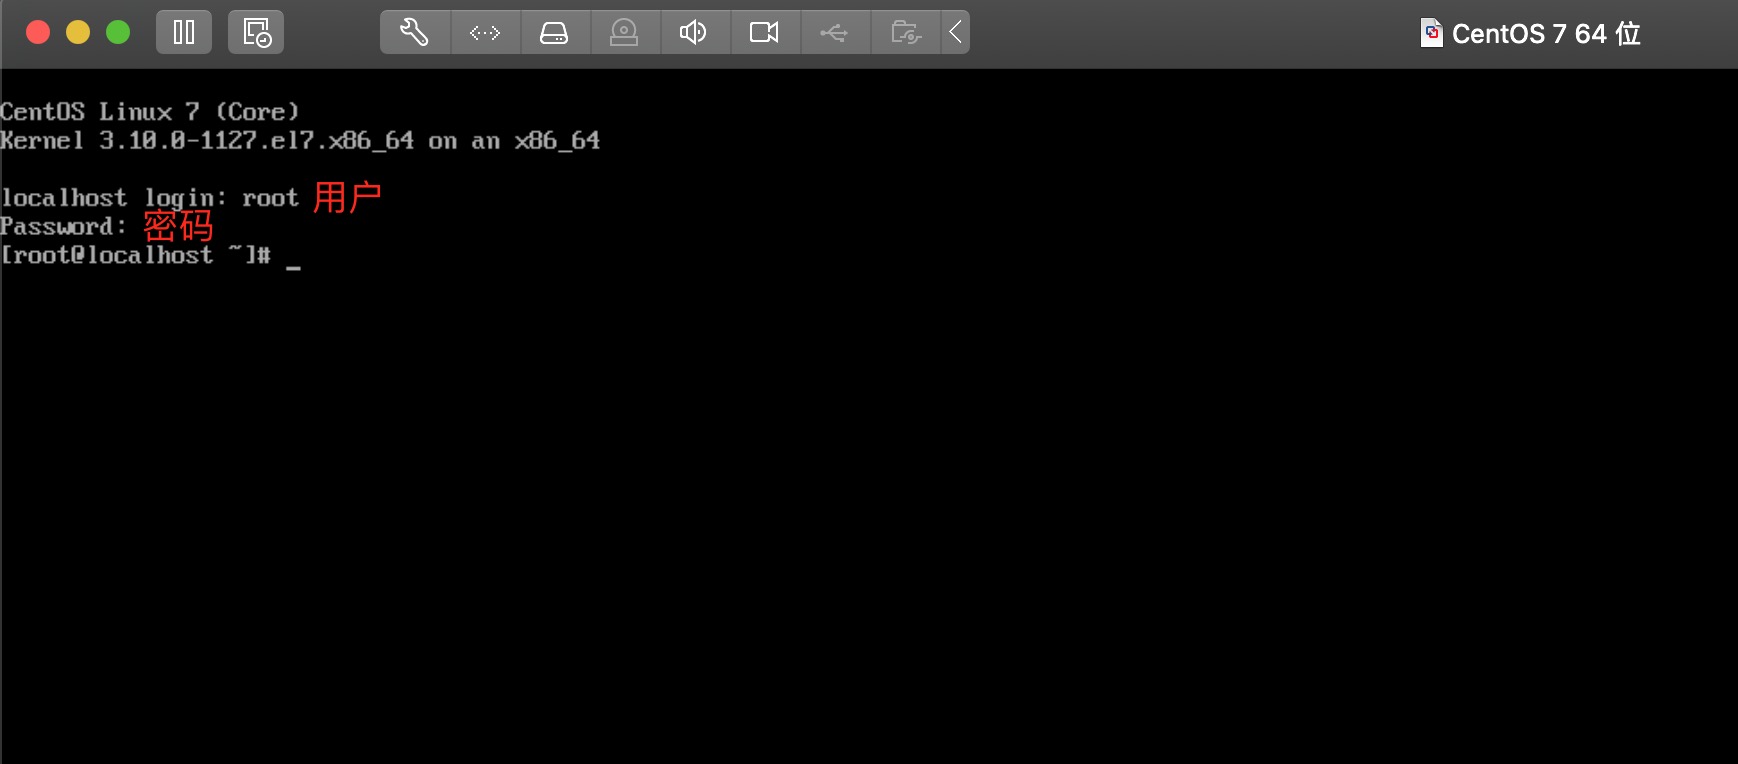
17、重启后输入用户名和密码进入终端界面
三、安装后的初始化配置
1、配置阿里源
mv /etc/yum.repos.d/CentOS-Base.repo /etc/yum.repos.d/CentOS-Base.repo.backup
curl -o /etc/yum.repos.d/CentOS-Base.repo https://mirrors.aliyun.com/repo/Centos-7.repo
sed -i -e '/mirrors.cloud.aliyuncs.com/d' -e '/mirrors.aliyuncs.com/d' /etc/yum.repos.d/CentOS-Base.repo
yum makecache
yum -y update
2、安装epel源
yum install -y wget
wget -O /etc/yum.repos.d/epel.repo http://mirrors.aliyun.com/repo/epel-7.repo
3、关闭防火墙
systemctl status firewalld.service
systemctl stop firewalld.service
systemctl disable firewalld.service
4、关闭selinux
sed -i "s#SELINUX=enforcing#SELINUX=disable#g" /etc/selinux/config
5、时间同步
yum install -y ntp ntpdate
systemctl enable ntpd
systemctl start ntpd
6、安装常用命令
yum install -y vim net-tools htop gcc glibc gcc-c++ make net-tools screen lrzsz tree
yum install -y dos2unix lsof tcpdump bash-completion wget ntp
7、清空网络规则配置文件(不是网卡配置文件)
echo '>/etc/udev/rules.d/70-persistent-net.rules' >> /etc/rc.local
8、设置UTF_8为默认字符集
cp /etc/locale.conf /etc/locale.conf.ori
cat > /etc/locale.conf << EOF
LANG=en_US.UTF-8
LC_ALL=en_US.utf8
LC_CTYPE=en_US.utf8
LANG=en_US.utf8
EOF

source /etc/locale.conf
echo $LANG
9、内核文件优化
cp -p /etc/sysctl.conf /etc/sysctl.conf_bak
cat >>/etc/sysctl.conf<<EOF
net.ipv4.tcp_fin_timeout = 2
net.ipv4.tcp_tw_reuse = 1
net.ipv4.tcp_tw_recycle = 1
net.ipv4.tcp_syncookies = 1
net.ipv4.tcp_keepalive_time = 600
net.ipv4.ip_local_port_range = 4000 65000
net.ipv4.tcp_max_syn_backlog = 16384
net.ipv4.tcp_max_tw_buckets = 36000
net.ipv4.route.gc_timeout = 100
net.ipv4.tcp_syn_retries = 1
net.ipv4.tcp_synack_retries = 1
net.core.somaxconn = 16384
net.core.netdev_max_backlog = 16384
net.ipv4.tcp_max_orphans = 16384
EOF
10、重启服务器
reboot
原文链接: https://www.cnblogs.com/lrvingli/p/13143278.html
欢迎关注
微信关注下方公众号,第一时间获取干货硬货;公众号内回复【pdf】免费获取数百本计算机经典书籍;
也有高质量的技术群,里面有嵌入式、搜广推等BAT大佬

原创文章受到原创版权保护。转载请注明出处:https://www.ccppcoding.com/archives/355799
非原创文章文中已经注明原地址,如有侵权,联系删除
关注公众号【高性能架构探索】,第一时间获取最新文章
转载文章受原作者版权保护。转载请注明原作者出处!