
配置过程
安装homebrew
打开命令行
ruby-e"$(curl-fsSL https://raw.githubusercontent.com/Homebrew/install/master/install)"
安装GLEW和GLFW
brew install glewbrew install glfwbrew install glm
brew安装的目录在/usr/local/Cellar下,后面会使用到路径。
新建一个Xcode Command Line C++项目
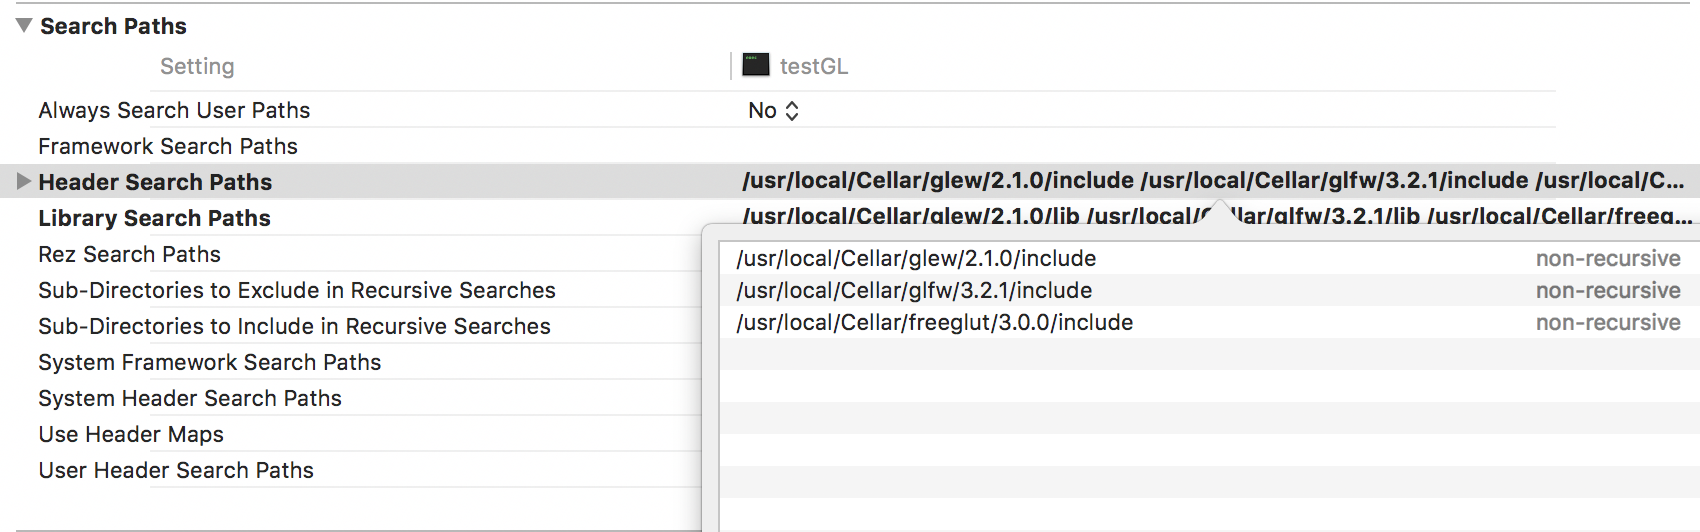
- 修改Build Settings的Header Search Path和Library Search Path,分别添加两个库的头文件和库文件路径(请自行忽略里面的freeglut,因为博主也配好了,与步骤无关)
- 我下载的是glew 2.0.0,后面的lib也是,大家记住自己的版本号哈


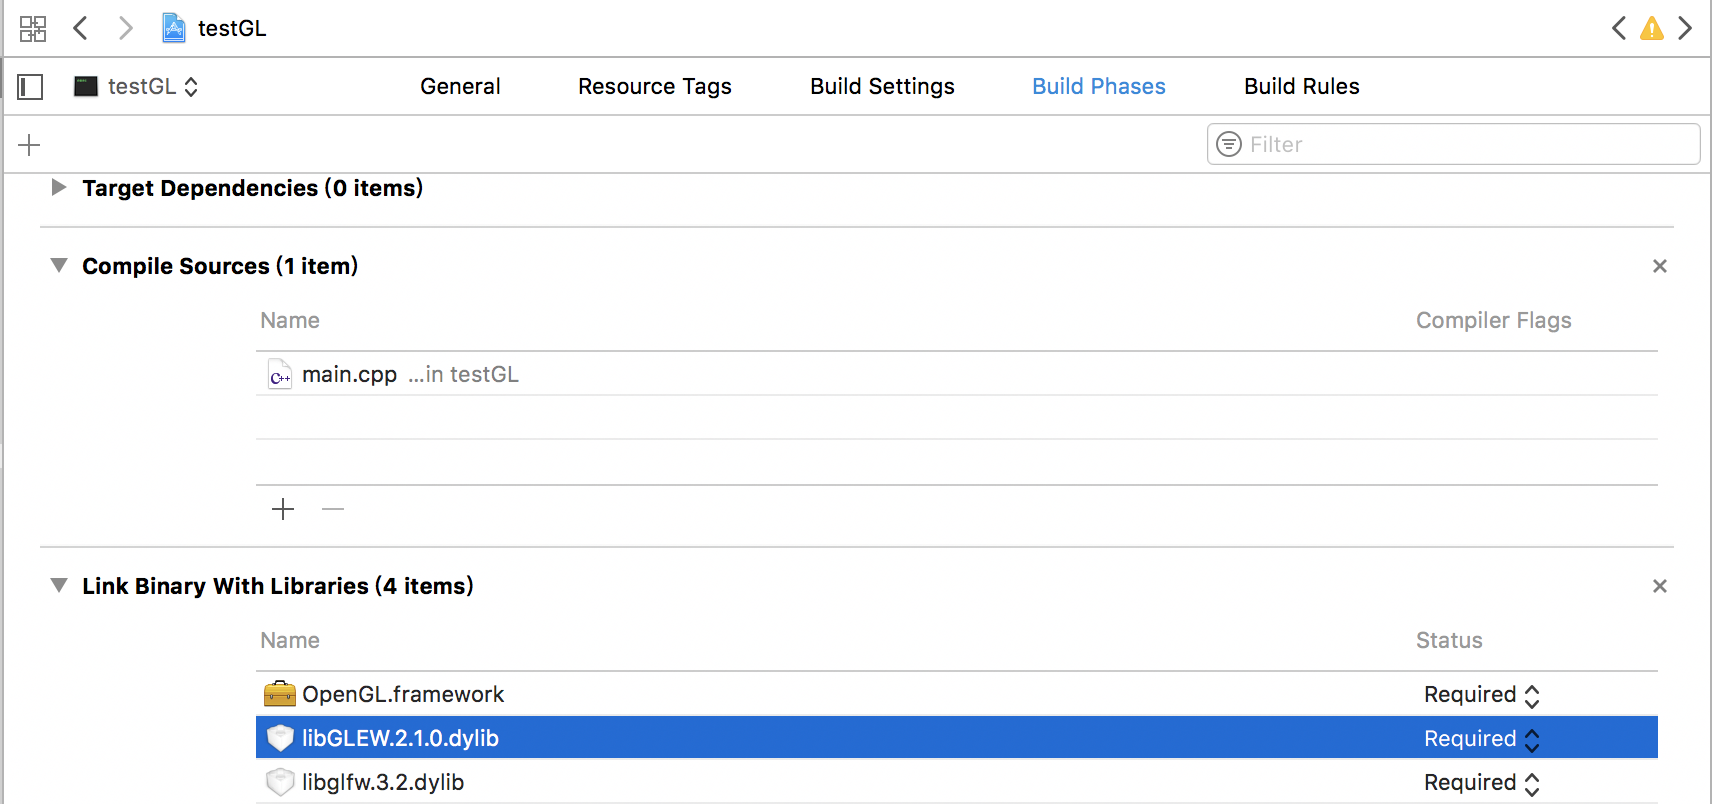
- 在Build Phases里面添加库文件
- 在使用时只要把头文件包含进来就可以了
- 这一步骤是搜索不出来的,需要直接打开lib所在文件夹,然后手动拖进来。
测试
#include <iostream>
#include <GL/glew.h>
#include <GLFW/glfw3.h>
int main(void)

{

    GLFWwindow* window;

    /* Initialize the library */

    if (!glfwInit())

        return -1;

    /* Create a windowed mode window and its OpenGL context */

    window = glfwCreateWindow(640, 480, "Hello World", NULL, NULL);

    if (!window)

    {

        glfwTerminate();

        return -1;

    }

    /* Make the window's context current */


    glfwMakeContextCurrent(window);


    /* Loop until the user closes the window */

    while (!glfwWindowShouldClose(window))

    {

        /* Render here */

        /* Swap front and back buffers */

        glfwSwapBuffers(window);

        /* Poll for and process events */

        glfwPollEvents();

    }
    glfwTerminate();

    return 0;
}
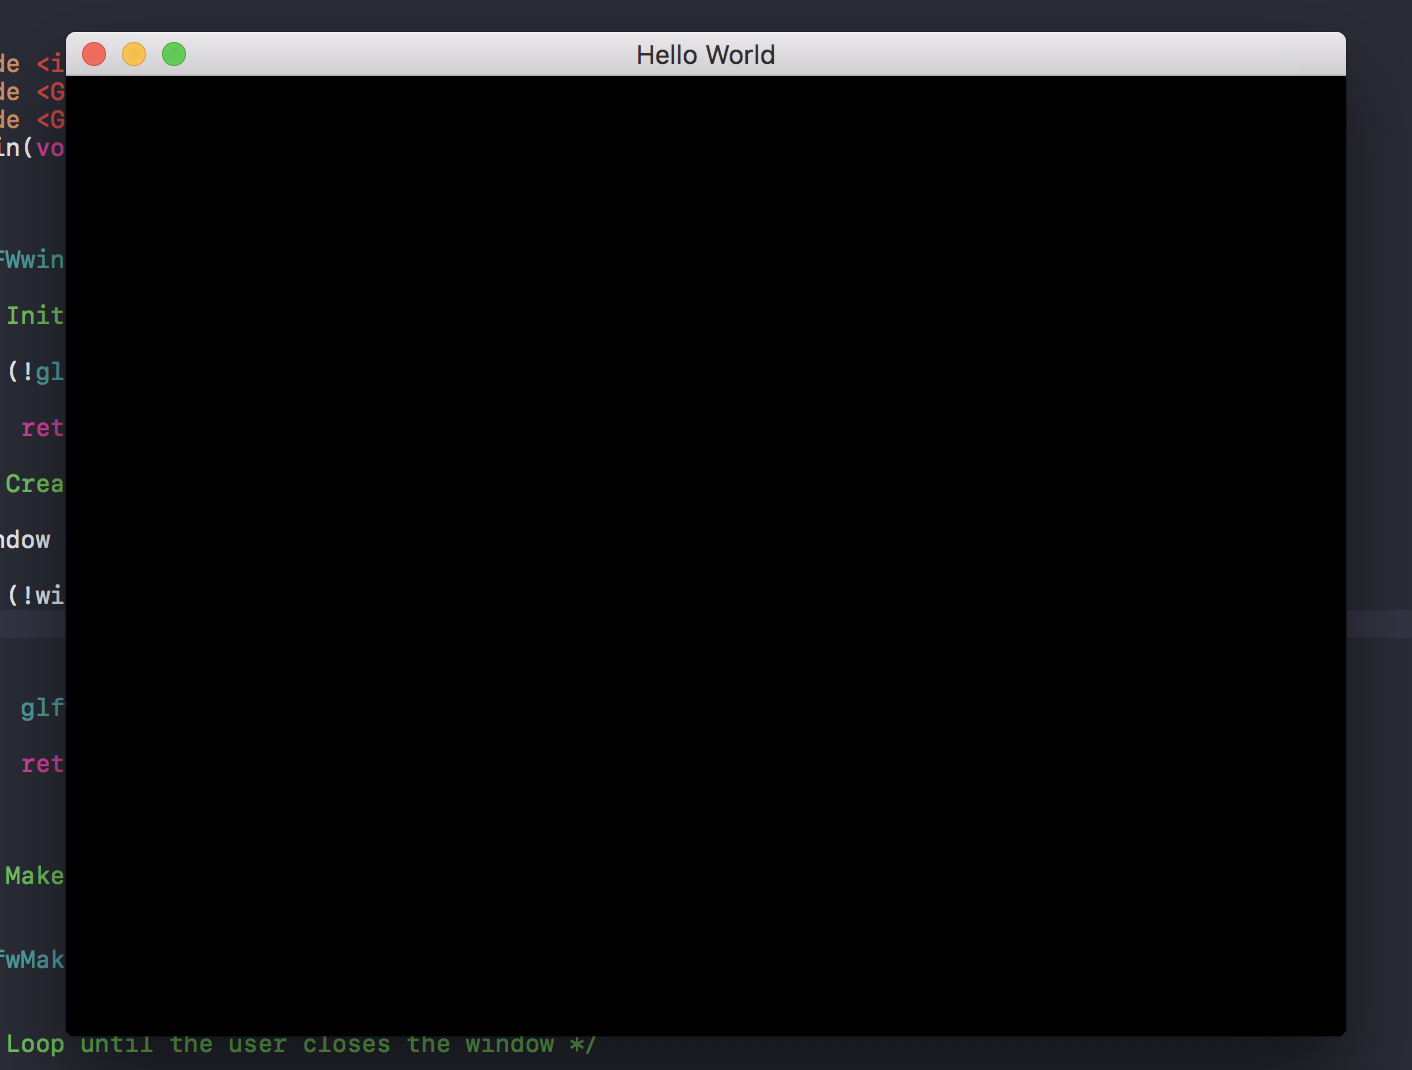
显示了一个标题为hello world的黑框,0 warnings, 0 errors。
配置成功!!!
/usr/local/Cellar/glfw/3.2.1/include
/usr/local/Cellar/glew/2.0.0/include/usr/local/Cellar/freeglut/3.0.0/include
/usr/local/Cellar/glm/0.9.9.0/include
/usr/local/Cellar/glew/2.0.0/lib/usr/local/Cellar/freeglut/3.0.0/lib/usr/local/Cellar/glfw/3.2.1/lib其中glm只需要添加h文件就行,lib啥的都不要管,也不用拖lib库.xcode 版本下的OpenGL常用的头文件:
#include <GL/glew.h>
   #include <GLFW/glfw3.h>
   #include <glm/glm.hpp>
   #include <glm/gtc/matrix_transform.hpp>
   #include <GLUT/GLUT.h>

 using namespace glm;
 using namespace std;
原文链接: https://www.cnblogs.com/Anita9002/p/9143515.html
欢迎关注
微信关注下方公众号,第一时间获取干货硬货;公众号内回复【pdf】免费获取数百本计算机经典书籍
原创文章受到原创版权保护。转载请注明出处:https://www.ccppcoding.com/archives/275457
非原创文章文中已经注明原地址,如有侵权,联系删除
关注公众号【高性能架构探索】,第一时间获取最新文章
转载文章受原作者版权保护。转载请注明原作者出处!