
Oracle Database 11g Release 2 (11.2) Installation On Oracle Linux 6
This article describes the installation of Oracle Database 11g Release 2 (11.2) (64-bit) on Oracle Linux 6 (64-bit). The article is based on a server installation with a minimum of 2G swap, with both SELinux and the firewall disabled. The following package groups were included for this installation.
-
Base System
- Base
- Debugging Tools
- Directory Client
- Hardware monitoring Client
- Large Systems Performance
- Network file system client
- Performance Tools
- Perl Support
-
Servers
- Server Platform
- System administration tools
-
Desktops
- Desktop
- Desktop Platform
- Fonts
- General Purpose Desktop
- Graphical Administration Tools
- X Windows System
-
Applications
- Internet Browser
-
Development
- Development Tools
An example of this type of Linux installations can be seen here. Alternative installations may require more packages to be loaded, in addition to the ones listed below.
- Download Software
- Unpack Files
- Hosts File
- Set Kernel Parameters
- Setup
- Installation
- Post Installation
Download Software
Download the Oracle software from OTN or MOS depending on your support status.
- OTN: Oracle Database 11g Release 2 (11.2.0.1) Software (64-bit)
- MOS: Oracle Database 11g Release 2 (11.2.0.2) Software (64-bit)
Unpack Files
Unzip the files.
# 11.2.0.1
unzip linux.x64_11gR2_database_1of2.zip
unzip linux.x64_11gR2_database_2of2.zip

#11.2.0.2
unzip p10098816_112020_Linux-x86-64_1of7.zip
unzip p10098816_112020_Linux-x86-64_2of7.zip
You should now have a single directory called "database" containing installation files.
Hosts File
The "/etc/hosts" file must contain a fully qualified name for the server.
<IP-address> <fully-qualified-machine-name> <machine-name>
For example.
127.0.0.1       localhost.localdomain  localhost
192.168.0.181   ol6-112.localdomain    ol6-112
Set Kernel Parameters
Oracle recommend the following minimum parameter settings.
fs.suid_dumpable = 1
fs.aio-max-nr = 1048576
fs.file-max = 6815744
kernel.shmall = 2097152
kernel.shmmax = 536870912
kernel.shmmni = 4096
kernel.sem = 250 32000 100 128
net.ipv4.ip_local_port_range = 9000 65500
net.core.rmem_default = 262144
net.core.rmem_max = 4194304
net.core.wmem_default = 262144
net.core.wmem_max = 1048586
The current values can be tested using the following command.
/sbin/sysctl -a | grep <param-name>
Add or amend the following lines in the "/etc/sysctl.conf" file.
fs.suid_dumpable = 1
fs.aio-max-nr = 1048576
fs.file-max = 6815744
kernel.shmall = 2097152
kernel.shmmax = 536870912
kernel.shmmni = 4096
# semaphores: semmsl, semmns, semopm, semmni
kernel.sem = 250 32000 100 128
net.ipv4.ip_local_port_range = 9000 65500
net.core.rmem_default=4194304
net.core.rmem_max=4194304
net.core.wmem_default=262144
net.core.wmem_max=1048586
Run the following command to change the current kernel parameters.
/sbin/sysctl -p
Add the following lines to the "/etc/security/limits.conf" file.
oracle              soft    nproc   2047
oracle              hard    nproc   16384
oracle              soft    nofile  1024
oracle              hard    nofile  65536
oracle              soft    stack   10240
Disable secure linux by editing the "/etc/selinux/config" file, making sure the SELINUX flag is set as follows.
SELINUX=disabled
Once the change is complete, restart the server.
Setup
Install the following packages if they are not already present.
# From Oracle Linux 6 DVD
cd /media/cdrom/Server/Packages
rpm -Uvh binutils-2*x86_64*
rpm -Uvh glibc-2*x86_64* nss-softokn-freebl-3*x86_64*
rpm -Uvh glibc-2*i686* nss-softokn-freebl-3*i686*
rpm -Uvh compat-libstdc++-33*x86_64*
rpm -Uvh glibc-common-2*x86_64*
rpm -Uvh glibc-devel-2*x86_64*
rpm -Uvh glibc-devel-2*i686*
rpm -Uvh glibc-headers-2*x86_64*
rpm -Uvh elfutils-libelf-0*x86_64*
rpm -Uvh elfutils-libelf-devel-0*x86_64*
rpm -Uvh gcc-4*x86_64*
rpm -Uvh gcc-c++-4*x86_64*
rpm -Uvh ksh-*x86_64*
rpm -Uvh libaio-0*x86_64*
rpm -Uvh libaio-devel-0*x86_64*
rpm -Uvh libaio-0*i686*
rpm -Uvh libaio-devel-0*i686*
rpm -Uvh libgcc-4*x86_64*
rpm -Uvh libgcc-4*i686*
rpm -Uvh libstdc++-4*x86_64*
rpm -Uvh libstdc++-4*i686*
rpm -Uvh libstdc++-devel-4*x86_64*
rpm -Uvh make-3.81*x86_64*
rpm -Uvh numactl-devel-2*x86_64*
rpm -Uvh sysstat-9*x86_64*
rpm -Uvh compat-libstdc++-33*i686*
cd /
eject
Note. This will install all the necessary 32-bit packages for 11.2.0.1. From 11.2.0.2 onwards many of these are unnecessary, but having them present does not cause a problem.
Create the new groups and users.
groupadd -g 501 oinstall
groupadd -g 502 dba
groupadd -g 503 oper
groupadd -g 504 asmadmin
groupadd -g 506 asmdba
groupadd -g 505 asmoper

useradd -u 502 -g oinstall -G dba,asmdba,oper oracle
passwd oracle
Note. We are not going to use the "asm" groups, since this installation will not use ASM.
Create the directories in which the Oracle software will be installed.
mkdir -p /u01/app/oracle/product/11.2.0/db_1
chown -R oracle:oinstall /u01
chmod -R 775 /u01
Login as root and issue the following command.
xhost +<machine-name>
Login as the oracle user and add the following lines at the end of the ".bash_profile" file.
# Oracle Settings
TMP=/tmp; export TMP
TMPDIR=$TMP; export TMPDIR

ORACLE_HOSTNAME=ol6-112.localdomain; export ORACLE_HOSTNAME
ORACLE_UNQNAME=DB11G; export ORACLE_UNQNAME
ORACLE_BASE=/u01/app/oracle; export ORACLE_BASE
ORACLE_HOME=$ORACLE_BASE/product/11.2.0/db_1; export ORACLE_HOME
ORACLE_SID=DB11G; export ORACLE_SID

PATH=/usr/sbin:$PATH; export PATH
PATH=$ORACLE_HOME/bin:$PATH; export PATH

LD_LIBRARY_PATH=$ORACLE_HOME/lib:/lib:/usr/lib; export LD_LIBRARY_PATH
CLASSPATH=$ORACLE_HOME/jlib:$ORACLE_HOME/rdbms/jlib; export CLASSPATH
Installation
Log into the oracle user. If you are using X emulation then set the DISPLAY environmental variable.
DISPLAY=<machine-name>:0.0; export DISPLAY
Start the Oracle Universal Installer (OUI) by issuing the following command in the database directory.
./runInstaller
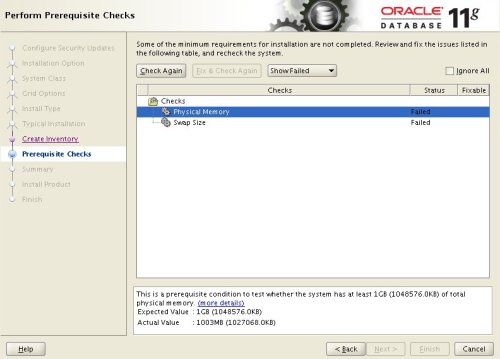
Proceed with the installation of your choice. The prerequisites checks will fail for the following version-dependent reasons:
- 11.2.0.1: The installer shows multiple "missing package" failures because it does not recognize several of the newer version packages that were installed. These "missing package" failures can be ignored as the packages are present. The failure for the "pdksh" package can be ignored because we installed the "ksh" package in its place.
- 11.2.0.2: The installer should only show a single "missing package" failure for the "pdksh" package. It can be ignored because we installed the "ksh" package in its place.
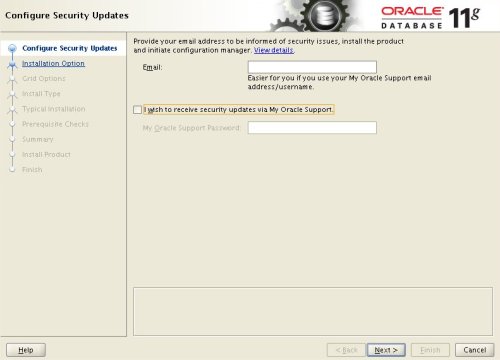
You can see the installation I performed by clicking on the links below to see screen shots of each stage.
- Configure Security Updates
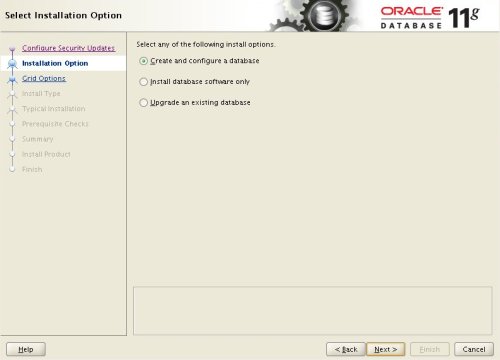
- Select Install Option
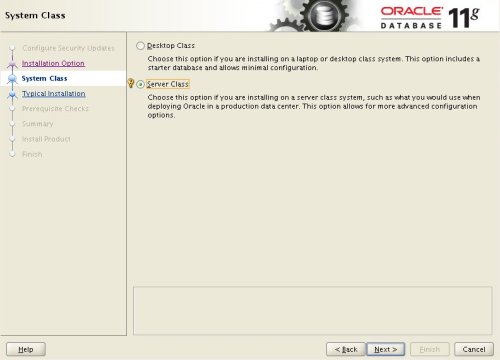
- System Class
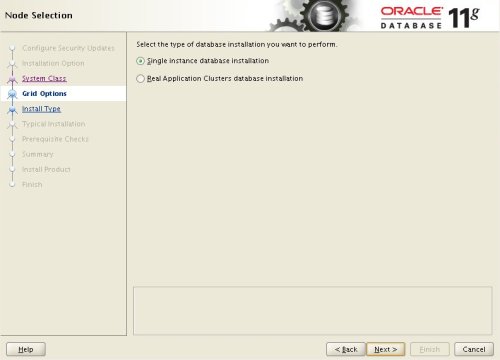
- Node Selection
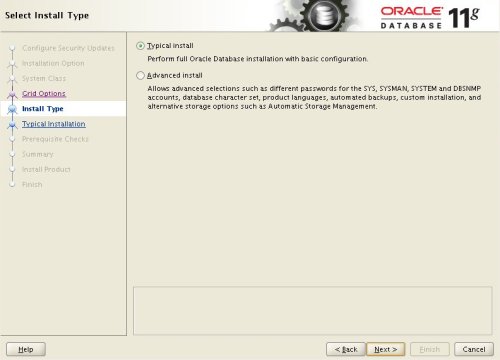
- Select Install Type
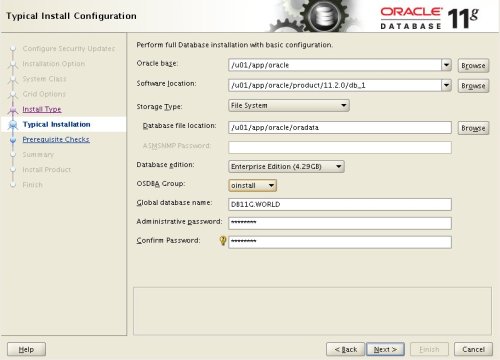
- Typical Install Configuration
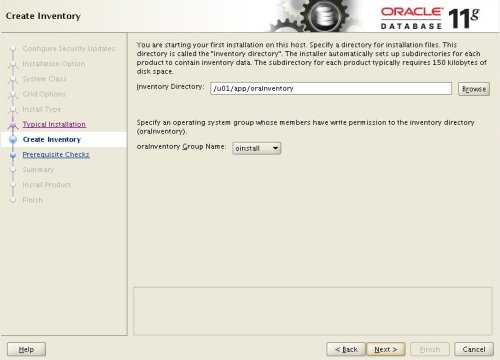
- Create Inventory
- Perform Prerequisite Checks
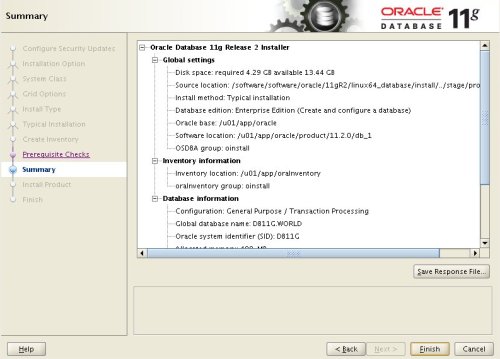
- Summary
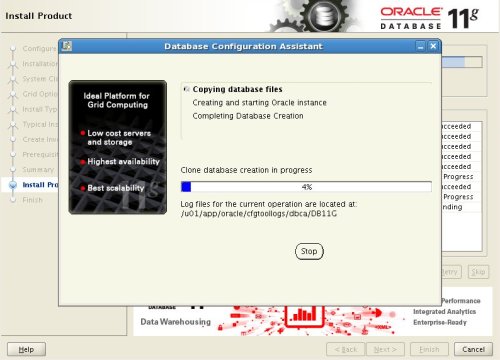
- Install Product
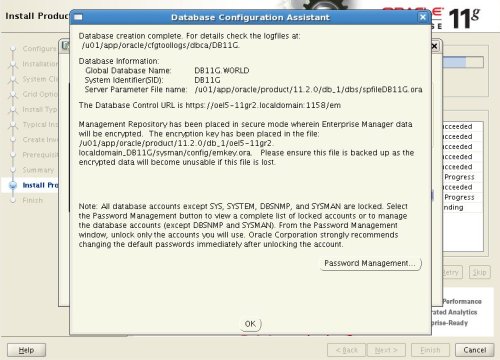
- Database Configuration Assistant
- Database Configuration Assistant 2
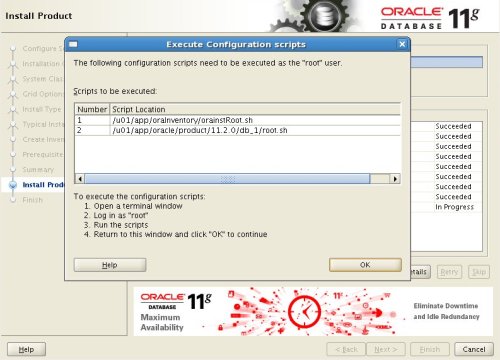
- Execute Configuration Scripts
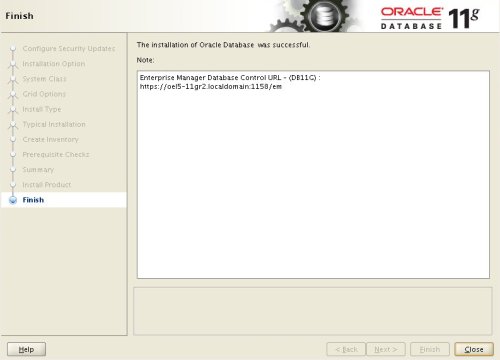
- Finish
Post Installation
Edit the "/etc/oratab" file setting the restart flag for each instance to 'Y'.
DB11G:/u01/app/oracle/product/11.2.0/db_1:Y
For more information see:
- Oracle Database Installation Guide 11g Release 2 (11.2) for Linux
- Automating Database Startup and Shutdown on Linux
Hope this helps. Regards Tim...
Back to the Top.
原文链接: https://www.cnblogs.com/QDuck/archive/2011/06/16/2082848.html
欢迎关注
微信关注下方公众号,第一时间获取干货硬货;公众号内回复【pdf】免费获取数百本计算机经典书籍
原创文章受到原创版权保护。转载请注明出处:https://www.ccppcoding.com/archives/27289
非原创文章文中已经注明原地址,如有侵权,联系删除
关注公众号【高性能架构探索】,第一时间获取最新文章
转载文章受原作者版权保护。转载请注明原作者出处!