
环境
[root@localhost ~]# cat /etc/redhat-release
CentOS release 6.8 (Final)
[root@localhost ~]# uname -a
Linux localhost.localdomain 2.6.32-642.el6.x86_64 #1 SMP Tue May 10 17:27:01 UTC 2016 x86_64 x86_64 x86_64 GNU/Linux
[root@localhost ~]# hostname -I
10.0.0.10
[root@localhost ~]# hostname
localhost.localdomain
所需软件
Centos6
nginx-1.8.1.tar.gz
nginx-rtmp-module
FFmpeg 和 FFmpeg开发包
VLC拉流播放
下载所需要的软件包
yum -y install gcc gcc-c++ autoconf automake make openssl openssl-devel pcre-devel git
nginx-rtmp-module安装
nginx-rtmp-module的官方github地址:https://github.com/arut/nginx-rtmp-module
git clone https://github.com/arut/nginx-rtmp-module.git
nginx安装
nginx的官方网站为:http://nginx.org/en/download.html
wget http://nginx.org/download/nginx-1.8.1.tar.gz
tar -zxvf nginx-1.8.1.tar.gz
cd nginx-1.8.1
./configure --prefix=/usr/local/nginx  --add-module=../nginx-rtmp-module  --with-http_ssl_module
make
make install
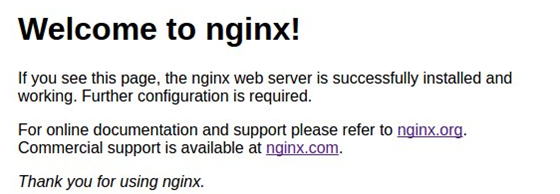
启动nginx测试是否正常启动
/usr/local/nginx/sbin/nginx
浏览器输入ip

FFmpeg安装
点播视频服务器配置
配置nginx.conf文件
worker_processes  1;

events {
    worker_connections  1024;
}

rtmp {                      #RTMP服务

    server {
        listen 1935;        #服务端口
        chunk_size 4096;    #数据传输块的大小
    application vod {
        play /opt/vide/vod; #视频文件存放位置。需要创建此目录(可放入视频进行播放)
       }
    }
}
http {

    include       mime.types;
    default_type  application/octet-stream;
    sendfile        on;
    keepalive_timeout  65;
    server {
        listen       80;
        server_name  localhost;
        location / {
            root   html;
            index  index.html index.htm;
        }
        error_page   500 502 503 504  /50x.html;
        location = /50x.html {
            root   html;
        }
    }
}
配置目录/opt/video/vod为存放视频文件的位置

重启下nginx
[root@localhost vod]# /usr/local/nginx/sbin/nginx -s reload
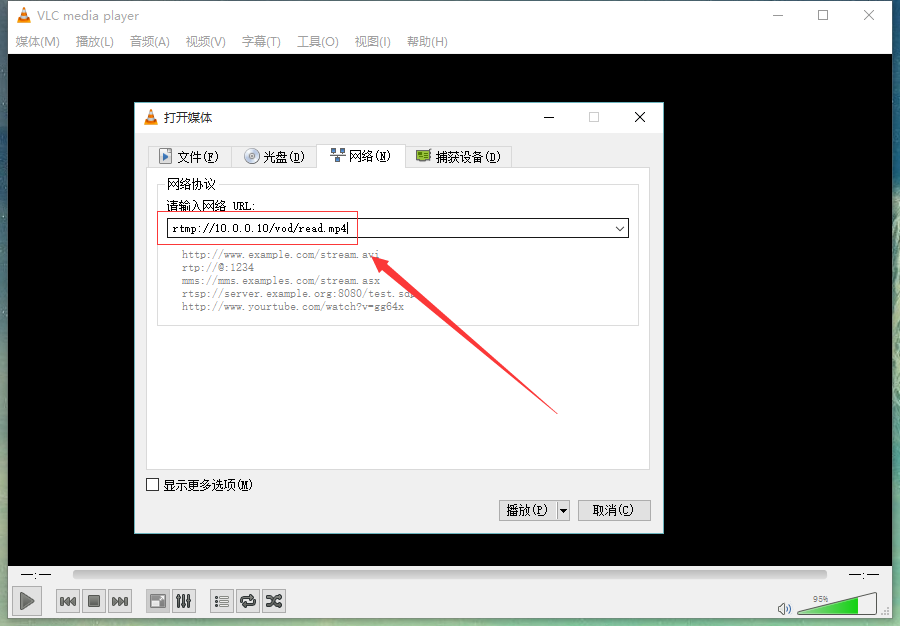
点击play就可以播放了。
直播视频服务器配置
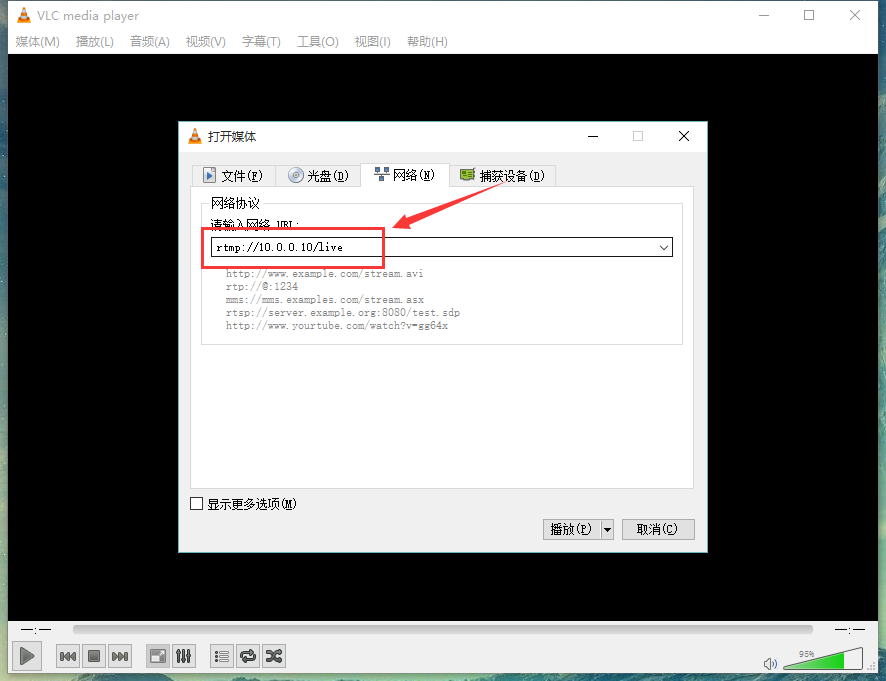
接着我们就在点播服务器配置文件的基础之上添加直播服务器的配置。一共2个位置,第一处就是给RTMP服务添加一个application这个名字可以任意起,也可以起多个名字,由于是直播我就叫做它live 吧,如果打算弄多个频道的直播就可以live_cctv1、live_cctv2名字任意。第二处就是添加两个location字段,字段的内容请直接看文件吧。
worker_processes  1;

events {

    worker_connections  1024;

}

rtmp {
    server {
        listen 1935;
    chunk_size 4096;
    application vod {
        play /opt/video/vod;
    }
    application live {     #第一处添加的直播字段
        live on;
    }
    }
}
http {
    include       mime.types;
    default_type  application/octet-stream;
    sendfile        on;
    keepalive_timeout  65;
    server {
        listen       80;
        server_name  localhost;
    location /stat {       #第二处添加的location字段。
        rtmp_stat all;
        rtmp_stat_stylesheet stat.xsl;
    }

    location /stat.xsl {   #第二处添加的location字段。
        root /usr/local/nginx/nginx-rtmp-module/;     ##注意需要把这个模块放到nginx目录中
    }

    location / {
        root   html;
        index  index.html index.htm;

        }

        error_page   500 502 503 504  /50x.html;
        location = /50x.html {
            root   html;
        }
    }
}
添加完这两处之后,重新启动nginx打开浏览器看看,是否有如下图显示:
使用ffmpeg推送流
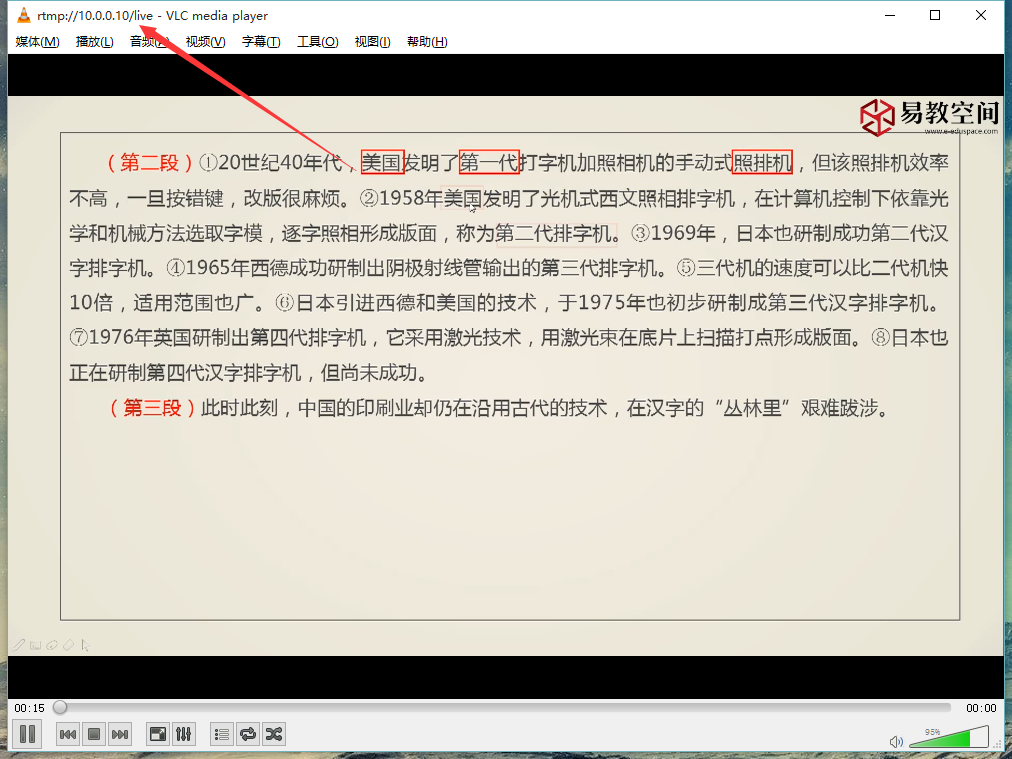
[root@localhost ~]# ffmpeg -re -i read.mp4 -vcodec libx264 -acodec aac -strict -2 -f flv rtmp://10.0.0.10:1935/live

注意此处推送到的live就是配置文件里面写的
原文链接: https://www.cnblogs.com/syavingcs/p/7850520.html
欢迎关注
微信关注下方公众号,第一时间获取干货硬货;公众号内回复【pdf】免费获取数百本计算机经典书籍
原创文章受到原创版权保护。转载请注明出处:https://www.ccppcoding.com/archives/263598
非原创文章文中已经注明原地址,如有侵权,联系删除
关注公众号【高性能架构探索】,第一时间获取最新文章
转载文章受原作者版权保护。转载请注明原作者出处!