
前言
配合韦东山老师TQ2440linux开发的视频,孟宁老师的《linux内核分析》使用更佳。
Require
系统: CentOS7.6 x86_64,
内核:4.4.224-1.el7.elrepo.x86_64
源码:3.16.84
工具:gcc4.8.5,gdb7.16.1,VSCode。其中gcc和gdb用版本把系统自带的版本更到最新就行。
Qiuck Start
运行release版内核
# 升级库
yum -y install epel-release && yum clean all && yum makecache
# 安装模拟器 gcc gdb
yum -y install qemu gcc make
# 下载linux内核源码
wget http://ftp.sjtu.edu.cn/sites/ftp.kernel.org/pub/linux/kernel/v3.x/linux-3.18.84.tar.xz
# 安装编译依赖库
yum -y install  glibc glibc-utils glibc-devel
# 编译内核
make x86_64_defconfig && make -j2
# 写测试程序
mkdir hello && cat <<-EOF > hello/hello.c
#include "stdio.h"
int main()
{
    while(1)
    {
          printf("hello worldn");
          sleep(1);
    }
    return 0;
}
EOF
# 打包成静态库
yum -y install glibc-static
gcc -o hello/init hello/hello.c -pthread -static
find hello/init | cpio -o -Hnewc | gzip -9 > rootfs.img
# 模拟器启动内核
# qemu-system-x86_64 -kernel linux-3.16.84/arch/x86/boot/bzImage
-initrd hello/rootfs.img -nographic --append "console=ttyS0"
运行debug版内核
# 交互的库
yum -y install ncurses-devel
# 自定义编译内核,这里面默认调价了debug信息
cd linux-3.16.84 && make mrproper && make menuconfig
# 编译
make -j2
# 修改gdb源码,不然会报一行错误。
# 用 yum 安装 gdb 依赖
yum -y install gdb
yum install gcc-c++ #g++
# 下载源码并修改源码
wget https://mirror.bjtu.edu.cn/gnu/gdb/gdb-7.6.1.tar.gz
# 解压
tar -xvf gdb-7.6.1.tar.gz
vi gdb-7.6.1/gdb/remote.c
  - /* Further sanity checks, with knowledge of the architecture.  */
  - // if (buf_len > 2 * rsa->sizeof_g_packet)
  - //   error (_("Remote 'g' packet reply is too long (expected %ld bytes, got %d "
  - //      "bytes): %s"),
  - //    rsa->sizeof_g_packet, buf_len / 2,
  - //    rs->buf.data ());
  + if (buf_len > 2 * rsa->sizeof_g_packet) {
  +     rsa->sizeof_g_packet = buf_len;
  +     for (i = 0; i < gdbarch_num_regs (gdbarch); i++){
  +         if (rsa->regs[i].pnum == -1)
  +             continue;
  +         if (rsa->regs[i].offset >= rsa->sizeof_g_packet)
  +             rsa->regs[i].in_g_packet = 0;
  +         else
  +             rsa->regs[i].in_g_packet = 1;
  +     }
  + }
# 编译
cd gdb-7.6.1 && ./configure && make -j2
# 删除下载的gdb,并不会删除依赖
yum remove gdb
# 安装
make install
# 打开两个终端 分别 执行下面命令
# 终端 1
gdb linux-3.16.84/vmlinux
# 终端 2
qemu-system-x86_64 -kernel linux-3.16.84/arch/x86/boot/bzImage
-initr d hello/rootfs.img -nographic --append "console=ttyS0" -s -S
1 linux内核运行hello world
1. 1 安装qemu,gcc,及其依赖
把内核升到3.18.6以上,可以参考这个。
升级好内核之后,安装qemu,运行yum -y install qemu
如果说系统找不到这个软件,运行yum -y install epel-release && yum clean all && yum makecache导入epel的源。
然后qemu-system-x86_64 --version有输出就安装好了。


1.2 编译x86_64架构linux内核及运行
解压源码tar -xvf linux-3.16.84.tar.xz 然后cd linux-3.16.84 && make help能查看官方提供的配置。
里面就包含1386_defconfig和x86_64_defconfig分别对应两种不同的架构的模块配置。
安装依赖yum -y install glibc glibc-utils glibc-devel安装编译C程序基本的库,如果等下编译内核错误,应该是漏了这几个。
进到内核目录编译源码make x86_64_defconfig && make -j2(j后面跟的是用于编译的cpu线程数量)。
然后就过漫长的等待,ls -la linux-3.16.84/arch/x86_64/boot查看编译好的内核。
如果编译失败,请先执行make mrproper清理全部生成文件,再从配置开始

1.3 编写一个hello程序用于测试
cat <<-EOF > main.c
#include "stdio.h"
int main()
{
    while(1)
    {
          printf("hello worldn");
          sleep(1);
    }
    return 0;
}
EOF
安装静态库编译工具yum -y install glibc-static。
hello.c编译为init.ocd ~/ && gcc -o hello/init hello/hello.c -pthread -static 。
在x86_64的系统中不建议用-m32参数编译成32位程序,其他linux发行版还好,centos真的很少32位的库,不然找依赖会找到你怀疑人生
把init打包起来find hello/init | cpio -o -Hnewc | gzip -9 > rootfs.img。
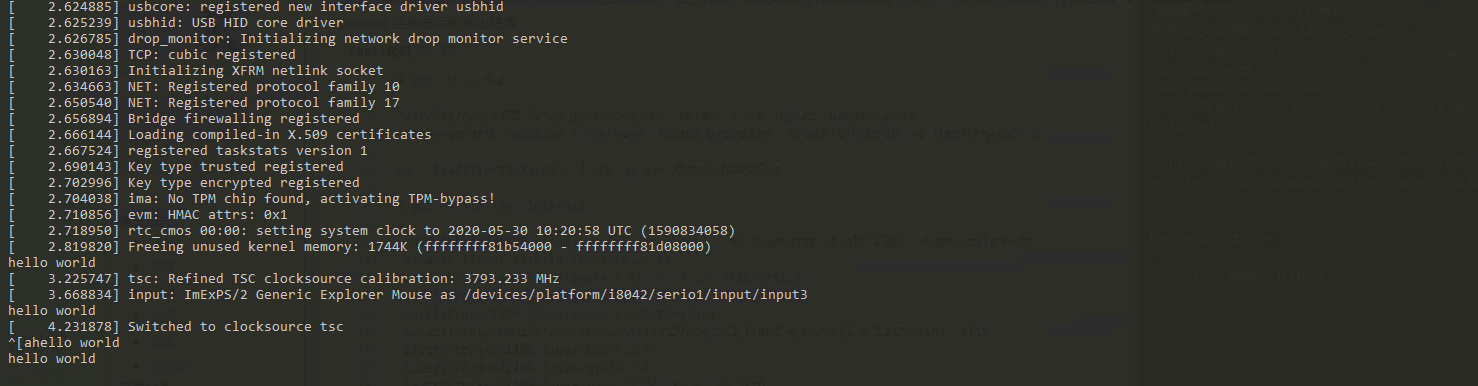
用qemu把他们都运行起来 qemu-system-x86_64 -kernel linux-3.16.84/arch/x86/boot/bzImage -initrd hello/rootfs.img -nographic --append "console=ttyS0"-kernel执行驱动内核,-initrd指定启动的第一个程序,-nographic不弹出新窗口,--append指定追加额外参数,console=ttyS0指定用本窗口的串口设备输出加载信息。然后看到hello world输出那你就成功了第一步了。退出qemu用(ctrl + a )松开马上按x
二、给内核添加调试信息,gdb调试内核
2.1 生成development版内核
上一部分所生成的bzImage相当于一个release版本的内核,下面我们要生成一个带调试信息的development版内核。
安装配置菜单的包yum -y install ncurses-devel
到linux目录下清理现场,运行配置菜单cd linux-3.16.84 && make mrproper && make menuconfig 然后会弹出一蓝蓝的框。

然后把添加调试信息项打上星号,光标移动到对应位置按空格就行
(默认已经打上了,位置在kernel hacking --> Compile-time checks and compiler options -->[*]compile the kernel with debug info)
然后SAVE再EXIT就行。配置之后make -j2。上一步我们已经成功生成内核的话,这一步就没多大问题,只是时间比之前长5倍左右...
2.2 安装gdb调试工具
由于系统下载的GDB在调试内核时会出现“Remote ‘g’ packet reply is too long”的错误,我们需要修改GDB的源码然后编译gdb。
我们先按安装官方的gdbyum -y install gdb不为别的,只图yum会帮我们把gdb依赖的库都会下载下来哈哈( ̄▽ ̄)~*,然后再安装c++,在centos有点特别要这样yum install gcc-c++
下载gdb源码wget https://mirror.bjtu.edu.cn/gnu/gdb/gdb-7.6.1.tar.gz 版本可以自己改。
解压tar -xvf gdb-7.6.1.tar.gz ,修改gdb-7.6.1/gdb目录下remote.cvi gdb-7.6.1/gdb/remote.c修改如下参考
    /* Further sanity checks, with knowledge of the architecture.  */
    // if (buf_len > 2 * rsa->sizeof_g_packet)
    //   error (_("Remote 'g' packet reply is too long (expected %ld bytes, got %d "
    //      "bytes): %s"),
    //    rsa->sizeof_g_packet, buf_len / 2,
    //    rs->buf.data ());
    if (buf_len > 2 * rsa->sizeof_g_packet) {
    rsa->sizeof_g_packet = buf_len;
    for (i = 0; i < gdbarch_num_regs (gdbarch); i++){
            if (rsa->regs[i].pnum == -1)
                continue;
            if (rsa->regs[i].offset >= rsa->sizeof_g_packet)
                rsa->regs[i].in_g_packet = 0;
            else
                rsa->regs[i].in_g_packet = 1;
        }
    }
修改之后cd gdb-7.6.1 && ./configure && make -j2配置并编译。可能会遇到很多编译问题要自己查了,我查了很久按我上面方法是最快的
编译好删除官方的gdbyum remove gdb,然后安装我们自己编译的make install
会把可执行文件放到/usr/local/bin/中,gdb -v有输出就ok了。

接下来就是用gdb命令行调试内核,先打开两个窗口,左运行gdb右运行linux。左gdb linux-3.16.84/vmlinuxvmlinux是代码索引文件,右qemu-system-x86_64 -kernel linux-3.16.84/arch/x86/boot/bzImage -initr d hello/rootfs.img -nographic --append "console=ttyS0" -s -S-s -S 启动之后等待有控制信息再往下执行。
先运行虚拟机,然后运行gdb,在gdb窗口连接本地的1234端口,然后再start_kernel打断点然后顺序执行。
三、VSCode搭建远程调试环境
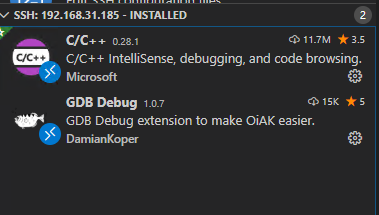
vscode上微软官网下载就行,然后我们需要几个插件,注意是安装在服务器中
VScode Remote 远程到服务器上修改代码
C/C++ 语法提示
gdb debug 调试插件。
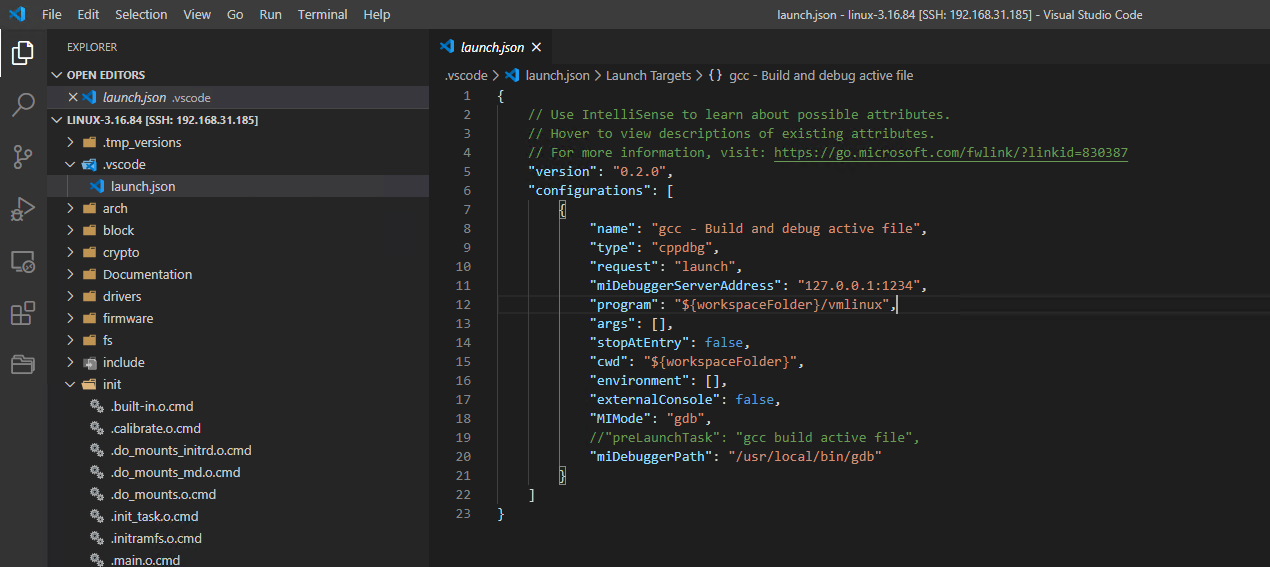
然后配置vscode的启动配置文件,在目录新建一个.vscode/launch.json文件,有时候vscode你按f5会帮你自动生成模板的,但快捷键我不知道哪个....写入如下信息。其实这个c++程序的调试模板,所以按着c++的程序配置就行。
.vscode/launch.json
{
    "version": "0.2.0",
    "configurations": [
        {
            "name": "gcc - Build and debug active file",
            "type": "cppdbg",    //c++程序
            "request": "launch",
            "miDebuggerServerAddress": "127.0.0.1:1234",    //运行内核的机器ip的1234端口
            "program": "${workspaceFolder}/vmlinux",    //索引文件目录linux-3.16.84/vmlinux
            "args": [],
            "stopAtEntry": false,
            "cwd": "${workspaceFolder}",
            "environment": [],
            "externalConsole": false,
            "MIMode": "gdb",
            "miDebuggerPath": "/usr/local/bin/gdb"    //gdb在远程机器上的绝对路径
        }
    ]
}
参考
qemu系列的区别
-pthread和-lpthread的区别
# centos7.6编译32位程序
yum install glibc-static
yum -y install glibc-devel.i686 libstdc++-devel.i686
gcc -o init hello.c -pthread -static -m32
原文链接: https://www.cnblogs.com/harmful-chan/p/12994693.html
欢迎关注
微信关注下方公众号,第一时间获取干货硬货;公众号内回复【pdf】免费获取数百本计算机经典书籍

原创文章受到原创版权保护。转载请注明出处:https://www.ccppcoding.com/archives/198145
非原创文章文中已经注明原地址,如有侵权,联系删除
关注公众号【高性能架构探索】,第一时间获取最新文章
转载文章受原作者版权保护。转载请注明原作者出处!