
准备工作:
系统:centos7.5.1804 yum仓库 有外网
*****************************************************************************************************************************************
step1:关闭防火墙,selinux
systemctl stop firewalld
vim /etc/selinux/config //永久设置
=====disabled
setenforce 0 //临时设置
step2:创建oracle用户
groupadd dba //创建dba组
groupadd oinstall //创建oinstall组
groupadd oper //创建oper组
useradd -g oinstall -G dba,oper oracle //创建oracle用户,并指定用户oracle的基本组和附加组
echo oracle |passwd --stdin oracle //设置oracle用户的密码
step3:创建目录
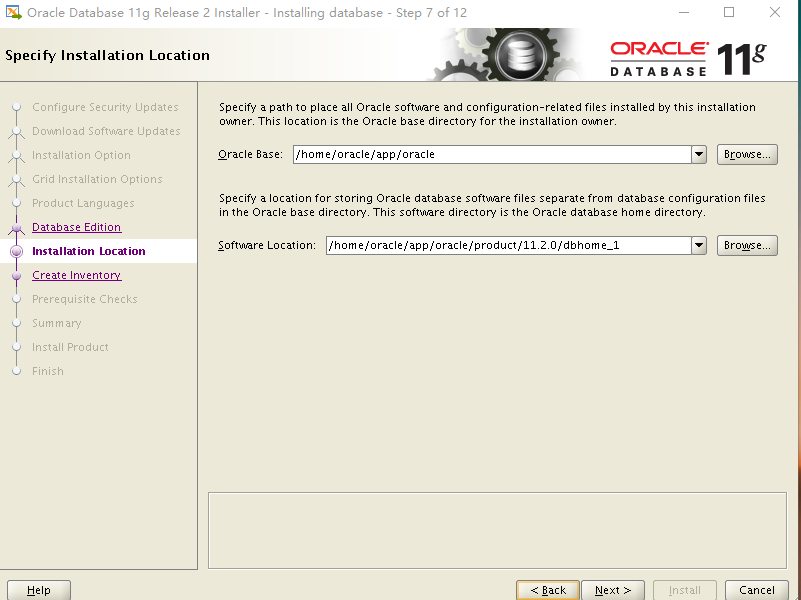
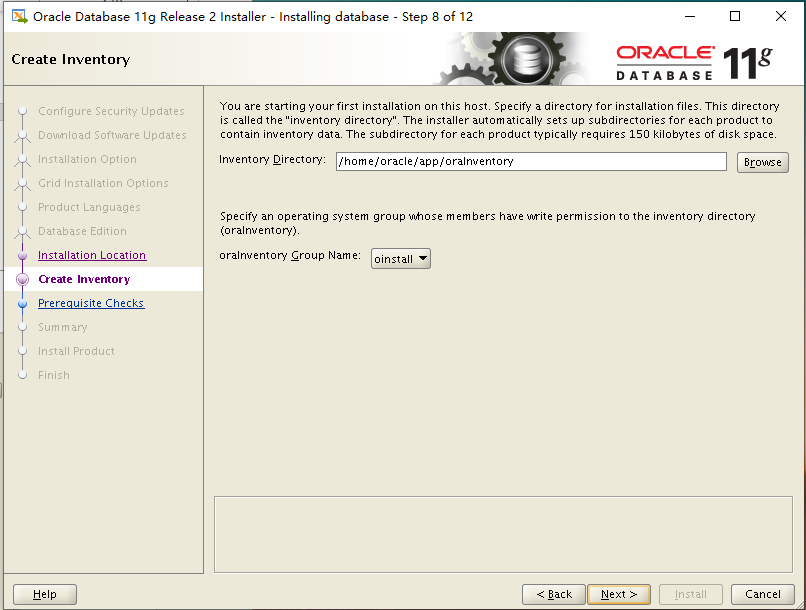
mkdir -p /home/oracle/app/oraInventory
mkdir -p /home/oracle/app/oracle/product/11.2.0/dbhome_1
step4:修改权限
chown -Rf oracle:oinstall /home/oracle/app
chmod -Rf 775 /home/oracle/app
step5:更改配置
vim /home/oracle/.bash_profile ======》source /home/oracle/.bash_profile
export ORACLE_BASE=/home/oracle/app
export ORACLE_HOME=$ORACLE_BASE/oracle/product/11.2.0/dbhome_1
export ORACLE_SID=orcl
export PATH=$PATH:$HOME/bin:$ORACLE_HOME/bin
export LD_LIBRARY_PATH=$ORACLE_HOME/lib:/usr/lib
vim /etc/sysctl.conf ====>sysctl -p // 刷新配置
fs.file-max = 6815744
fs.aio-max-nr = 1048576
kernel.shmall = 2097152
kernel.shmmax = 2147483648
kernel.shmmni = 4096
kernel.sem = 250 32000 100 128
net.ipv4.ip_local_port_range = 9000 65500
net.core.rmem_default = 4194304
net.core.rmem_max = 4194304
net.core.wmem_default = 262144
net.core.wmem_max = 1048586
vim /etc/security/limits.conf
oracle soft nproc 2047
oracle hard nproc 16384
oracle soft nofile 1024
oracle hard nofile 65536
oracle soft stack 10240
find / -name pam_limits.so //以root去查找文件绝对路径
vim /etc/pam.d/login
session required /usr/lib64/security/pam_limits.so
session required pam_limits.so
vim /etc/profile
unset i
unset -f pathmunge
if [ $USER = "oracle" ]; then
if [ $SHELL = "/bin/ksh" ]; then
ulimit -p 16384
ulimit -n 65536
else
ulimit -u 16384 -n 65536
fi
fi
step6:rz上传Oracle11g的安装包到/home/oracle
安装依赖包:
yum -y gcc make install libaio glibc compat-libstdc* elfutils-libelf-devel* gcc-c++ libaio-devel unixODBC* readline* xorg-x11-xauth xdpyinfo sysstat
上传xorg-x11-server-utils-7.7-20.el7.x86_64.rpm,pdksh-5.2.14-30.x86_64.rpm,compat-libstdc++-33-3.2.3-72.el7.x86_6 4.rpm
yum -y install compat-libstdc++-33-3.2.3-72.el7.x86_64.rpm
rpm -ivh --force pdksh-5.2.14-30.x86_64.rpm
yum -y install xorg-x11-server-utils-7.7-20.el7.x86_64.rpm
step7:解包
tar -xf oracle11g安装包
exit切回root用户
export DISPLAY=:0.0 //定义DISPLAY变量
step8:在makefile文件中添加参数
oracle用户:
vim /home/oracle/app/oracle/product/11.2.0/dbhome_1/sysman/lib/ins_emagent.mk
176行加入: -lnnz11 第一个是字母l 后面两个是数字1


本机windows安装xmanage --》运行----》工具---》Xstart开始--》新建会话--->运行
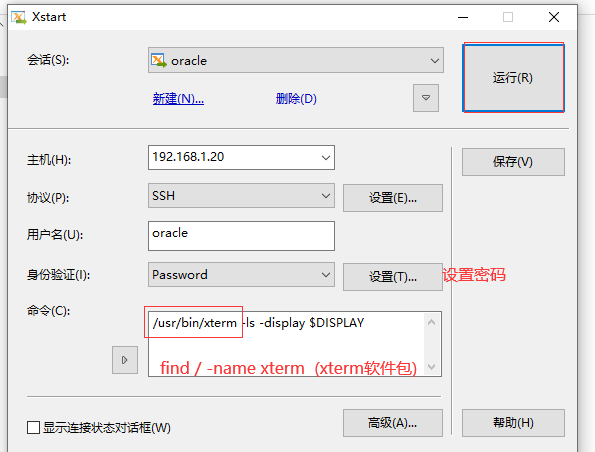
运行后在跳出的框里面:

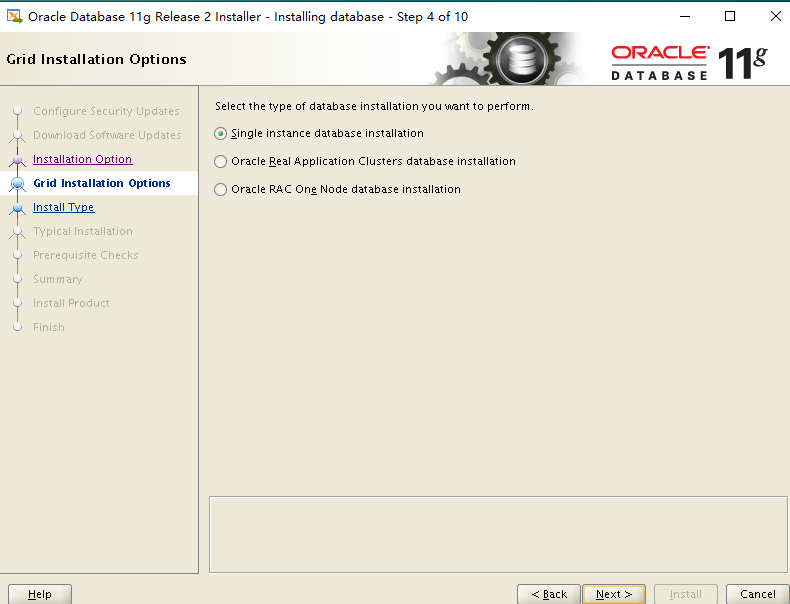
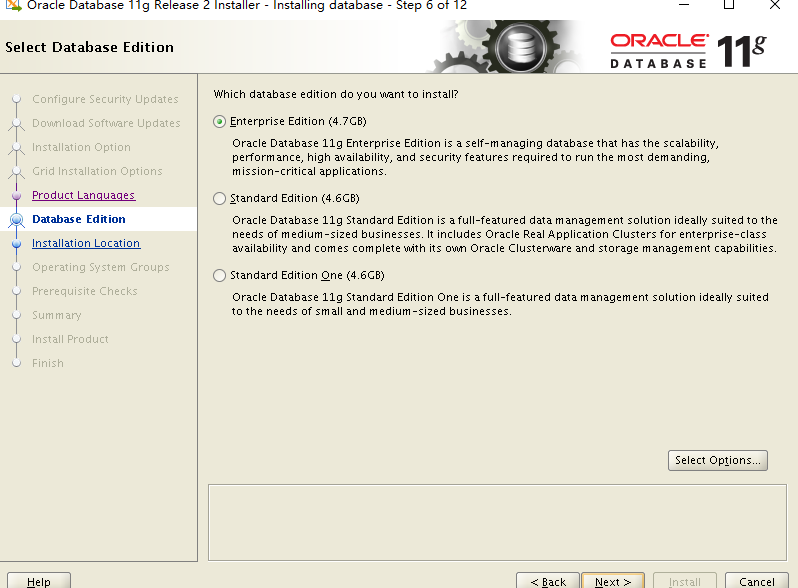
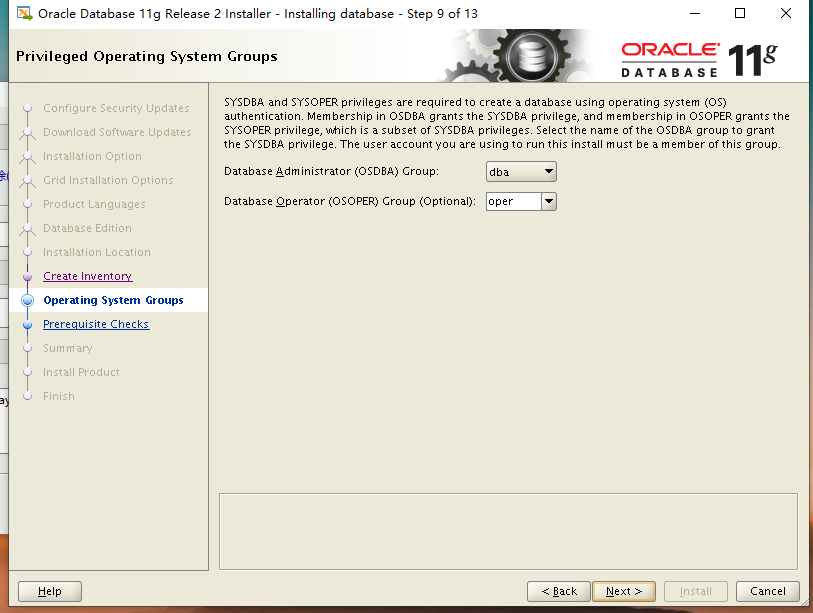
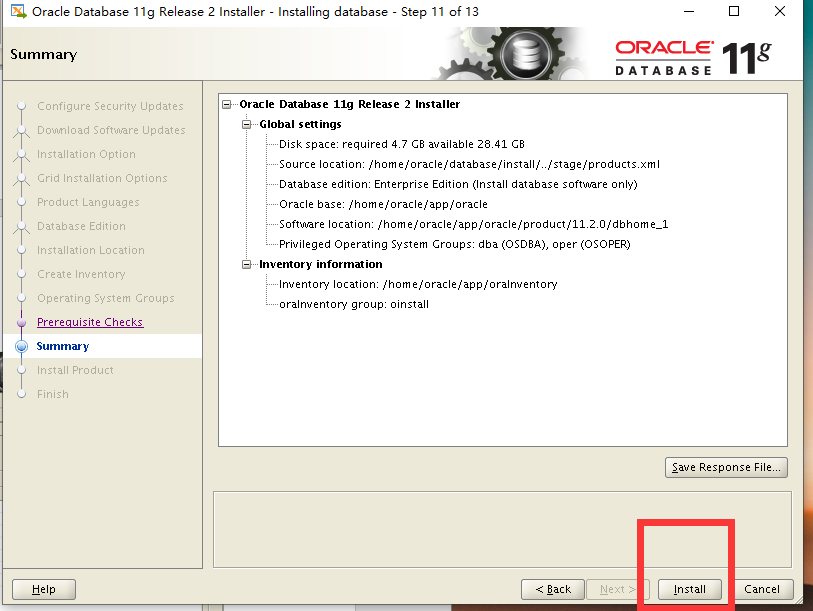
图形配置:

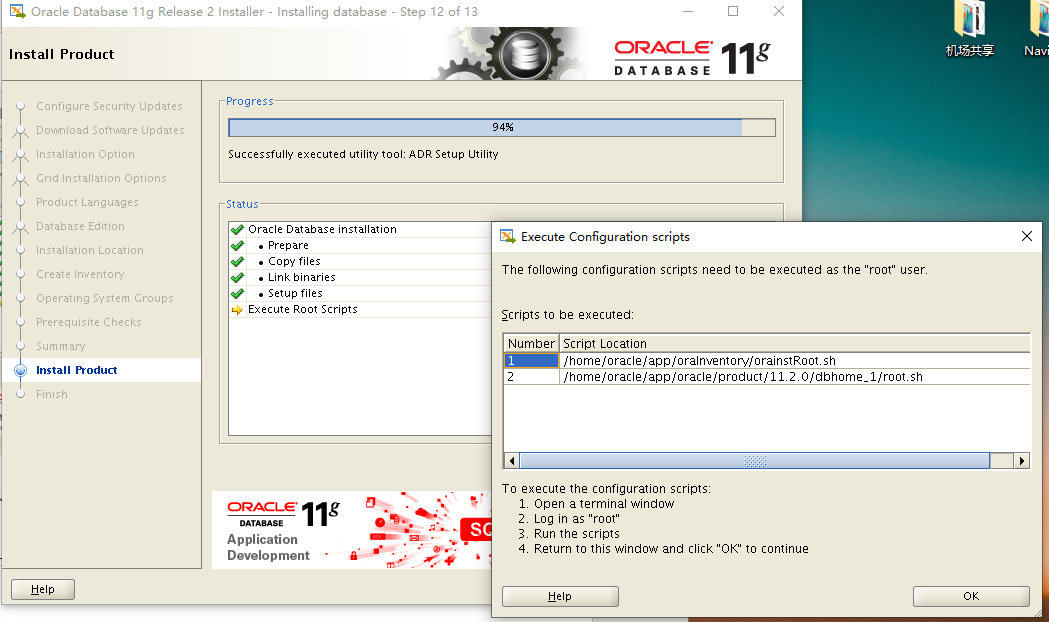
step9:以root用户执行两个shell脚本

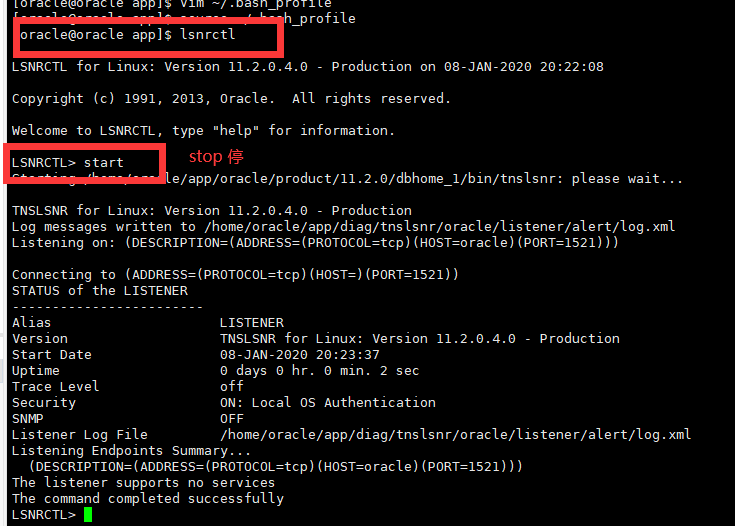
step10:启动监听着
#lsnrctl
LSNRCTL>start
原文链接: https://www.cnblogs.com/krystal-LA-zx/p/12168036.html
欢迎关注
微信关注下方公众号,第一时间获取干货硬货;公众号内回复【pdf】免费获取数百本计算机经典书籍

原创文章受到原创版权保护。转载请注明出处:https://www.ccppcoding.com/archives/191635
非原创文章文中已经注明原地址,如有侵权,联系删除
关注公众号【高性能架构探索】,第一时间获取最新文章
转载文章受原作者版权保护。转载请注明原作者出处!