
随堂笔记梳理,Oracle学习的前置相关,涉及到Oracle的安装等内容
安装准备工作
本安装教程仅供学习参考使用
环境准备
| 操作系统 | Oracle版本 | 系统镜像 |
|---|---|---|
| CentOS 7.4 | Oracle12 | CentOS-7-x86_64-DVD-1708.iso |
系统配置准备
1. 配置域名
[root@localhost ~]# vi /etc/hosts
127.0.0.1   localhost localhost.localdomain localhost4 localhost4.localdomain4
::1         localhost localhost.localdomain localhost6 localhost6.localdomain6
10.37.129.4 oracle12
[root@localhost ~]# hostnamectl set-hostname oracle12
[root@localhost ~]# exit
[root@oracle12 ~]# hostname
oracle12
2. 关闭防火墙
[root@oracle12 ~]# service firewalld status               # 检查防火墙状态
[root@oracle12 ~]# service firewalld stop                 # 关闭防火墙
Redirecting to /bin/systemctl stop firewalld.service
[root@oracle12 ~]# systemctl disable firewalld            # 关闭防火墙开机自启动
Removed symlink /etc/systemd/system/multi-user.target.wants/firewalld.service.
Removed symlink /etc/systemd/system/dbus-org.fedoraproject.FirewallD1.service.
3. 关闭SeLinux
[root@oracle12 ~]# setenforce 0                         # 临时关闭SeLinux
[root@oracle12 ~]# vi /etc/sysconfig/selinux            # 永久关闭SeLinux
# This file controls the state of SELinux on the system.
# SELINUX= can take one of these three values:
#     enforcing - SELinux security policy is enforced.
#     permissive - SELinux prints warnings instead of enforcing.
#     disabled - No SELinux policy is loaded.
SELINUX=disabled
# SELINUXTYPE= can take one of three two values:
#     targeted - Targeted processes are protected,
#     minimum - Modification of targeted policy. Only selected processes are protected.
#     mls - Multi Level Security protection.
SELINUXTYPE=targeted
[root@oracle12 ~]# reboot                               # 永久配置生效需要重启
4. 配置本地Yum源
[root@oracle12 ~]# mkdir /media/cdrom                                # 创建ISO镜像挂载的目录,目录可自定
[root@oracle12 ~]# mount /dev/cdrom /media/cdrom                     # 挂载ISO镜像到/media/cdrom
[root@oracle12 ~]$ df -HT                                            # 查看挂载情况,可以看到/dev/sr0已经挂载到/media/cdrom
文件系统                类型      容量  已用  可用 已用% 挂载点
/dev/mapper/centos-root xfs        66G   17G   50G   25% /
devtmpfs                devtmpfs  1.1G     0  1.1G    0% /dev
tmpfs                   tmpfs     1.1G     0  1.1G    0% /dev/shm
tmpfs                   tmpfs     1.1G  9.0M  1.1G    1% /run
tmpfs                   tmpfs     1.1G     0  1.1G    0% /sys/fs/cgroup
/dev/sda1               xfs       1.1G  131M  933M   13% /boot
/dev/sr0                iso9660   4.6G  4.6G     0  100% /media/cdrom
tmpfs                   tmpfs     210M  8.2k  210M    1% /run/user/1000
[root@oracle12 ~]# cd /etc/yum.repos.d/                              # 进到repo目录
[root@oracle12 ~]# mkdir ./bak                                       # 创建备份目录
[root@oracle12 ~]# mv ./*.repo ./bak                                 # 将现有的文件全部存入bak目录(任何操作务必备份)
[root@oracle12 ~]# cp ./bak/CentOS-Media.repo ./                     # 将CentOS-Media.repo文件取出到/etc/yum.repos.d/ 目录下
[root@oracle12 ~]# vi CentOS-Media.repo                              # 配置本地镜像repo
# CentOS-Media.repo
#
#  This repo can be used with mounted DVD media, verify the mount point for
#  CentOS-7.  You can use this repo and yum to install items directly off the
#  DVD ISO that we release.
#
# To use this repo, put in your DVD and use it with the other repos too:
#  yum --enablerepo=c7-media [command]
#
# or for ONLY the media repo, do this:
#
#  yum --disablerepo=* --enablerepo=c7-media [command]
[CentOS7-media]
name=CentOS-$releasever - Media
baseurl=file:///media/cdrom/
gpgcheck=0
enabled=1
gpgkey=file:///etc/pki/rpm-gpg/RPM-GPG-KEY-CentOS-7
[root@oracle12 ~]# yum clean all                                      # 清理yum
[root@oracle12 ~]# yum makecache                                      # 建立yum缓存
5. 安装依赖
[root@oracle12 ~]# yum install -y deltarpm python-deltarpm createrepo
[root@oracle12 ~]# yum install -y bc
[root@oracle12 ~]# yum install -y compat-libcap1* compat-libcap* compat-libstdc++-33
[root@oracle12 ~]# yum install -y binutils
[root@oracle12 ~]# yum install -y glfuils-libelf glfuils-libelf-devel
[root@oracle12 ~]# yum install -y gcc gcc-c++
[root@oracle12 ~]# yum install -y glibc-2.5 glibc-common glibc-devel glibc-headers glibc-kernheaders
[root@oracle12 ~]# yum install -y ksh libaio libaio-devel
[root@oracle12 ~]# yum install -y libgcc* libstdc++*
[root@oracle12 ~]# yum install -y make* sysstat* libXp* net-tools-*
[root@oracle12 ~]#  yum install -y smartmontools
6. 内核调优
[root@oracle12 ~]# vi /etc/sysctl.conf
	kernel.shmall = 4294967296                    -----公式:内存大小*1024*1024*1024/4,表示所有内存大小(单位:页=4K)
	kernel.shmmax = 277495689510912               -----表示最大共享内存大小,一般为物理内存的3/4,但是常用的就是将所有内存换算成字节后-1(单位:字节)
	kernel.shmmni = 4096                          -----表示最小共享内存,固定4096K,一般固定值
	kernel.sem = 250 32000 100 128                -----4个参数如下:(四个参数为固定内容大小)
							          SEMMSL	每个用户拥有信号量最大数
								  SEMMNS	系统信号量最大数
								  SEMOPM	每次semopm系统调用操作数
								  SEMMNI	系统辛苦量集数最大数
	net.core.rmem_default = 262144                -----表示套接字接收缓冲区大小的缺省值
	net.core.rmem_max = 4194304                   -----表示套接字接收缓冲区大小的最大值
	net.core.wmem_default =262144                 -----表示套接字发送缓冲区大小的缺省值
	net.core.wmem_max = 1048586                   -----表示套接字发送缓冲区大小的最大值
	fs.file-max = 6815744                         ----文件句柄,一次可以打开的文件个数
	net.ipv4.tcp_max_tw_buckets = 6000
	net.ipv4.ip_local_port_range = 9000 65500     -----表示端口范围,为指定的内容,一般是固定值
	net.ipv4.tcp_tw_recycle = 0
	net.ipv4.tcp_tw_reuse = 1
	net.core.netdev_max_backlog = 262144
	net.ipv4.tcp_max_orphans = 262144
	net.ipv4.tcp_max_syn_backlog = 262144
	net.ipv4.tcp_synack_retries = 2
	net.ipv4.tcp_syn_retries = 1
	net.ipv4.tcp_fin_timeout = 1
	net.ipv4.tcp_keepalive_time = 30
	net.ipv4.tcp_keepalive_probes = 6
	net.ipv4.tcp_keepalive_intvl = 5
	net.ipv4.tcp_timestamps = 0
	fs.aio-max-nr =1048576
	net.ipv4.conf.all.rp_filter = 2
	net.ipv4.conf.default.rp_filter = 2
7. 修改limits.conf
[root@oracle12 ~]# vi /etc/security/limits.conf       # 在文件末尾追加如下配置
	oracle soft nofile 1024
	oracle hard nofile 65536
	oracle soft nproc 16384
	oracle hard nproc 16384
	oracle soft stack 10240
	oracle hard stack 32768
	oracle hard memlock 134217728
	oracle soft memlock 134217728
8. 限制使用进程
[root@oracle12 ~]# vi /etc/pam.d/login               # 在文件末尾追加如下配置
	session required /lib/security/pam_limits.so
	session required pam_limits.so
9. 配置环境变量
[root@oracle12 ~]# vi /etc/profile                   # 在文件末尾追加如下配置
if [ $USER = "oracle" ]; then
	if [ $SHELL = "/bin/ksh" ]; then
		ulimit -p 16384
		ulimit -n 65535
	else
		ulimit -u 16384 -n 65535
	fi
fi
[root@oracle12 ~]# source /etc/profile
Oracle安装准备
1. 创建文件目录和相应的用户
[root@oracle12 ~]# groupadd oinstall        # 创建oinstall组,安装软件使用
[root@oracle12 ~]# groupadd dba             # 创建dba组,管理数据库软件使用
[root@oracle12 ~]# groupadd oper            # 创建oper组,操作数据库软件使用
[root@oracle12 ~]# useradd -g install -G dba,oper oracle
# -g 代表的是主组
# -G 代表的是属组
# oracle 代表的是建立的用户名
[root@oracle12 ~]# mkdir -p /u01/app/oracle
[root@oracle12 ~]# mkdir -p /u01/oraInventory    # 这个目录下存放的是安装oracle所需要的环境
[root@oracle12 ~]# chown -R oracle.oinstall /u01
[root@oracle12 ~]# chown -R oracle.oinstall /u01/app/oracle/
[root@oracle12 ~]# chmod -R 775 /u01/app/oracle/
2. 设置oracle密码
[root@oracle12 ~]# passwd oracle
[root@oracle12 ~]# su - oracle
[oracle@oracle12 ~]$
3. 修改oracle用户的环境变量文件
[oracle@oracle12 ~]# vi .bash_profile
# 尾行后追加如下
export EDITOR=vi                           # 默认编辑器是vi
export TMP=/tmp                            # ORACLE默认的临时目录是/tmp
export TMPDIR=$TMP                         # 临时目录生成
export ORACLE_SID=orcl                     # ORACLE实例名称是orcl
export ORACLE_BASE=/u01/app/oracle         # ORACLE的基本目录
export ORACLE_HOME=$ORACLE_BASE/product/12.2.0/db_1     # ORACLE数据库的Home目录
export INVENTORY_LOCATION=/u01/oraInventory             # ORACLE安装时候的inventory
export TNS_ADMIN=$ORACLE_HOME/network/admin             # ORACLE的网络文件主目录
export LD_LIBRARY_PATH=$ORACLE_HOME/lib                 # ORACLE的库文件目录
# export NLS_LANG="AMERICAN_AMERICA.AL32UTF8"             # ORACLE的字符集,这里修改成UTF8
# export NLS_DATE_FORMAT="YYYY-MM-DD HH24:MI:SS"          # ORACLE的日期格式,使用会话的方式修改,如果没有NLS_LANG,那这个参数不会生成
export PATH=$ORACLE_HOME/bin:/bin:/usr/bin:/usr/sbin:/usr/local/bin:/usr/X11R6/bin:$PATH:$HOME/bin     #生成相关参数
umask 022
[oracle@oracle12 ~]# source .bash_profile
4. 上传软件并解压
数据库文件:linuxx64_12201_database.zip
上传路径:/u01
[oracle@oracle12 ~]# su
[root@oracle12 ~]# cd /u01
[root@oracle12 ~]# chow -R oracle:oinstall linuxx64_12201_database.zip
[root@oracle12 ~]# su - oracle
[oracle@oracle12 ~]# yum install unzip -y
[oracle@oracle12 ~]# unzip linuxx64_12201_database.zip
Oracle安装
1. 安装Oracle12c
在这里我们使用的是xmanager进行安装,所以需要使用的xstart,需要在服务器上安装Xterm以及X windows
[root@oracle12 ~]# yum groupinstall -y "X Window System"
[root@oracle12 ~]# yum groupinstall -y xterm
安装完成后进行如下操作: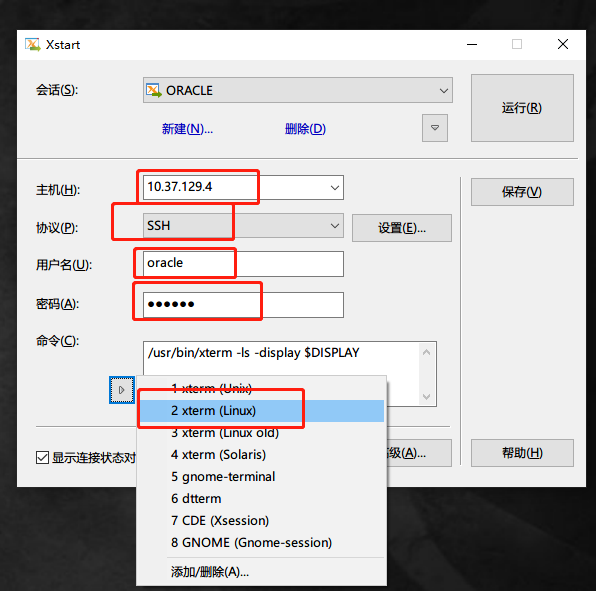

在运行之后会出现如下的环境: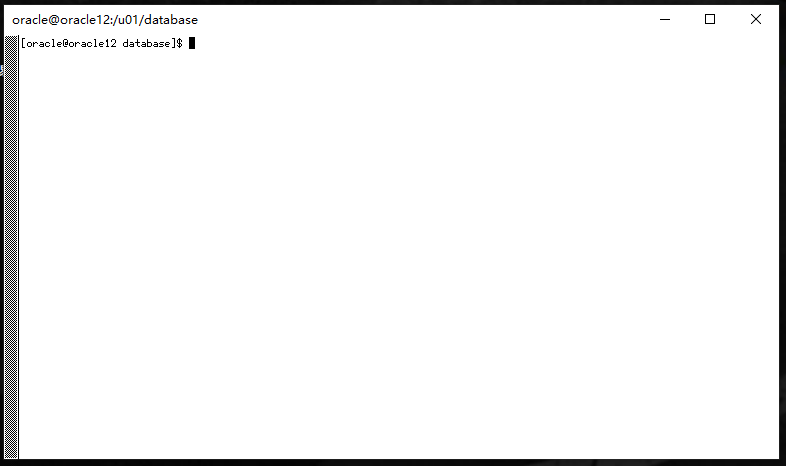
[oracle@oracle12 ~]# cd /u01/database/
[oracle@oracle12 ~]# ./runInstaller
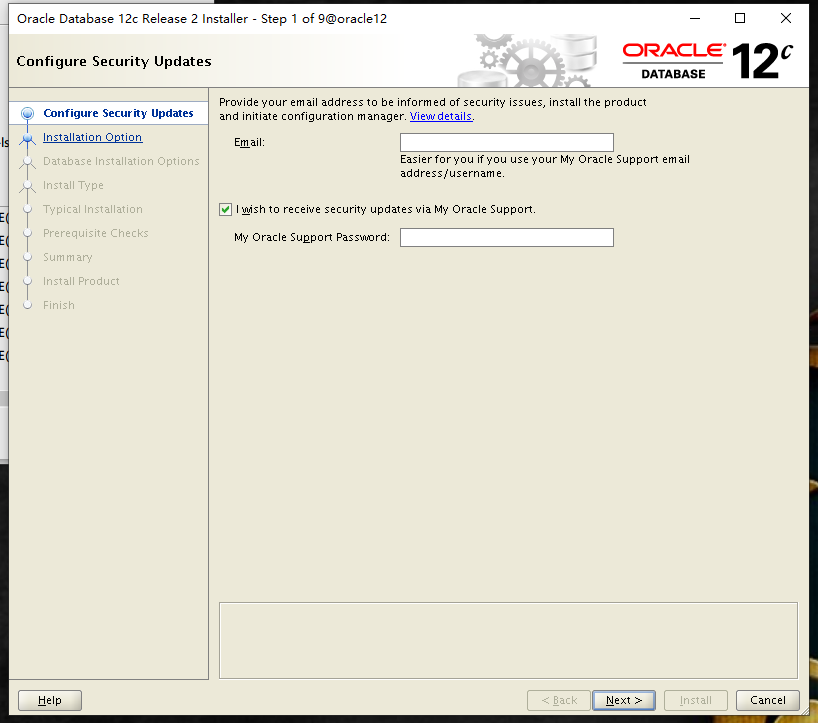
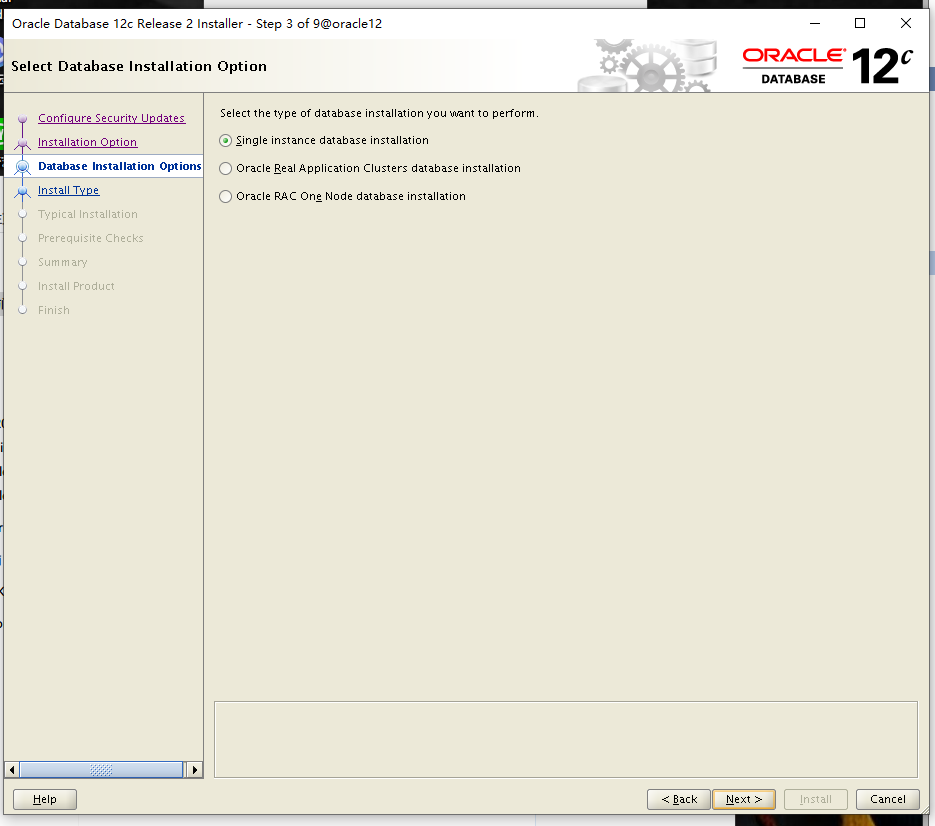
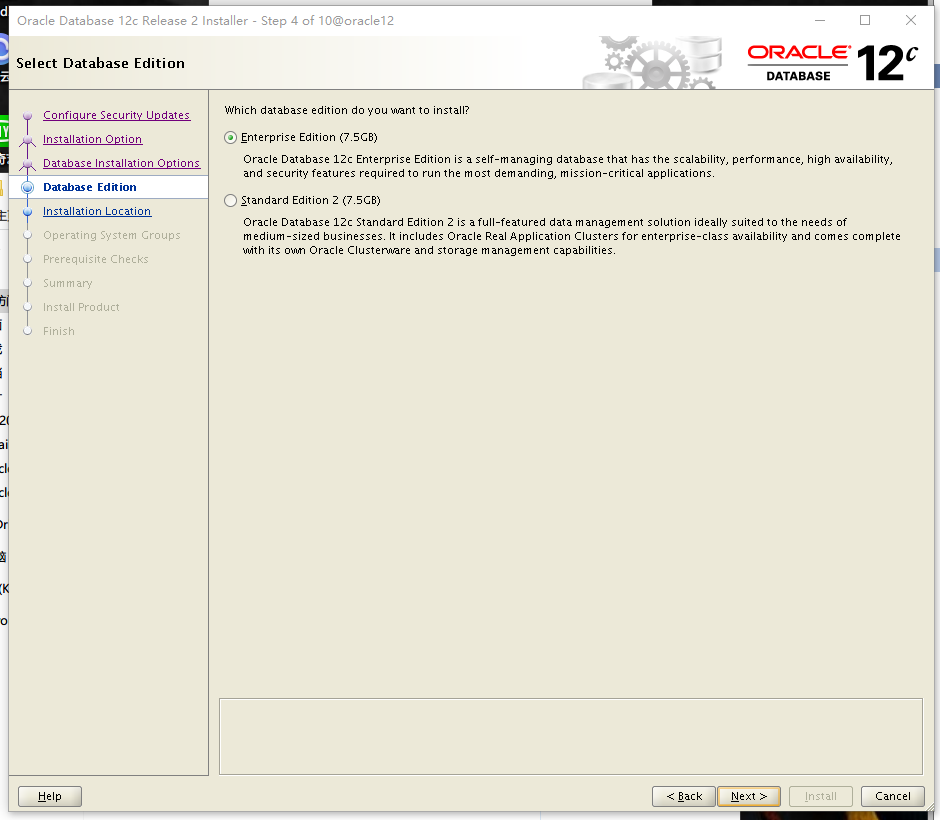
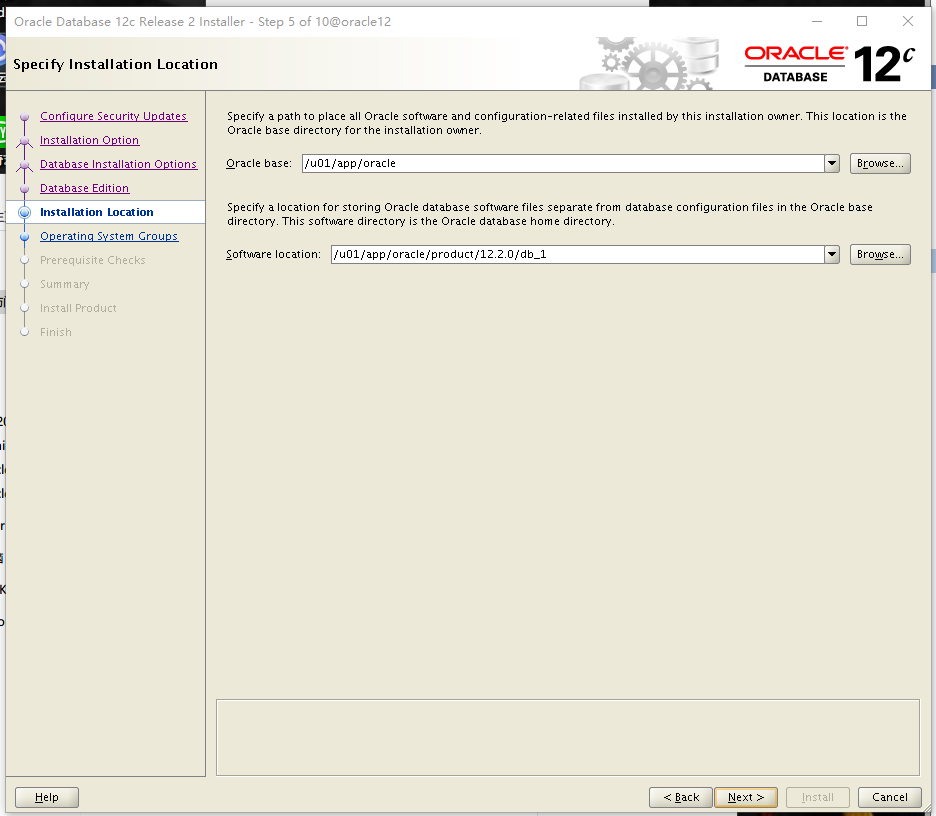
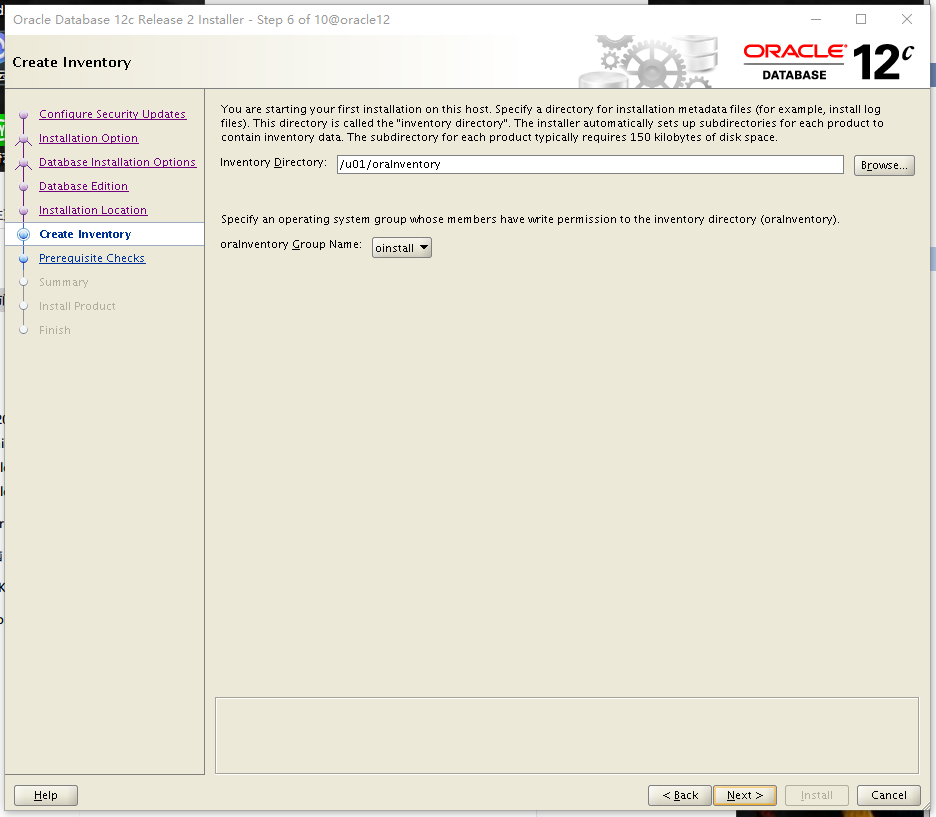
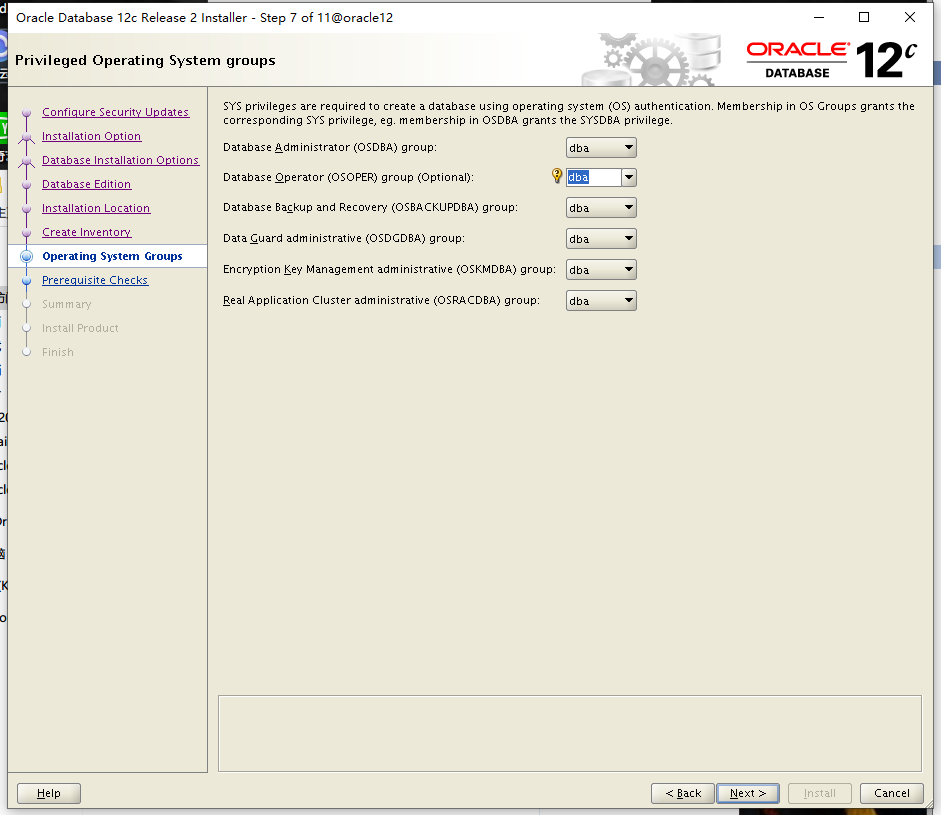
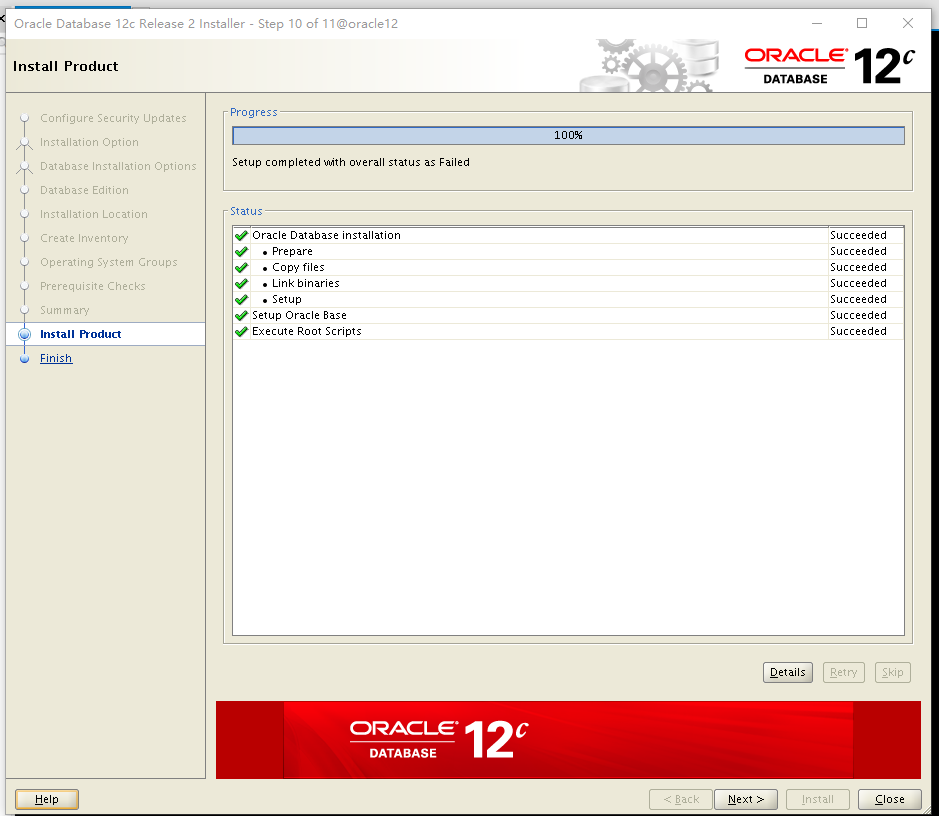
2. 图形化安装Oracle


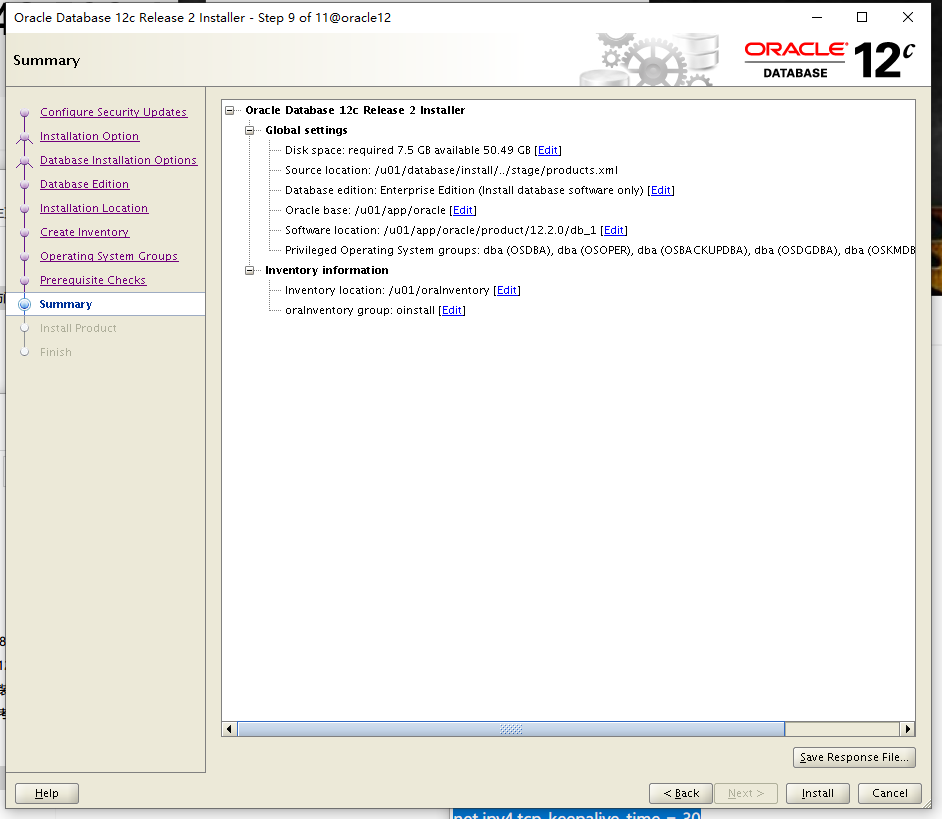
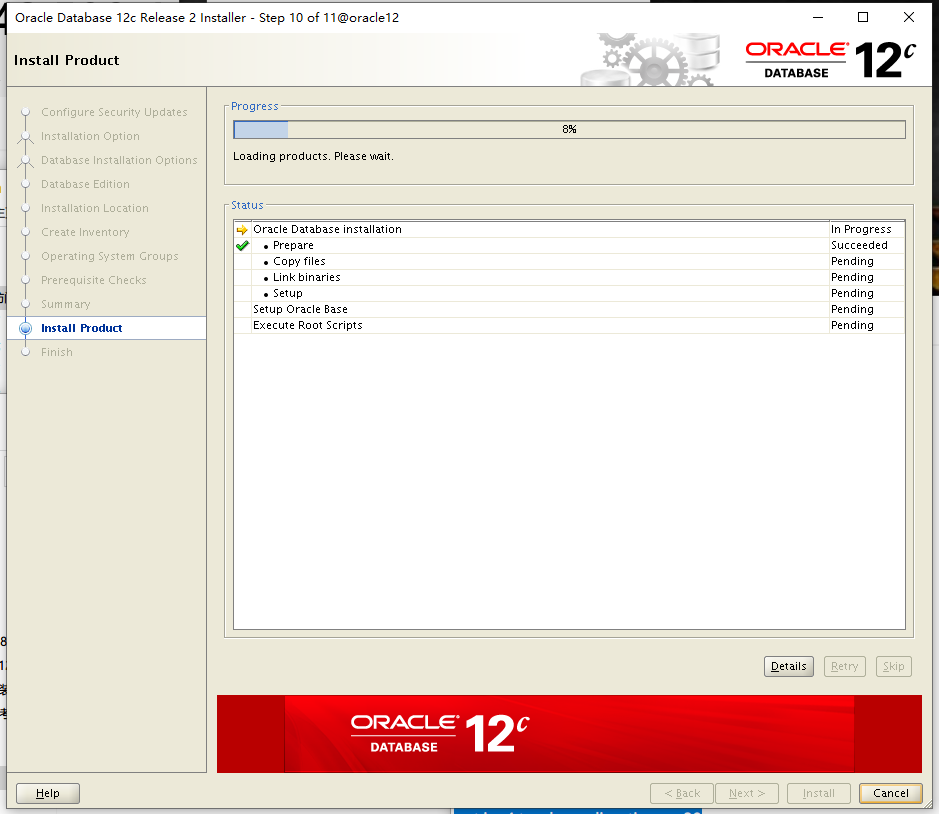
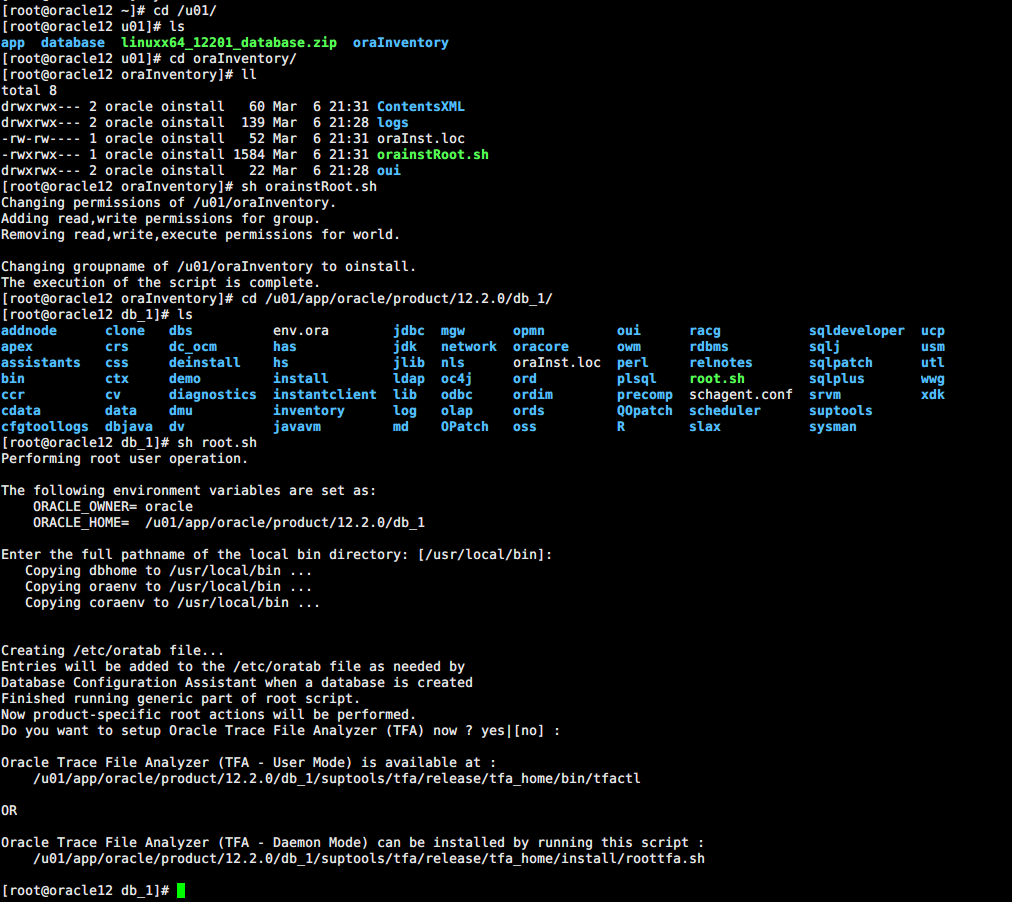
[root@oracle12 ~]# cd /u01/oraInventory/
[root@oracle12 ~]# sh orainstRoot.sh
[root@oracle12 ~]# cd /u01/app/oracle/product/12.2.0/db_1/
[root@oracle12 ~]# sh root.sh
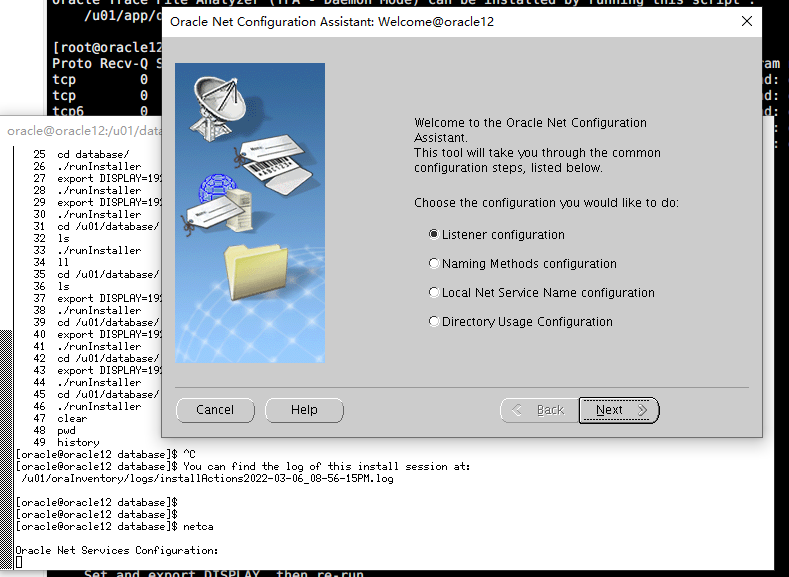
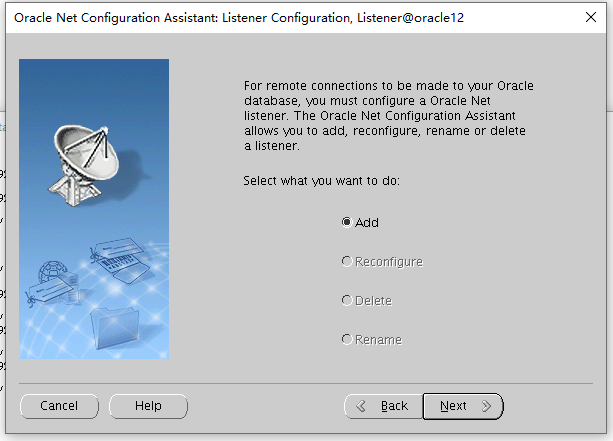
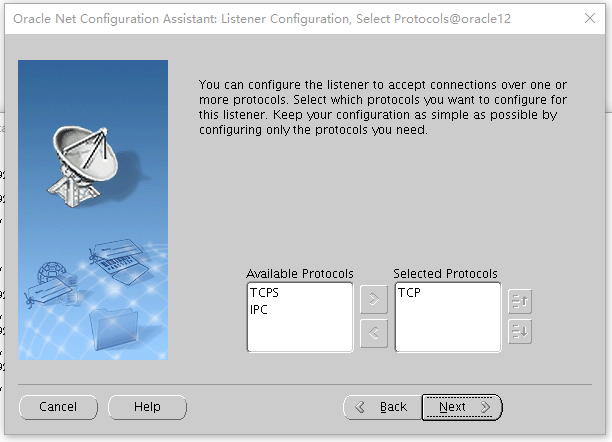
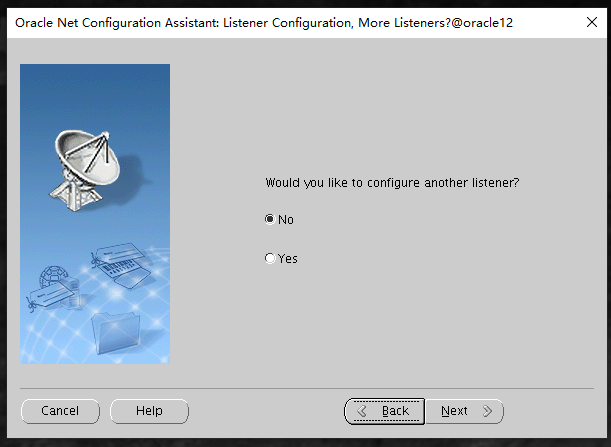
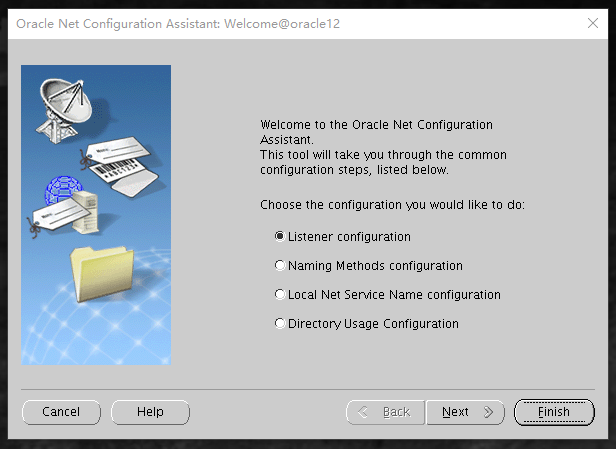
3. 配置监听
[oracle@oracle12 ~]# netca


[oracle@oracle12 ~]# lsnrctl status

LSNRCTL for Linux: Version 12.2.0.1.0 - Production on 06-MAR-2022 22:05:33

Copyright (c) 1991, 2016, Oracle.  All rights reserved.

Connecting to (DESCRIPTION=(ADDRESS=(PROTOCOL=TCP)(HOST=oracle12)(PORT=1521)))
STATUS of the LISTENER
------------------------
Alias                     LISTENER
Version                   TNSLSNR for Linux: Version 12.2.0.1.0 - Production
Start Date                06-MAR-2022 21:40:54
Uptime                    0 days 0 hr. 24 min. 38 sec
Trace Level               off
Security                  ON: Local OS Authentication
SNMP                      OFF
Listener Parameter File   /u01/app/oracle/product/12.2.0/db_1/network/admin/listener.ora
Listener Log File         /u01/app/oracle/diag/tnslsnr/oracle12/listener/alert/log.xml
Listening Endpoints Summary...
  (DESCRIPTION=(ADDRESS=(PROTOCOL=tcp)(HOST=oracle12)(PORT=1521)))
  (DESCRIPTION=(ADDRESS=(PROTOCOL=ipc)(KEY=EXTPROC1521)))
The listener supports no services
The command completed successfully
注:本文来自博客园,严禁商用
作者:lexder,参照:51CTO多哥OCP
涉及到的软件因相关原因,不提供下载
转载请注明原文链接:https://www.cnblogs.com/lexder/p/15774874.html,
原文链接: https://www.cnblogs.com/lexder/p/15774874.html
欢迎关注
微信关注下方公众号,第一时间获取干货硬货;公众号内回复【pdf】免费获取数百本计算机经典书籍

原创文章受到原创版权保护。转载请注明出处:https://www.ccppcoding.com/archives/184162
非原创文章文中已经注明原地址,如有侵权,联系删除
关注公众号【高性能架构探索】,第一时间获取最新文章
转载文章受原作者版权保护。转载请注明原作者出处!